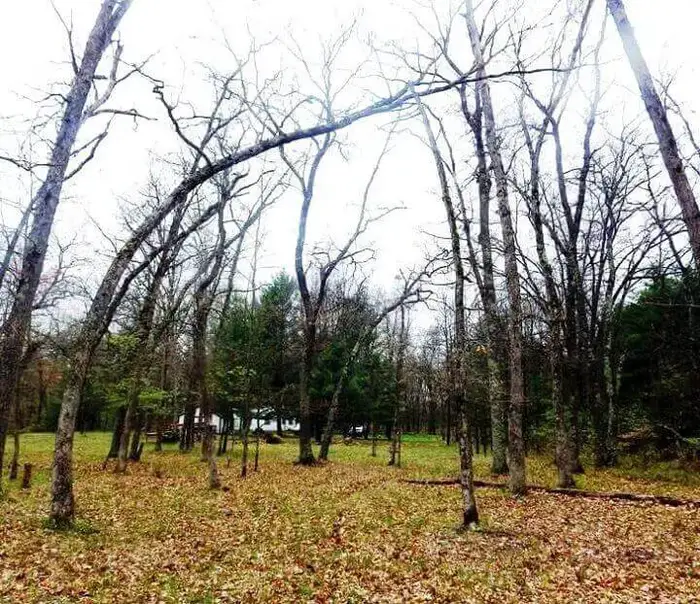
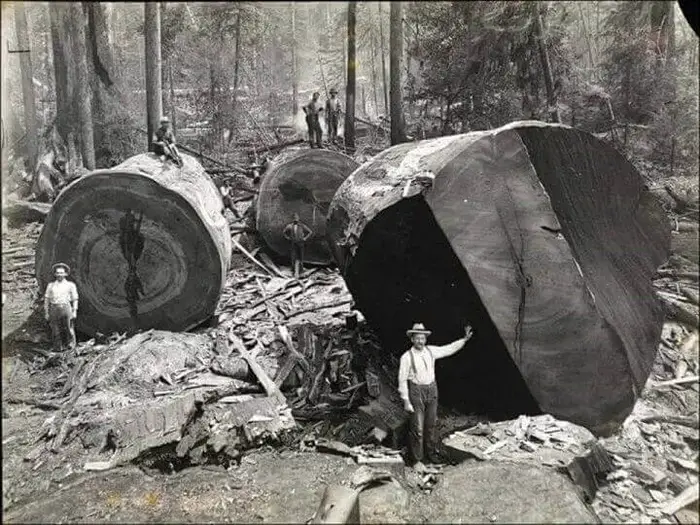
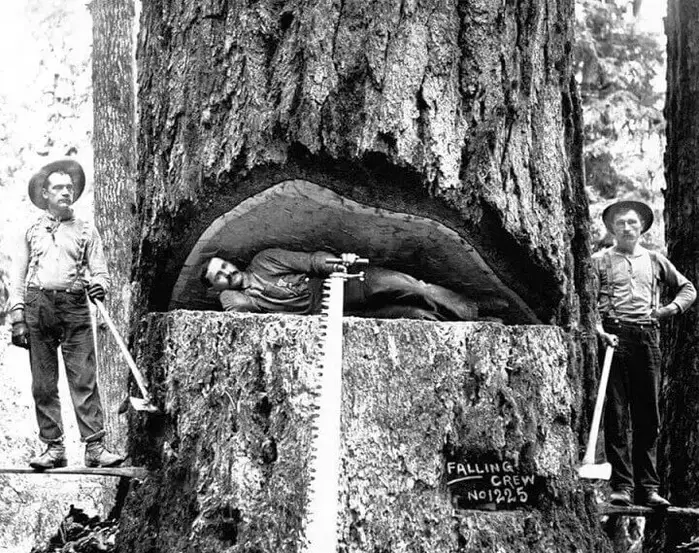
Anyone with multiple trees on their property faces the inevitable day when a tree has to come down. The easiest solution is to hire a tree service, but that can be expensive. Cutting down a tree yourself is the most economical solution, but anyone who has cut down multiple trees knows that the forest is full of surprises.
The Facts
According to the Occupational Safety and Health Administration (OSHA), there are more than 100 fatalities every year as a result of someone cutting down a tree themselves. The Tree Care Industry Association (TCIA) reports that accidents are 10 times more likely to happen when someone is felling a tree. And these stats are for everyday people, not the pros.
The fact of the matter is that a mature tree can weigh 10 tons or more. TCIA also reports that when homeowners cut down a tree, they are 5 times more likely to suffer an injury than a professional. It’s all enough to make you think twice about hiring a professional tree service, but you can still cut some of your own trees safely if you approach it the right way. Even then, there are occasions when you should just walk away and call a pro.
Want to save this post for later? Click Here to Pin It On Pinterest!
And About Those Chainsaws
Before you fire up the chainsaw and start cutting, it’s worth knowing that approximately 36,000 people a year are treated in hospital emergency rooms for chainsaw related injuries. That number does not include the people who choose to treat their injuries at home so it’s most likely much higher.
In spite of the statistics, many people continue to fell their own trees and for a homesteader, it’s often a necessary need and skill. Most have extensive experience and some have learned the hard way, but it’s worth a review of all factors that can make felling a tree a safe decision.
Before we get into all the fun stuff about chainsaws, it’s worth considering some basic tools that help to make tree cutting safer.
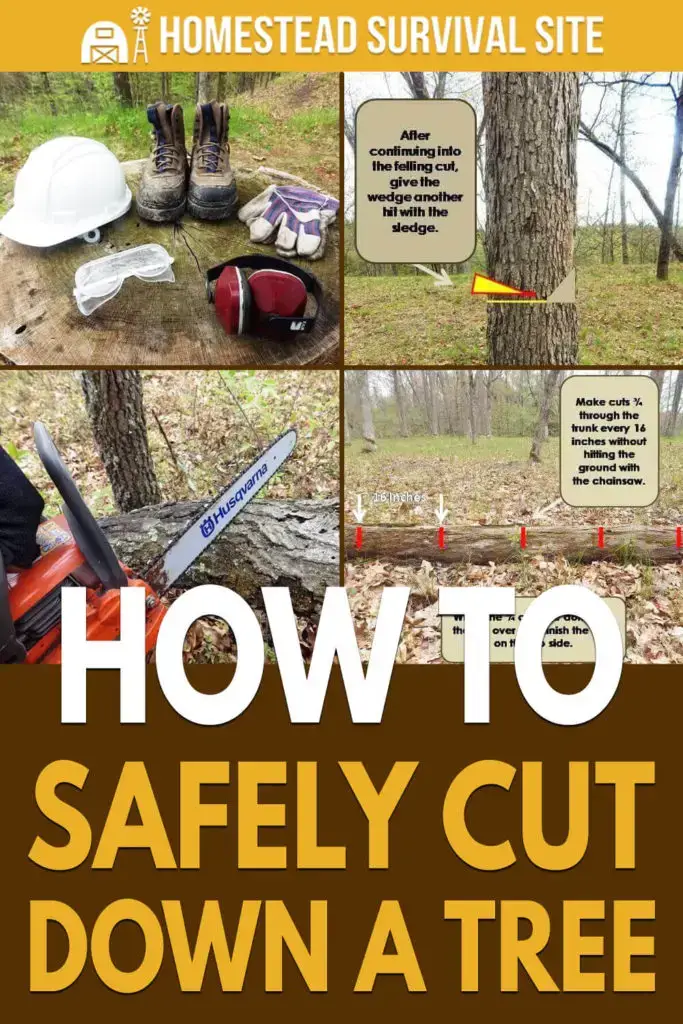
Safety Equipment
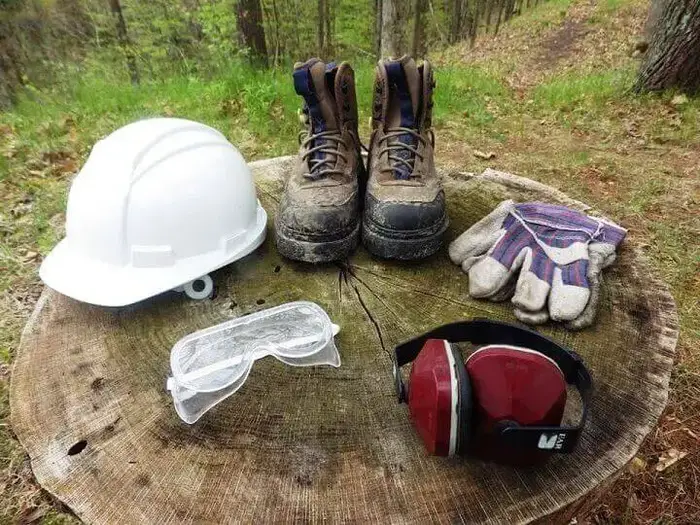
Hardhat
If you don’t have one, buy one. They’re not expensive and they could save your life. A lot can fall from above when cutting down a tree, especially weak or dangling branches called “widow makers.” The rule is simple. If you’re cutting down a tree, wear a hard hat.
Gloves
Working around trees is rough, coarse work. Gloves are another necessary piece of equipment. Thick, leather gloves are good but there are also Kevlar gloves that can effectively protect your hands from chainsaw cuts. Whether they’re leather or Kevlar, gloves should also be a standard safety rule for tree felling.
Goggles
Chainsaws will send woodchips and saw dust flying. Wear protective eyewear or a face shield. This is especially important when making the critical cuts to fell the tree, but even trimming the branches from a fallen tree (bucking) can send wood chips into your face and eyes.
Ear Protection
There’s more to felling a tree than cutting into a trunk a few times to take it down. After the tree is down, there’s continuing work and cutting that has to happen to cut up the trunk and branches. That can mean hours of cutting and chainsaws are always loud. Protect your ears the way you protect your eyes. Wear ear plugs or muffs.
Boots
A lot can fall on your feet while working around trees, so lose the gym shoes and wear some durable boots. There are boots with steel tipped toes that offer added protection, but at least wear boots whenever felling a tree.
Leather Chaps
Professionals wear leather chaps over their thighs when cutting trees. It’s another way to protect from chainsaw injuries if the saw abruptly kicks back or cuts through too quickly. They’re also relatively inexpensive. Don’t wait to gash your thigh to wear them. If you are doing a lot of tree cutting, they’re worth the investment.
Chain Sharpening Tools
The pros recommend that you sharpen your chain before each use. That may not be necessary for the casual cutter but if you’re heading into a major project that involves felling a large tree and cutting up the trunk and all the branches, it’s more than worth your time to sharpen your chain.
Tools
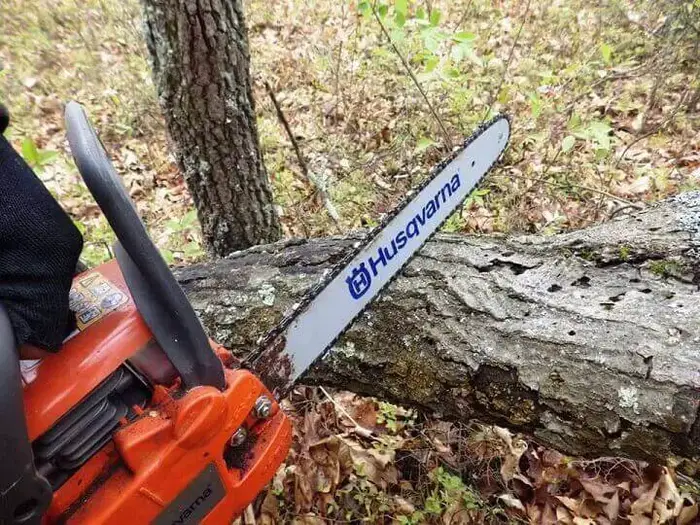
Chainsaw
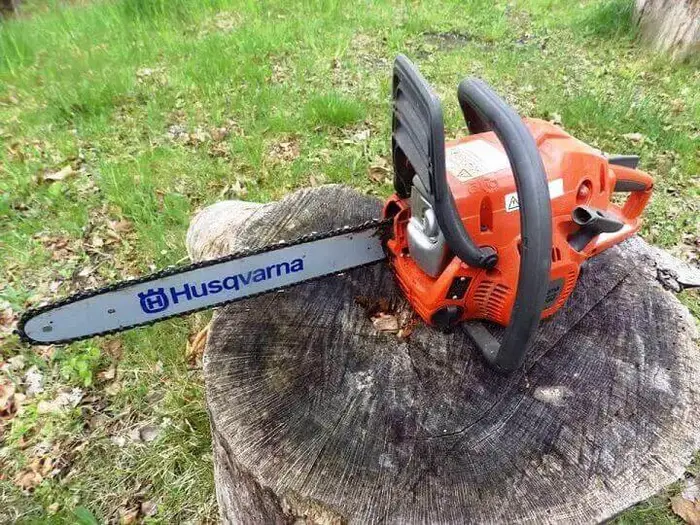
Books have been written about chainsaws but there are some basic chainsaw things to keep in mind any time you stand and ponder a tree that needs to come down.
Bar Length
Chainsaws are measured by their bar length. It’s the length that the chain extends from the engine. Sizes vary on standard chainsaws from 8 to 24-inches. Saws with bar lengths larger than 24-inches fall in the professional category. The important thing to remember is the bar length should be at least 2-inches longer than the diameter of the branch or trunk you are cutting.
A good average size for a reasonably priced chainsaw is 18”. That will let you cut a tree with a trunk up to 16” safely, although an experienced tree feller can work the saw blade to cut larger diameters. Regardless, from a safety standpoint, it’s better to use a bar length that exceeds the diameter cut by 2-inches.
Chain Type
There are basically two types of chains that can be used on a chain saw: crosscut chains and rip chains.
- A crosscut chain is designed to cut across the grain of a branch or trunk. It’s the most commonly used chain and is the standard chain installed on most chain saws.
- A rip chain has teeth aligned to cut down the length of a trunk or branch with the grain. If ever you feel the need to replace a chain on your chainsaw, make sure you aren’t buying a rip chain by mistake. Take a look at the package. Displays at the hardware store get mixed up and a rip chain struggles with crosscuts the same way a crosscut chain struggles when trying to rip saw down the length of a trunk or branch.
Gas or Electric?
For heavy duty work, a gas chainsaw is the most effective and the safest bet. Electric saws are fine for light trimming work around the yard, but you’re limited by the length of your extension cord.
Some electric saws have rechargeable batteries and they also work fine for small, yard work but the last thing you want is for the battery to die when making a critical cut while felling a tree. Gas saws are also highly portable and can run all day with the occasional top off with gas and chain oil.
Chainsaw Gas and Oils
Gas chainsaws use a gas and 2-cycle oil mix. The mixture can vary, although in most saws it’s 40:1, some recommend 50:1. Make sure you get it right and measure the gas/oil mix accurately.
Most 2-cycle oils are marked with measurements on the side of the bottle in ounces. If you mix it wrong or haphazardly, the saw will sputter and quit while cutting. That’s not safe. Mix your chainsaw gas like a chemist. Measure and mix it carefully.
Chain Oil
Almost all chainsaws have a separate reservoir for chain oil. Chain oil is a thick and highly viscous oil that the saw automatically dispenses to the chainsaw bar while you cut. Check the reservoir from time to time to make sure there’s enough chain oil. The chain will not cut at the best speed without it and could bind on the bar.
Gas Stabilizers
Many people use chainsaws intermittently. That means a chainsaw could sit for months without use. Gas over 30 days old begins to degrade and could cause a varnish to form on the carburetor jets. Gas stabilizers like Sta-Bil help prevent this. Follow the directions on the label to get the right proportions. It’s another way to keep a chainsaw from sputtering or quitting while you cut.
Additional Tools and Equipment
Wedges and Sledges
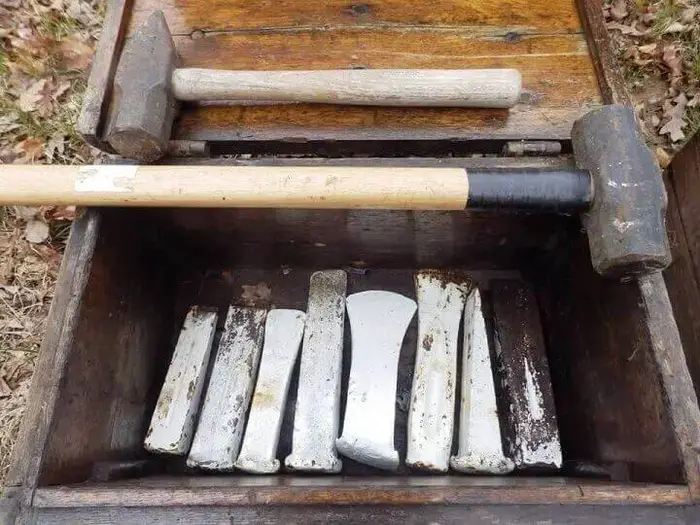
Professional tree services use wedges on a regular basis when felling a tree. It’s not a special purpose tool for them. They use it most times when making the final cut into a trunk.
Plastic or wooden wedges are the standard recommendation because they won’t harm the blade if you accidentally back into the wedge while making the final cut. Metal wedges can be used as well as long as you don’t pull the chain back into the tip of the metal wedge.
Sledge Hammers
A sledge or the back of an axe is used to drive the wedges. The size depends on the size of the tree. The bigger the tree, the bigger the wedge and the bigger the sledge.
Ropes, Cables, Chains and Come Alongs
At times it can be wise to attach a rope or cable to a tree as high as you can reach or throw it, and secure it to the trunk of another tree at a good distance. This can encourage the tree to fall in a given direction; cause it to at least swing towards a general direction, or prevent it from falling in a direction you really don’t want.
Unless you have an extremely strong rope, a heavy duty cable may be a better bet. A tree weighing tons can make short work of even the strongest rope. A chain is another option but you may need a Come Along to get it taut.
A Come Along is a pulley with a handle on a ratchet that lets you tighten a cable or chain and continue to add tension. In some instances it can be used to force a tree to fall in a certain direction, but if a heavy tree decides to go its own way, even a cable on a Come Along may lose the battle.
Curiously, the best trees for attached ropes, cables or chains are the straightest. Too often we assume we can coax a straight tree to fall in the direction we want with carefully cut notches, back cuts and wedges, but a straight tree can be moody and choose to fall in many directions, depending on the slightest factors like wind, a deceptive v-notch in the trunk high above, varying strength in the sapwood and heartwood, hollows in the trunk, or even a small proportion of branches to one side.
Tree Ladders
To be clear, ladders and trees don’t mix. Conventional ladders are not designed for trees. They’re designed for flat surfaces and walls. There are various attachments across different designs that can be affixed to the top end of a ladder to make them safer when supported against a tree. Some come to a long, tapering point to fit in a notch in the tree. Others are designed to cup the trunk to provide support.
And don’t be tempted to brace a conventional ladder in a tree notch. It may look like it should work, but it won’t. Your shifting weight on the ladder as you ascend could cause one side of the ladder to slip and shift in the notch turning the ladder sideways. It’s one of the reasons total injuries and fatalities from ladders exceed chainsaws.
Take a Good Look at the Tree
This is the time for the go/no-go decision. There are some characteristics on a tree that can make it a highly dangerous situation. Here are the things to look for.
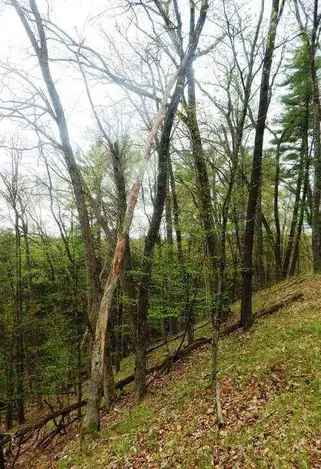
The Lean of the Tree
This can be harder than it sounds. Some trees may appear to be perfectly straight vertically but take a closer look.
Stand at the base of the trunk and look straight up. You may notice the tree is actually leaning a bit in one direction. That’s a good indication it will fall that way.
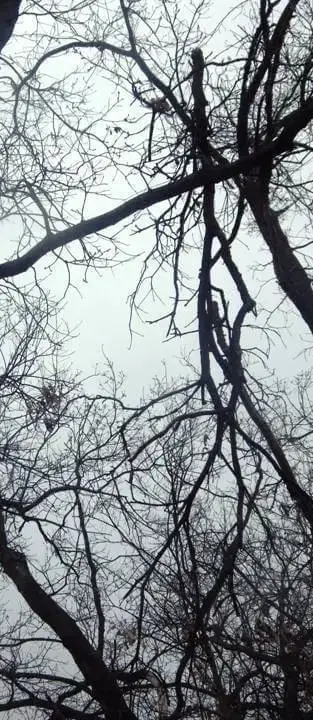
Large Branches
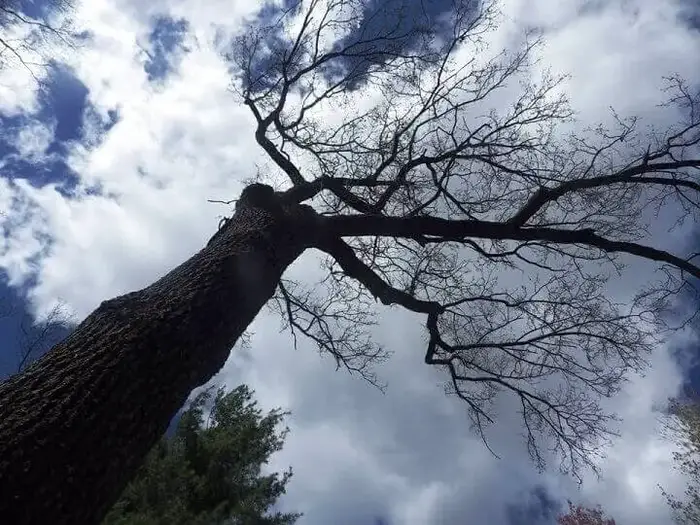
They can cause a tree to fall in the direction of the branch even if it’s opposite the leaning side of the tree.
Multiple Branches On One Side
You might see a larger branch on one side of the tree but if the opposite side has multiple small branches it could surprise you.
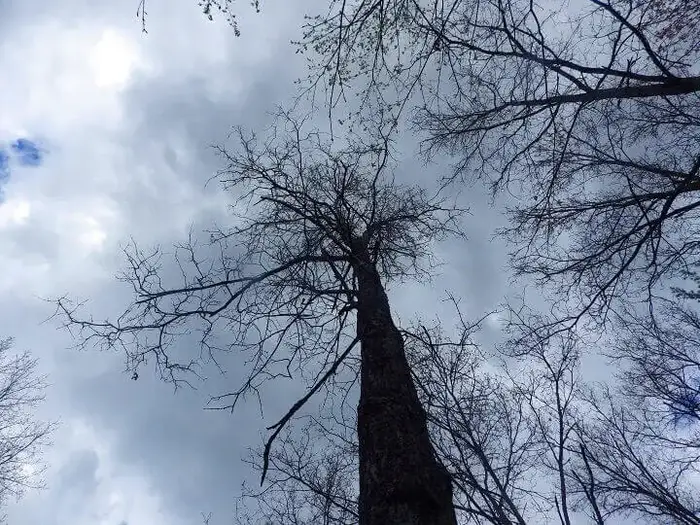
Gravity has some simple rules and the most weight on a vertical object will cause something like a tree to fall in the direction where the weight is greatest. Multiple little branches can weigh as much or more than one larger branch.
A V-notch Where Two Large Branches Diverge
This is definitely worth studying. The chances are very good that one is larger and heavier than the other and in a battle with gravity, the larger branch always wins.
A Long, Deep Bend
A surprising possibility occurs with trees showing a long, deep bend. It may seem like an easy tree to cut with its direction so clearly visible, but trees with deep bends have a hidden danger.
The bend in the tree exerts significant strain on the trunk and there’s a possibility that the tree could crack and snap back, sending a part of the trunk backwards towards the cut as the loaded stress from the bend is partially released.
Beware Of Hollow Trees
Most of the trees we choose to cut down have died. There’s a reason they died and some tree diseases or infestations result in a hollow trunk. You can’t see it but if you tap with a hammer or the back of an axe you can hear it.

If you tap on a tree with a hammer and hear a hollow sound, walk away. Don’t even think about cutting it down. Call a professional. A hollow tree may seem like an easy task but it may be one of the most dangerous trees to take down.
The reason is that a hollow trunk defies the laws of physics. It doesn’t matter if you cut a perfect v-notch on the downward side and use ever wedge in your tool box. When the weight of the tree starts to put stress on a hollow trunk, the hollow trunk can shatter and fall in a direction you never suspected. It could even collapse straight down on top of you.
Professionals never cut down a hollow tree. They disassemble it. They use a cherry-picker crane to take it apart a branch at a time and when they get to the hollow trunk, they cut it down in short sections. Never cut down a hollow tree yourself.
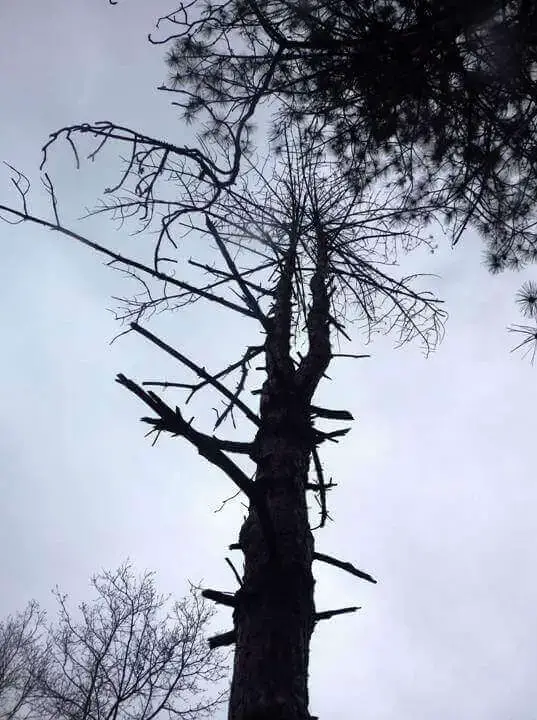
Beware the Widow Makers
A widow maker is when a branch or part of the tree at the top comes straight down when the tree is vibrated by a chainsaw or the tree starts to fall.
Some widow makers are easily visible as broken branches suspended in the tree.
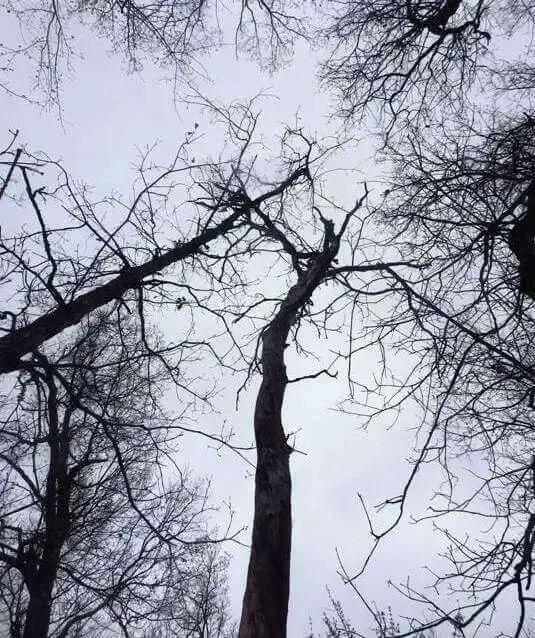
Others are just waiting to happen when a rotting trunk at the top of the tree snaps and sends a 400 pound javelin of wood straight down.
If you see a widow maker suspended in a tree, try throwing a weighted rope to snare it and pull it down before cutting the tree down. A ladder is also a possibility if you have the proper attachments to make it safe for use in a tree.
If none of your efforts get the widow maker out of the tree, walk away and hire professionals. Widow makers got their name from lumberjacks in the 1800’s because they killed so many men. They were pros and if the old pros fear a widow maker, you should too.
Look At The Surrounding Trees
Trees often grown in the company of other trees.
Consider the possibility of your tree getting hung up when it falls into a notch or branches of a neighboring tree. Do everything you can to avoid this. It may be a good time to use your cables, chains and come along. Anything to prevent a hang up.
If it happens, walk away and call the professionals. It’s one of the most dangerous scenarios you could encounter and the eventual direction of fall for both trees is very difficult to predict and even harder to avoid if you’re cutting underneath them.
In some instances the hung up tree will fall free and straight down along the other tree trunk while you’re sawing the other tree. Let the pros handle it.
Look At The Vines
In some parts of the country, trees are crawling with vines. Ever heard of Kudzu? What complicates things is the fact that vines are often very strong and numerous vines can affect the direction of the tree fall. Cut away any vines at the base of the tree up to as high as you can reach.
If the vines on the tree have crossed over and are growing into other trees -walk away and call the pros.
Determine the Direction of Fall
You want to calculate two things. An idea of the direction the tree may fall and the height of the tree.
One simple way to determine where the top of the tree may land is to take a picture and then draw a line on the picture to the top of the tree. Measure the line and extend it horizontally at the same length from the base of the tree to the surrounding area. This will give you an idea of things around the tree that it may hit.
Look at the Area Around the Tree
Think 360 degrees. There are too many YouTube videos of people cutting down trees onto houses, cars, garages, fences and into the street. If you have a good estimate of the tree height you can look around at anything it could potentially fall on and move it. If it’s an immovable object like a shed, power lines or your neighbor’s house, walk away and call the professionals.
Clear an Escape Zone Around The Base of the Tree
When the tree starts to come down, you want to get away from it fast. You also want to keep an eye on the tree as it falls in case you need to suddenly change direction. Because you won’t be watching where you’re walking or running, make sure the area is clear of anything you could trip over or run into. And have at least two escape paths from the tree. If things don’t go as planned, you’ll need a plan B.
Have a Lookout
A lookout is someone standing behind you with a 5-foot stick in their hand. While you’re watching the chain saw make the final cut, they’re watching the tree. If the tree starts to go, they will tap you on the shoulder with the stick. The reason they’re tapping you on the shoulder with a stick is because the sound of the chainsaw and your ear protection may make it impossible to hear their voice.
Once you feel that tap, get away from that tree. There are occasions where the cutter doesn’t notice the tree is starting to fall and the lookout can give you the benefit of a couple of seconds warning.
Lumber Cuts 101
There are some critical cuts you’ll have to make to fell a tree and cut it up after it’s on the ground. We’ll start with cutting the tree down and move on to cuts for bucking or cutting the limbs and branches.
The Marker Cut
You’re going to be cutting a notch into the side of the tree where you hope it falls and another cut opposite the notch to topple the tree.
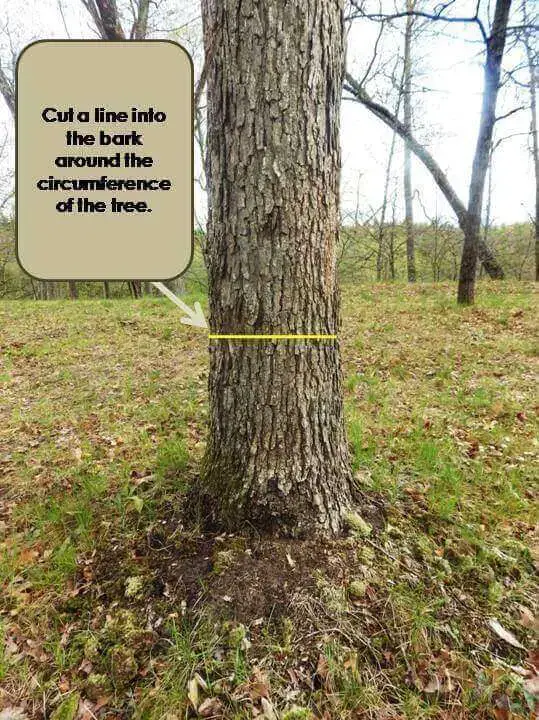
Aligning the cuts on both sides of the tree is important so cut a shallow circle into the bark around the tree as level as you can to act as a marker for all cuts.
The Notch Cut
This is a critical cut and will hopefully send your tree in the right direction. To start, look out at the direction you want the tree to fall and then look back at the trunk and mark the center of where you’ll cut so you can cut a notch facing in the right direction.
1. Using your center mark, cut the bark around the circumference.
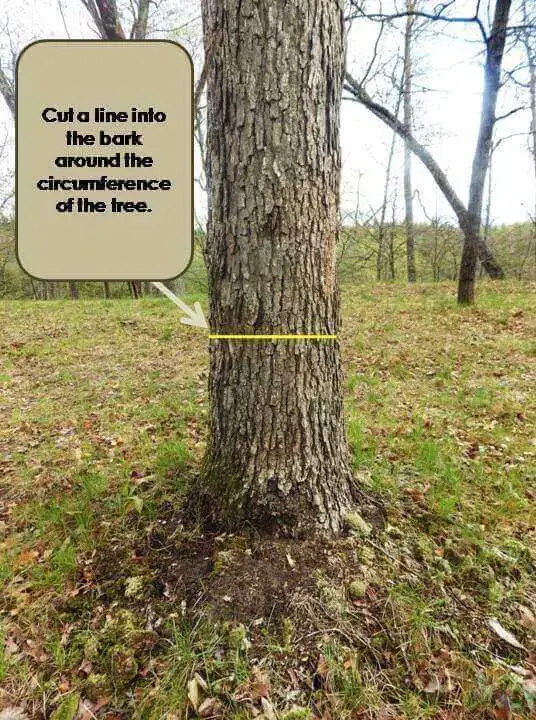
You’ll continue to use this mark in the bark as reference for additional cuts.
2. Cut down towards the marker at a 70 degree angle.
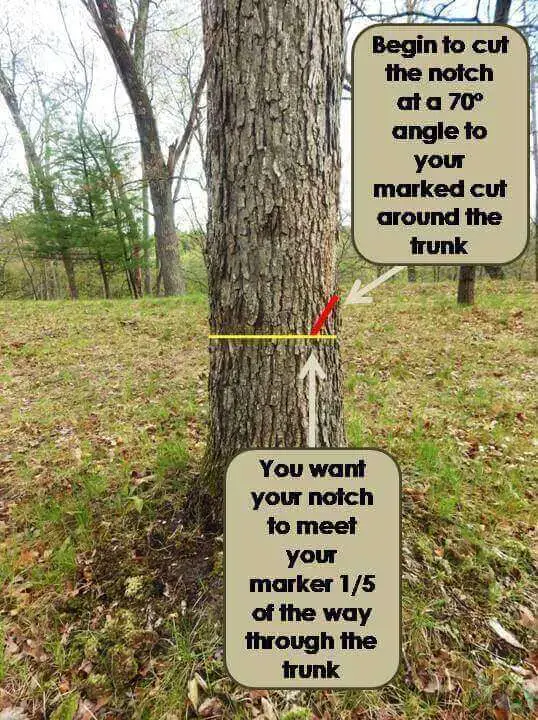
The cut should travel down to your circular marker cut and meet it about 1/5 of the way into the trunk.
3. To finish the notch, make a second, level cut towards the corner of the notch cut.
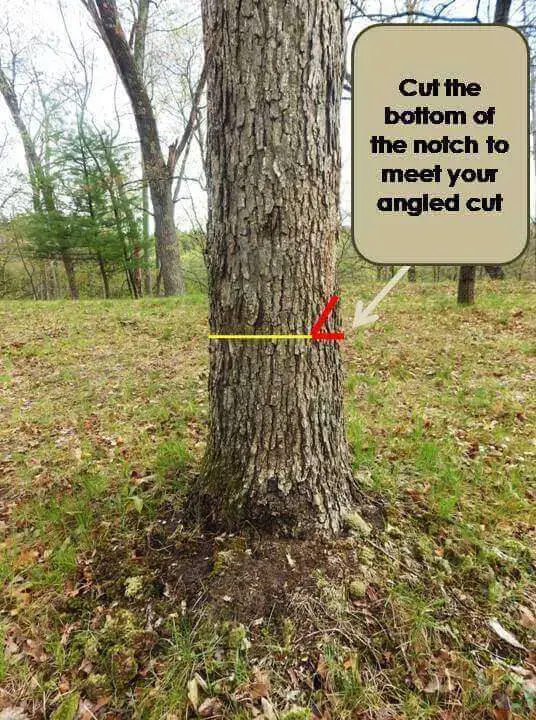
You may have to make some minor cuts in the top of the notch cut and the level cut to get the two cuts to meet.
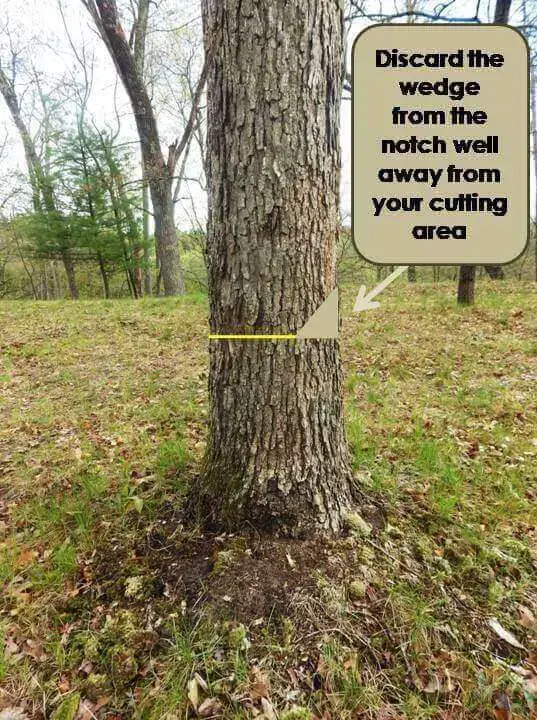
Remove the wedge of wood from the notch and toss it well away from the tree so you don’t trip over it. And be forewarned. Cutting a notch doesn’t guarantee a tree will fall in that direction. You have to consider all of the other factors as well.
The Felling Cut
1. This is the cut that will ultimately take your tree down.
2. Go to the back end of the tree and find your marker cut.
Figure out the point that is directly opposite your notch cut. Begin another cut into the back of the tree about an inch or two above your circular marker, cut angling down towards the corner of your notch.
3. Once you have the felling cut deep enough for the chainsaw bar to be totally into the tree by about a couple of inches, remove the chainsaw and drive two wedges into the felling cut using a sledge.
This will prevent the tree from binding the saw in case it decides it wants to fall in a different direction. You want them in tight but with enough room to reinsert the chainsaw bar and continue the cut.
4. Continue cutting, but stop about 2 inches short of the notch cut in front of the tree.
This will act has a hinge which is very important for the tree to fall where you want it to. Without the hinge, the tree could fall in any direction that wind or gravity wants it to. It could even rotate on the stump and fall in an unexpected direction.
If the tree still doesn’t fall, give your two wedges in the gap one last hit with the sledge to start the fall.
5. At this point, you should hear a crack or snap or feel your lookout’s tap on your shoulder. Move away from the tree quickly, watching as it falls and keep moving.
Bucking or Cutting Up the Tree
Once your tree is down, the real work begins. Don’t get complacent. This is where the majority of chainsaw injuries occur and the tree can still hurt you. Especially if it’s on a slope.
Start cutting branches from the tree towards the base of the tree and work your way up. Start with the limbs pointing up or out cutting down into the branches with something called a topside cut.
The chain will be moving away from you so this is also sometimes called a pulling cut.
- If the tree is on a hill or slope, stand uphill from the trunk while you cut so the tree doesn’t roll towards you as you cut branches that may be supporting or balancing the tree on the slope.
- Branches under the tree are bearing the weight of the trunk. Carefully cut them underneath the branch to avoid binding.
This is called a downside or pushing cut because the chain will push back at you. Look carefully at which branches are supporting the tree off the ground. If you can, rotate the trunk so there is less stress on the downside branches.
- Cutting the trunk is easier if it’s supported off the ground at some point so you can cut from the topside all the way through the trunk.
- If the trunk is on the ground, cut ¾ of the way through the trunk but do not let the chain contact the ground.
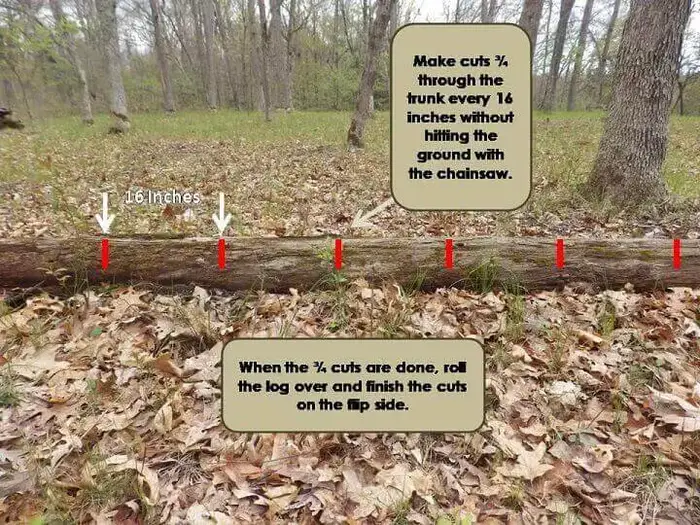
Make these ¾ cuts every 16 inches along the length of the trunk.
When done, roll the trunk over and finish the cuts you’ve already made.
Stay Cool
It’s tempting for some of us to start to think and believe that we are the masters of the wild as we continue to do dangerous and dramatic things like felling large trees. If there’s one thing that’s for certain it’s that every tree is unique and will present its own set of challenges and surprises.
Stay cool as you approach any new tree felling project and treat it like your first time. Wear all of the safety equipment and just know that the day will come when a tree surprises you with something new. The key is to be ready for it and avoid becoming one of those statistics we mentioned earlier.
Anyone with multiple trees on their property faces the inevitable day when a tree has to come down. The easiest solution is to hire a tree service, but that can be expensive. Cutting down a tree yourself is the most economical solution, but anyone who has cut down multiple trees knows that the forest is full of surprises.
The Facts
According to the Occupational Safety and Health Administration (OSHA), there are more than 100 fatalities every year as a result of someone cutting down a tree themselves. The Tree Care Industry Association (TCIA) reports that accidents are 10 times more likely to happen when someone is felling a tree. And these stats are for everyday people, not the pros.
The fact of the matter is that a mature tree can weigh 10 tons or more. TCIA also reports that when homeowners cut down a tree, they are 5 times more likely to suffer an injury than a professional. It’s all enough to make you think twice about hiring a professional tree service, but you can still cut some of your own trees safely if you approach it the right way. Even then, there are occasions when you should just walk away and call a pro.
Want to save this post for later? Click Here to Pin It On Pinterest!
And About Those Chainsaws
Before you fire up the chainsaw and start cutting, it’s worth knowing that approximately 36,000 people a year are treated in hospital emergency rooms for chainsaw related injuries. That number does not include the people who choose to treat their injuries at home so it’s most likely much higher.
In spite of the statistics, many people continue to fell their own trees and for a homesteader, it’s often a necessary need and skill. Most have extensive experience and some have learned the hard way, but it’s worth a review of all factors that can make felling a tree a safe decision.
Before we get into all the fun stuff about chainsaws, it’s worth considering some basic tools that help to make tree cutting safer.
Safety Equipment
If you don’t have one, buy one. They’re not expensive and they could save your life. A lot can fall from above when cutting down a tree, especially weak or dangling branches called “widow makers.” The rule is simple. If you’re cutting down a tree, wear a hard hat.
Gloves
Working around trees is rough, coarse work. Gloves are another necessary piece of equipment. Thick, leather gloves are good but there are also Kevlar gloves that can effectively protect your hands from chainsaw cuts. Whether they’re leather or Kevlar, gloves should also be a standard safety rule for tree felling.
Goggles
Chainsaws will send woodchips and saw dust flying. Wear protective eyewear or a face shield. This is especially important when making the critical cuts to fell the tree, but even trimming the branches from a fallen tree (bucking) can send wood chips into your face and eyes.
Ear Protection
There’s more to felling a tree than cutting into a trunk a few times to take it down. After the tree is down, there’s continuing work and cutting that has to happen to cut up the trunk and branches. That can mean hours of cutting and chainsaws are always loud. Protect your ears the way you protect your eyes. Wear ear plugs or muffs.
Boots
A lot can fall on your feet while working around trees, so lose the gym shoes and wear some durable boots. There are boots with steel tipped toes that offer added protection, but at least wear boots whenever felling a tree.
Leather Chaps
Professionals wear leather chaps over their thighs when cutting trees. It’s another way to protect from chainsaw injuries if the saw abruptly kicks back or cuts through too quickly. They’re also relatively inexpensive. Don’t wait to gash your thigh to wear them. If you are doing a lot of tree cutting, they’re worth the investment.
Chain Sharpening Tools
The pros recommend that you sharpen your chain before each use. That may not be necessary for the casual cutter but if you’re heading into a major project that involves felling a large tree and cutting up the trunk and all the branches, it’s more than worth your time to sharpen your chain.
Tools
Chainsaw
Books have been written about chainsaws but there are some basic chainsaw things to keep in mind any time you stand and ponder a tree that needs to come down.
Bar Length
Chainsaws are measured by their bar length. It’s the length that the chain extends from the engine. Sizes vary on standard chainsaws from 8 to 24-inches. Saws with bar lengths larger than 24-inches fall in the professional category. The important thing to remember is the bar length should be at least 2-inches longer than the diameter of the branch or trunk you are cutting.
A good average size for a reasonably priced chainsaw is 18”. That will let you cut a tree with a trunk up to 16” safely, although an experienced tree feller can work the saw blade to cut larger diameters. Regardless, from a safety standpoint, it’s better to use a bar length that exceeds the diameter cut by 2-inches.
Chain Type
There are basically two types of chains that can be used on a chain saw: crosscut chains and rip chains.
A crosscut chain is designed to cut across the grain of a branch or trunk. It’s the most commonly used chain and is the standard chain installed on most chain saws.
A rip chain has teeth aligned to cut down the length of a trunk or branch with the grain. If ever you feel the need to replace a chain on your chainsaw, make sure you aren’t buying a rip chain by mistake. Take a look at the package. Displays at the hardware store get mixed up and a rip chain struggles with crosscuts the same way a crosscut chain struggles when trying to rip saw down the length of a trunk or branch.
Gas or Electric?
For heavy duty work, a gas chainsaw is the most effective and the safest bet. Electric saws are fine for light trimming work around the yard, but you’re limited by the length of your extension cord.
Some electric saws have rechargeable batteries and they also work fine for small, yard work but the last thing you want is for the battery to die when making a critical cut while felling a tree. Gas saws are also highly portable and can run all day with the occasional top off with gas and chain oil.
Chainsaw Gas and Oils
Gas chainsaws use a gas and 2-cycle oil mix. The mixture can vary, although in most saws it’s 40:1, some recommend 50:1. Make sure you get it right and measure the gas/oil mix accurately.
Most 2-cycle oils are marked with measurements on the side of the bottle in ounces. If you mix it wrong or haphazardly, the saw will sputter and quit while cutting. That’s not safe. Mix your chainsaw gas like a chemist. Measure and mix it carefully.
Chain Oil
Almost all chainsaws have a separate reservoir for chain oil. Chain oil is a thick and highly viscous oil that the saw automatically dispenses to the chainsaw bar while you cut. Check the reservoir from time to time to make sure there’s enough chain oil. The chain will not cut at the best speed without it and could bind on the bar.
Gas Stabilizers
Many people use chainsaws intermittently. That means a chainsaw could sit for months without use. Gas over 30 days old begins to degrade and could cause a varnish to form on the carburetor jets. Gas stabilizers like Sta-Bil help prevent this. Follow the directions on the label to get the right proportions. It’s another way to keep a chainsaw from sputtering or quitting while you cut.
Additional Tools and Equipment
Wedges and Sledges
Professional tree services use wedges on a regular basis when felling a tree. It’s not a special purpose tool for them. They use it most times when making the final cut into a trunk.
Plastic or wooden wedges are the standard recommendation because they won’t harm the blade if you accidentally back into the wedge while making the final cut. Metal wedges can be used as well as long as you don’t pull the chain back into the tip of the metal wedge.
Sledge Hammers
A sledge or the back of an axe is used to drive the wedges. The size depends on the size of the tree. The bigger the tree, the bigger the wedge and the bigger the sledge.
Ropes, Cables, Chains and Come Alongs
At times it can be wise to attach a rope or cable to a tree as high as you can reach or throw it, and secure it to the trunk of another tree at a good distance. This can encourage the tree to fall in a given direction; cause it to at least swing towards a general direction, or prevent it from falling in a direction you really don’t want.
Unless you have an extremely strong rope, a heavy duty cable may be a better bet. A tree weighing tons can make short work of even the strongest rope. A chain is another option but you may need a Come Along to get it taut.
A Come Along is a pulley with a handle on a ratchet that lets you tighten a cable or chain and continue to add tension. In some instances it can be used to force a tree to fall in a certain direction, but if a heavy tree decides to go its own way, even a cable on a Come Along may lose the battle.
Curiously, the best trees for attached ropes, cables or chains are the straightest. Too often we assume we can coax a straight tree to fall in the direction we want with carefully cut notches, back cuts and wedges, but a straight tree can be moody and choose to fall in many directions, depending on the slightest factors like wind, a deceptive v-notch in the trunk high above, varying strength in the sapwood and heartwood, hollows in the trunk, or even a small proportion of branches to one side.
Tree Ladders
To be clear, ladders and trees don’t mix. Conventional ladders are not designed for trees. They’re designed for flat surfaces and walls. There are various attachments across different designs that can be affixed to the top end of a ladder to make them safer when supported against a tree. Some come to a long, tapering point to fit in a notch in the tree. Others are designed to cup the trunk to provide support.
And don’t be tempted to brace a conventional ladder in a tree notch. It may look like it should work, but it won’t. Your shifting weight on the ladder as you ascend could cause one side of the ladder to slip and shift in the notch turning the ladder sideways. It’s one of the reasons total injuries and fatalities from ladders exceed chainsaws.
Take a Good Look at the Tree
This is the time for the go/no-go decision. There are some characteristics on a tree that can make it a highly dangerous situation. Here are the things to look for.
The Lean of the Tree
This can be harder than it sounds. Some trees may appear to be perfectly straight vertically but take a closer look.
Stand at the base of the trunk and look straight up. You may notice the tree is actually leaning a bit in one direction. That’s a good indication it will fall that way.
Large Branches
They can cause a tree to fall in the direction of the branch even if it’s opposite the leaning side of the tree.
Multiple Branches On One Side
You might see a larger branch on one side of the tree but if the opposite side has multiple small branches it could surprise you.
Gravity has some simple rules and the most weight on a vertical object will cause something like a tree to fall in the direction where the weight is greatest. Multiple little branches can weigh as much or more than one larger branch.
A V-notch Where Two Large Branches Diverge
This is definitely worth studying. The chances are very good that one is larger and heavier than the other and in a battle with gravity, the larger branch always wins.
A Long, Deep Bend
A surprising possibility occurs with trees showing a long, deep bend. It may seem like an easy tree to cut with its direction so clearly visible, but trees with deep bends have a hidden danger.
The bend in the tree exerts significant strain on the trunk and there’s a possibility that the tree could crack and snap back, sending a part of the trunk backwards towards the cut as the loaded stress from the bend is partially released.
Beware Of Hollow Trees
Most of the trees we choose to cut down have died. There’s a reason they died and some tree diseases or infestations result in a hollow trunk. You can’t see it but if you tap with a hammer or the back of an axe you can hear it.
If you tap on a tree with a hammer and hear a hollow sound, walk away. Don’t even think about cutting it down. Call a professional. A hollow tree may seem like an easy task but it may be one of the most dangerous trees to take down.
The reason is that a hollow trunk defies the laws of physics. It doesn’t matter if you cut a perfect v-notch on the downward side and use ever wedge in your tool box. When the weight of the tree starts to put stress on a hollow trunk, the hollow trunk can shatter and fall in a direction you never suspected. It could even collapse straight down on top of you.
Professionals never cut down a hollow tree. They disassemble it. They use a cherry-picker crane to take it apart a branch at a time and when they get to the hollow trunk, they cut it down in short sections. Never cut down a hollow tree yourself.
Beware the Widow Makers
A widow maker is when a branch or part of the tree at the top comes straight down when the tree is vibrated by a chainsaw or the tree starts to fall.
Some widow makers are easily visible as broken branches suspended in the tree.
Others are just waiting to happen when a rotting trunk at the top of the tree snaps and sends a 400 pound javelin of wood straight down.
If you see a widow maker suspended in a tree, try throwing a weighted rope to snare it and pull it down before cutting the tree down. A ladder is also a possibility if you have the proper attachments to make it safe for use in a tree.
If none of your efforts get the widow maker out of the tree, walk away and hire professionals. Widow makers got their name from lumberjacks in the 1800’s because they killed so many men. They were pros and if the old pros fear a widow maker, you should too.
Look At The Surrounding Trees
Trees often grown in the company of other trees.
Consider the possibility of your tree getting hung up when it falls into a notch or branches of a neighboring tree. Do everything you can to avoid this. It may be a good time to use your cables, chains and come along. Anything to prevent a hang up.
If it happens, walk away and call the professionals. It’s one of the most dangerous scenarios you could encounter and the eventual direction of fall for both trees is very difficult to predict and even harder to avoid if you’re cutting underneath them.
In some instances the hung up tree will fall free and straight down along the other tree trunk while you’re sawing the other tree. Let the pros handle it.
Look At The Vines
In some parts of the country, trees are crawling with vines. Ever heard of Kudzu? What complicates things is the fact that vines are often very strong and numerous vines can affect the direction of the tree fall. Cut away any vines at the base of the tree up to as high as you can reach.
If the vines on the tree have crossed over and are growing into other trees -walk away and call the pros.
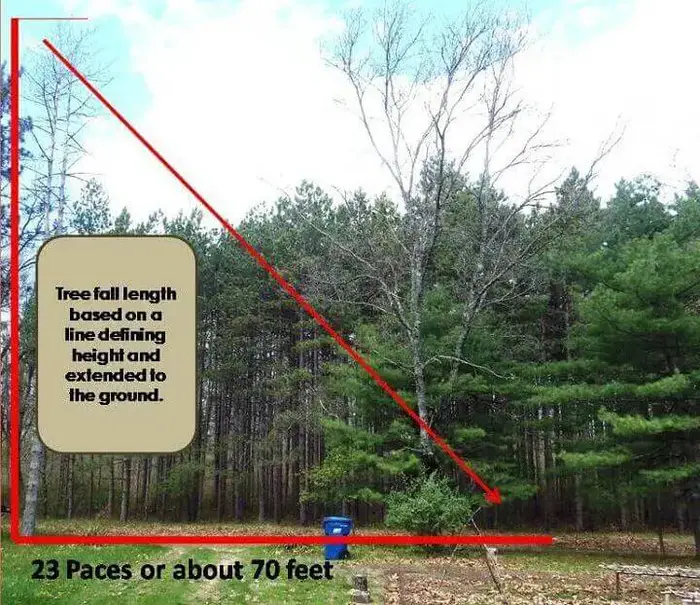
Determine the Direction of Fall
You want to calculate two things. An idea of the direction the tree may fall and the height of the tree.
One simple way to determine where the top of the tree may land is to take a picture and then draw a line on the picture to the top of the tree. Measure the line and extend it horizontally at the same length from the base of the tree to the surrounding area. This will give you an idea of things around the tree that it may hit.
Look at the Area Around the Tree
Think 360 degrees. There are too many YouTube videos of people cutting down trees onto houses, cars, garages, fences and into the street. If you have a good estimate of the tree height you can look around at anything it could potentially fall on and move it. If it’s an immovable object like a shed, power lines or your neighbor’s house, walk away and call the professionals.
Clear an Escape Zone Around The Base of the Tree
When the tree starts to come down, you want to get away from it fast. You also want to keep an eye on the tree as it falls in case you need to suddenly change direction. Because you won’t be watching where you’re walking or running, make sure the area is clear of anything you could trip over or run into. And have at least two escape paths from the tree. If things don’t go as planned, you’ll need a plan B.
Have a Lookout
A lookout is someone standing behind you with a 5-foot stick in their hand. While you’re watching the chain saw make the final cut, they’re watching the tree. If the tree starts to go, they will tap you on the shoulder with the stick. The reason they’re tapping you on the shoulder with a stick is because the sound of the chainsaw and your ear protection may make it impossible to hear their voice.
Once you feel that tap, get away from that tree. There are occasions where the cutter doesn’t notice the tree is starting to fall and the lookout can give you the benefit of a couple of seconds warning.
Lumber Cuts 101
There are some critical cuts you’ll have to make to fell a tree and cut it up after it’s on the ground. We’ll start with cutting the tree down and move on to cuts for bucking or cutting the limbs and branches.
The Marker Cut
You’re going to be cutting a notch into the side of the tree where you hope it falls and another cut opposite the notch to topple the tree.
Aligning the cuts on both sides of the tree is important so cut a shallow circle into the bark around the tree as level as you can to act as a marker for all cuts.
The Notch Cut
This is a critical cut and will hopefully send your tree in the right direction. To start, look out at the direction you want the tree to fall and then look back at the trunk and mark the center of where you’ll cut so you can cut a notch facing in the right direction.
1. Using your center mark, cut the bark around the circumference.
You’ll continue to use this mark in the bark as reference for additional cuts.
2. Cut down towards the marker at a 70 degree angle.
The cut should travel down to your circular marker cut and meet it about 1/5 of the way into the trunk.
3. To finish the notch, make a second, level cut towards the corner of the notch cut.
You may have to make some minor cuts in the top of the notch cut and the level cut to get the two cuts to meet.
Remove the wedge of wood from the notch and toss it well away from the tree so you don’t trip over it. And be forewarned. Cutting a notch doesn’t guarantee a tree will fall in that direction. You have to consider all of the other factors as well.
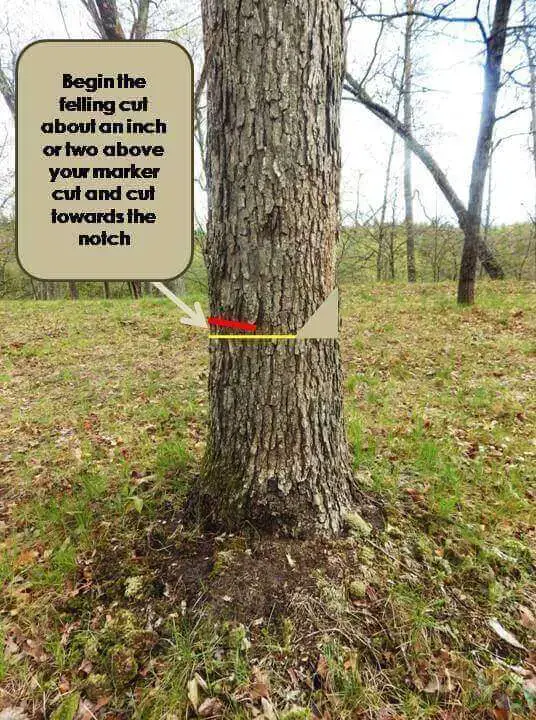
The Felling Cut
1. This is the cut that will ultimately take your tree down.
2. Go to the back end of the tree and find your marker cut.
Figure out the point that is directly opposite your notch cut. Begin another cut into the back of the tree about an inch or two above your circular marker, cut angling down towards the corner of your notch.
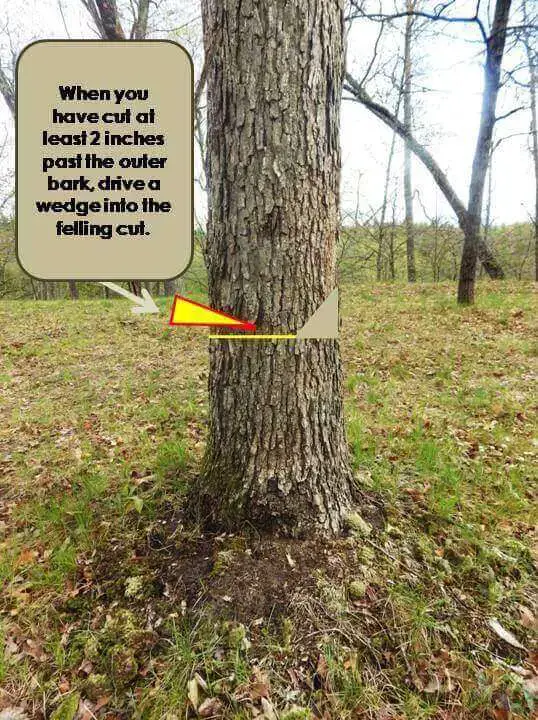
3. Once you have the felling cut deep enough for the chainsaw bar to be totally into the tree by about a couple of inches, remove the chainsaw and drive two wedges into the felling cut using a sledge.
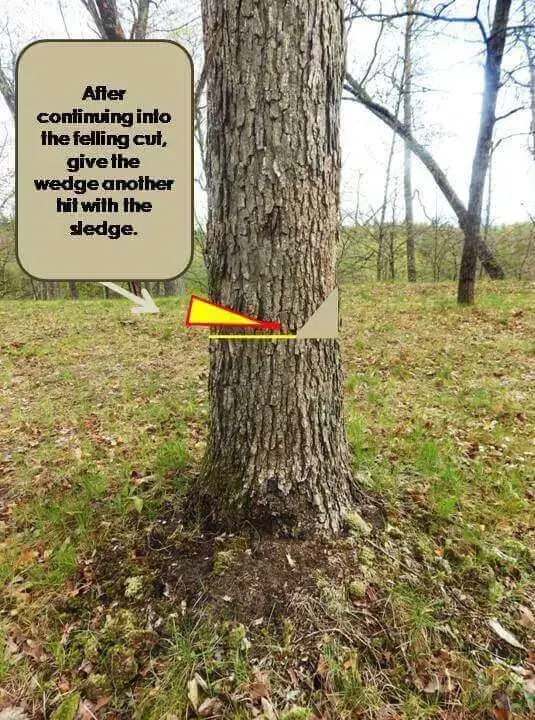
This will prevent the tree from binding the saw in case it decides it wants to fall in a different direction. You want them in tight but with enough room to reinsert the chainsaw bar and continue the cut.
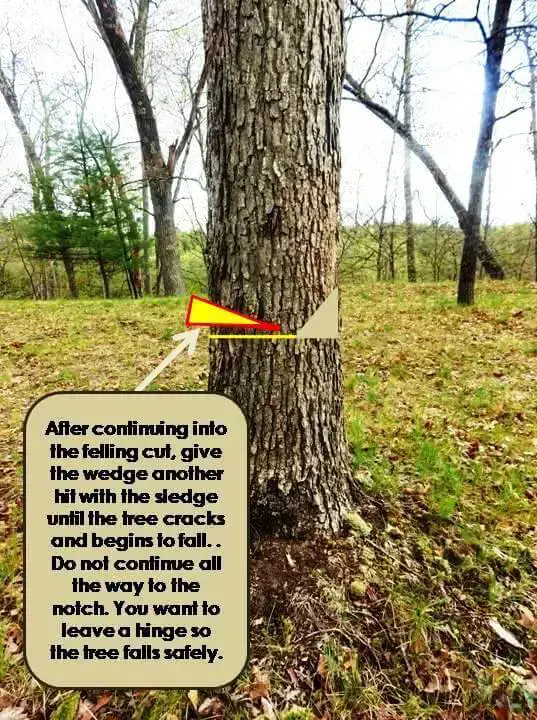
4. Continue cutting, but stop about 2 inches short of the notch cut in front of the tree.
This will act has a hinge which is very important for the tree to fall where you want it to. Without the hinge, the tree could fall in any direction that wind or gravity wants it to. It could even rotate on the stump and fall in an unexpected direction.
If the tree still doesn’t fall, give your two wedges in the gap one last hit with the sledge to start the fall.
5. At this point, you should hear a crack or snap or feel your lookout’s tap on your shoulder. Move away from the tree quickly, watching as it falls and keep moving.
Bucking or Cutting Up the Tree
Once your tree is down, the real work begins. Don’t get complacent. This is where the majority of chainsaw injuries occur and the tree can still hurt you. Especially if it’s on a slope.
Start cutting branches from the tree towards the base of the tree and work your way up. Start with the limbs pointing up or out cutting down into the branches with something called a topside cut.
The chain will be moving away from you so this is also sometimes called a pulling cut.
If the tree is on a hill or slope, stand uphill from the trunk while you cut so the tree doesn’t roll towards you as you cut branches that may be supporting or balancing the tree on the slope.
Branches under the tree are bearing the weight of the trunk. Carefully cut them underneath the branch to avoid binding.
This is called a downside or pushing cut because the chain will push back at you. Look carefully at which branches are supporting the tree off the ground. If you can, rotate the trunk so there is less stress on the downside branches.
Cutting the trunk is easier if it’s supported off the ground at some point so you can cut from the topside all the way through the trunk.
If the trunk is on the ground, cut ¾ of the way through the trunk but do not let the chain contact the ground.
Make these ¾ cuts every 16 inches along the length of the trunk.
When done, roll the trunk over and finish the cuts you’ve already made.
Stay Cool
It’s tempting for some of us to start to think and believe that we are the masters of the wild as we continue to do dangerous and dramatic things like felling large trees. If there’s one thing that’s for certain it’s that every tree is unique and will present its own set of challenges and surprises.
Stay cool as you approach any new tree felling project and treat it like your first time. Wear all of the safety equipment and just know that the day will come when a tree surprises you with something new. The key is to be ready for it and avoid becoming one of those statistics we mentioned earlier.
No comments:
Post a Comment