Incubating and hatching duck eggs is vitally important if you want to keep your flock growing should the breed you are keeping be excellent layers, but lousy sitters.
Some duck breeds both lay and sit their eggs well, but that is definitely not always the case. In such circumstances, investing in a quality incubator and learning how to use it properly to hatch duck eggs will be your only option to bring your own ducklings into the world.
Guides to hatching chicken eggs abound on the internet. Odds are many homesteaders and farmers where you live could easily offer valuable tips on the chicken egg hatching process from start to finish.
Although ducks and chickens are both poultry birds, there are distinct differences in the hatching process for each respective type of egg.
There is no special incubator for use on duck eggs. Nearly all standard incubators can also accommodate duck eggs. Jumbo Pekin duck hen legs could probably be the only issue in incubators with trays that have egg openings that are positioned too close together or too narrow in diameter.
I raise Pekin and Jumbo Pekin hens, and have yet to have any real issue keeping them firmly in place in an typical off the shelf chicken egg incubator.
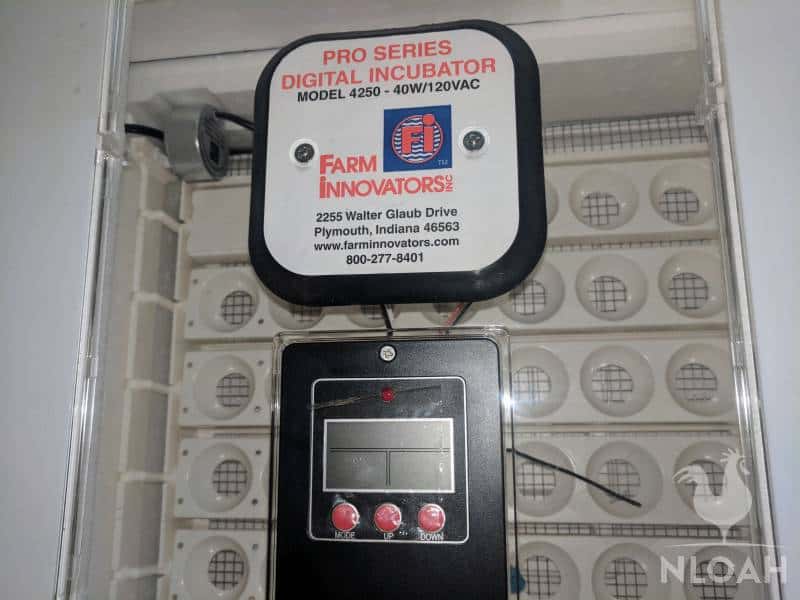
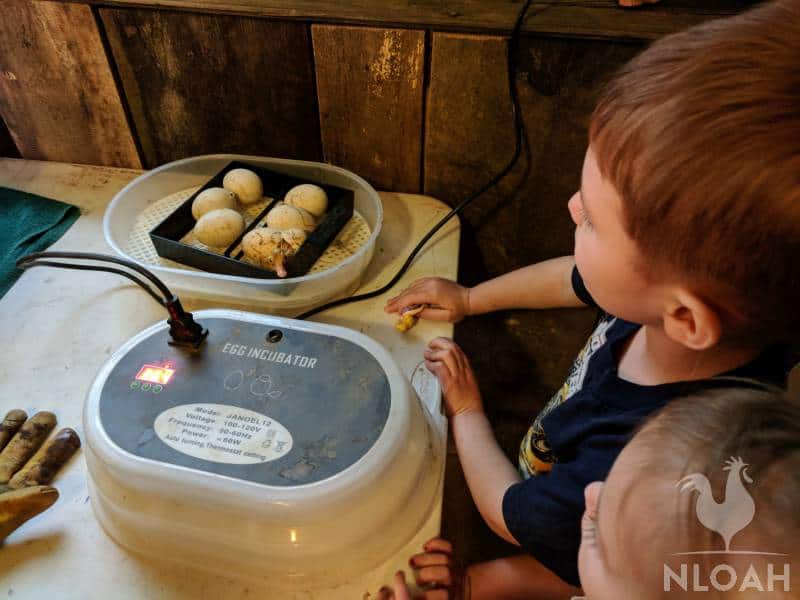
Either the large incubator shown in the photo above with egg opening style trays or the smaller incubator below that have open trays, can be easily used to incubate duck eggs.
How Long Does It Take To Incubate A Duck Egg?
The incubation period for duck eggs varies at least slightly by breed. It takes Pekin duck eggs about 28 days to hatch. Muscovy duck eggs typically take up to 35 days to hatch. This 28 to 35 day time frame should help guide you through the incubation process. Do not expect a duck egg to hatch at 21 days like a chicken egg or give up on a duck egg before the 35 (to even 38) day mark.
When Does The Incubation Period Begin?
The duck egg incubation period begins as soon as the egg is laid. If you do not collect eggs every day and the hen refuses to sit, the viability of the egg is greatly reduced. If the duck hen attempts to sit the egg and/or the weather is fairly warm, a two or sometimes three day old egg might remain viable enough to hatch in an electric incubator.
Automatic Turning Arm Incubators
This is a hotly debated question among duck keepers. An automatic turning arm or rack negates the need to for manual turning of the eggs multiple times per day.
Because duck eggs are much more susceptible to negative effects from humidity changes (even extremely brief ones) than chicken eggs, an automatic turning arm prevents the need to open the incubator lid multiple times per day to turn the eggs.
This reason alone was enough to convince me that purchasing incubators with an automatic turning arm was the best way to go.
An automatic turning rack does not actually turn the eggs, but rocks them back and forth.
While this is ideal for chicken eggs, which requires the air pocket turned upward to best facilitate breathing inside the egg, folks who do not favor automatic turning arms are concerned this type of positioning place the larger duck eggs too close to the heating element in the incubator.
Fluctuations of just five degrees on any part of the duck egg can cause significant hatching problems.
I have had average to above average duck egg hatching rates in my incubators that boast automatic turning arms. But, some folks garner equally good results in incubators that do not have an automatic turning arm or tray function and swear by them with equal vigor.
Regardless of whether or not you choose to buy an incubator with an automatic turning arm or not, mark an “X” on each egg to help keep track of how the egg moves throughout the day.
Duck eggs must shift position at least four times a day either manually or automatically to rotate them properly and increase the likelihood of hatching.
The Right Humidity To Incubate Duck Eggs
To successfully incubate duck eggs the humidity level should remain between 55 to 65 percent at all times. If the incubator has a “wet bulb” thermometer, it should read between 85 to 88 degrees to achieve proper humidity levels.
When attempting to incubate duck eggs laid by older hens, it is sometimes helpful to increase the relative humidity level to 75 percent (or 92 to 94 degrees F on a wet bulb thermometer) because such eggs are often far more porous.
Because incubating duck eggs requires a higher humidity level than hatching chicken eggs, it is not recommended to attempt to place both types of eggs in an incubator at the same time. Also, the increased humidity level and time frame for hatching duck eggs can increase the chances for bacteria to bloom to occur.
I have often had the best duck egg incubation hatch rates when keeping the humidity level between 45% to 55% for the initial 25 days, and then increasing it to 65% for just the last three days
The Right Temperature Level
The incubator should always be warmed to 98 degrees before placing the freshly laid duck eggs inside.
Duck eggs should be incubated at a temperature that ranges from 99.3 to 99.6 degrees F. The growing duckling embryos will cause the temperature to increase inside the incubator during the last week to 10 days before hatching.
Because of this natural temperature increase during the final stage of duck egg incubation, more frequent monitoring of the temperature becomes necessary. If the temperature inside of the incubator is not adjusted appropriately during this time frame the danger of the duckling embryos increases substantially.
Water Loss During Duck Egg Incubation
As the duckling embryo grows inside of the egg, water loss from the egg itself occurs. During this same phase of the duckling hatching process, the air cell inside of the egg grows.
When a duckling is developing as it should, the air cell should encompass roughly one-third of the interior space of the egg 25 days into the process.
If the duckling embryo is developing properly, the egg should feel approximately 14 percent lighter than it did when it was first placed in the incubator.
How Long Can Duck Eggs Sit Before Incubation?
Duck eggs are being kept for a short time to garner enough to at least partially fill the incubator. Although it is far better to use fresh fertilized eggs for incubating to increase chances of success, they can be kept for about one week to 10 days before the chances of hatching are too significantly decreased to bother trying to save them.
If you happen to find a duck egg in a nesting box, coop, run, or in the flock’s free ranging area, candle it to help determine its viability before either pitching the egg or saving it.
For the best hatching ratio results, all fertilized duck eggs should be placed in the incubator within three days of being laid.
Duck Egg Inspection Tips
Always look the duck eggs over carefully before placing them in the incubator. It will become rapidly clear if you have placed a cracked or rotten egg into the machine.
The bacteria that seeps out from a cracked egg will not only stink to high heaven, but can contaminate the interior of the incubator, and cause harm to the existing good eggs.
- If the candling reveals any cracks in the egg or double yolks, either pitch the egg or do the float or sink test to see if it is still safe to eat.
- Undersized duck eggs do not likely contain a healthy properly formed embryo and will likely not hatch.
- Misshapen duck eggs also rarely contain a healthy duckling embryo.
- Unless you are raising a duck breed that is supposed to create “jumbo” or extra large eggs, finding one of huge size in the hen’s nesting box likely indicates an improperly formed embryo.

Incubator Cost And Buying Tips
Incubators can cost as little as $65 yo $85 for a small and basic model with an automatic turning arm. A larger egg incubator with a lot of bells and whistles can run between $100 to $150.
The larger the incubator the more electricity it will use – which can be a deterrent for homesteaders living off grid. If the ducklings being hatched will be part of a homesteading business, the cost of the incubator and the electricity used to operate it may be a tax deductible expense.
- Almost all incubators on the market come complete with a built in temperature gauge – but not necessarily all. Read the description of the machine carefully before purchasing to make sure this essential tool is included in the price or if it is sold separately and available for immediate purchase, as well.
- Decide if you want an incubator with an automatic turning arm or not before selecting a model to purchase. Some machines are manufactured with removable trays or frame racks that allow the automatic turning arm to be removed for cleaning – or when hatching duck eggs, if you would like.
- Not all machines come with a humidity gauge or a wet bulb thermometer, especially smaller or less expensive models. One or the other of these devices will be needed to successfully hatch duck eggs. Either purchase a machine with such features or one that has accessories which can be purchased to safely and properly function inside of the machine.
- Incubators that have either a frame with dividers to keep eggs separated or with egg trays dramatically decrease the chances of eggs knocking into each other and cracking during the turning process.
- More advanced and expensive poultry egg incubators, regardless of size, often come complete with a “days to hatch” digital display screen. While not necessary to successfully hatch eggs, it does come in quite handy.
- Another included or add-on accessory that can also come in handy is an egg candler. This lightweight little gadget resembles a flashlight and makes candling a fertilized poultry egg a breeze.
- Water must be added into the machine to create the necessary humidity level for incubating any type of poultry hen egg. Depending upon the style of your machine, there might be a measure and pour cup to use, a well to pour the water in, or simply the recommendation to use a squirt bottle to infuse water into the incubator. The measure and pour cup style machine helps increase humidity accuracy. A fancy incubator may even have a built in heater that quickly water to a factory pre-set temperature – usually 100 degrees F (37 Celsius).
- Air circulation inside of the incubator is critical for a solid hatching success rate. Placing duck eggs inside of a smaller incubator can cause overcrowding and reduced air flow. The developing duckling embryo must have a steady supply of fresh air to develop properly. Large incubators often have air vent holes with little plastic caps that can be moved in or out at various degrees or removed entirely to help facilitate better airflow and/or to regulate humidity. During the final four days of the hatching process, I recommend keeping all of the ventilation holes completely open.
Incubator Setup And Usage Tips
- Test the incubator for at least an hour to make sure it warms up to the advised temperature and can hold it, before placing any eggs inside.
- Candle the ducks eggs inside the incubator again one week into the process and remove any that are either cloudy (dead embryo) or clear – infertile.
- Some folks clean the duck eggs before putting them inside of the incubator and others (like myself) place them into the trays in their natural state. The gunk on the egg shell from the laying process can help prevent bacteria from getting inside of the egg. Knocking off a little bit of dirt is fine, but I do not even bother with that. I merely put the eggs right from the nest into the incubator, and leave them just as they would be if their momma hen was sitting on them.
- If you purchased fertilized duck eggs from a hatchery or fellow homesteaders, they have been sanitized. Should you prefer to put only clean and sanitized eggs into your incubator, an egg wash can be purchased at agriculture supply stores like Tractor Supply and Rural King, or you can make your own. To make an egg wash, mix 1 capful of bleach with 1 gallon of water that has been heated until it is 110 degrees. Dunk each egg fully into the mixture for a couple of seconds and then place the duck eggs onto a towel and allow them to air dry.
- As noted above, mark each duck egg that will go into the incubator with an “X” in permanent marker so you can track its movements in the incubator.
- Remember to start counting incubation days not from the time you put them into the machine – unless they were laid and collected on the same day.
- When saving eggs until you have a decent sized batch to put in the incubator keep them in either a soft basket or an egg carton with the pointy side down. This protects the air bubble inside of the egg that the duckling embryo needs to breathe.
Ducklings and chicks can easily be kept in the same brooder, but not the same incubator because of the different humidity requirements to ensure successful hatching.
Duck Eggs Incubation Steps
- Place the incubator on a level and sturdy surface away from either drafty areas – or from close direct contact with a heat source, like a wood stove or fireplace.
- Heat the incubator to 98 degrees F, and wait one hour to make sure the temperature holds before placing an egg inside.
- Put the duck eggs in the trays or frames pointy side down.
- Pour the recommended amount of water into the designated spot or spots in the poultry egg incubator. Most incubator booklets offer instructions on humidity levels for each specific type of egg being incubated in the machine.
- Turn the egg four times per day if you do not have an automatic turning arm – do not put the pointy part of the egg straight down, just rotate from side to side, and tilt them from front to back. An automatic turning arm typically does small rotations on an hourly basis.
- Check humidity and temperature levels several times per day and add water as per the machines instructions to keep humidity at the recommended percentages. Remember, you can always add more water but not take any away. Using a measure and pour style cup will help you pour in the right amount the first time and prevent the opening of the lid of the incubator unnecessarily – causing potentially disastrous humidity and temperature changes.
- It is a good idea to keep a chart noting how each door opening and water pouring impacts both the humidity and heat changes inside of the machine and for how long. If the machine does not have a “days to hatch” display feature, marking off the days on the chart is also wise. Resist the urge to open up the viewing window to see what is going on inside of the incubator except when it is absolutely necessary to do so for adding water or turning eggs. It is normal for the window to develop a steamy appearance, which does obscure viewing.
- The final three to five days before the eggs are expected to hatch can be the most vital part of the process. Some duck keepers stop the rotation of the eggs at this point to give the ducklings a chance to acclimate themselves before they start to “pip” or poke through the egg.
- Once the duckling pips through the air bubble and starts to crack the egg, it can take between 12 to 48 hours for the duckling to make it all the way out. The egg cracking is an exhausting process. Do not try to help the duckling unless this time frame has passed or you are absolutely sure the baby bird is in distress – human intervention can do far more harm than good during the hatching process.
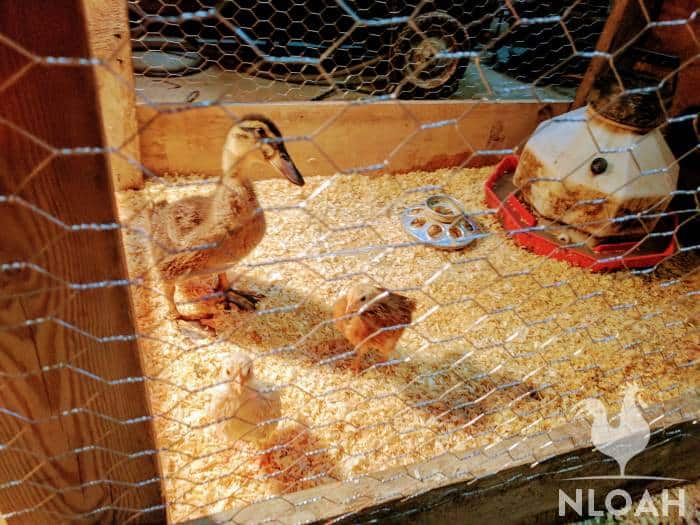
- Chicks are often left in the incubator for 24 hours after being hatched because it helps to keep them warm and they can garner the nutrients they need from what is left over inside of the egg. Ducklings are far larger when they are born and there is very little room to move about inside of the incubator. Because of their size, they can actually get hurt trying to move in or out of an egg tray opening. It is highly recommended to remove the duckling about an hour after its feathers have dried and place it directly into a waiting brooder that has been prepared with heat lamps, a waterer, and non-medicated chick starter feed.
- Wash out the incubator and all of the trays, and sanitize it thoroughly once all of the eggs have either been hatched or given up upon. Allow the brooder and all of its parts to air dry completely before putting it back together and storing it away.

If you do everything right with the duck eggs during the first and last five days of the incubation period, odds are the success rate of the hatching will be roughly 50%. If you are really lucky, and follow all of the egg collection and incubator protocols exactly, expect about a 70% hatch success rate.
Duck eggs are simply a bit more susceptible to humidity and temperature changes than chicken eggs – making successful hatch rates almost always lower. I have known excellent duck breeders who have incubated copious amounts of eggs, who get no more than an 80% successful hatch rate.
Do not be discouraged if only a handful of your duck eggs hatch in the incubator after the first few attempts. This is really normal and the number of duck eggs hatched successfully should increase at least slightly the better you get to know your incubator.
Keeping good records of the egg collection and incubation process truly will help you improve your hatching success rate over time. >Make sure the duck hens and drakes are consuming enough protein and calcium.
Game bird feed instead of more typical backyard chicken feed can help increase the protein levels in the flock, as will free ranging for insects.
No comments:
Post a Comment