Original Article:
By
They’re Strong, Flexible, Sharp, and Very Adaptable.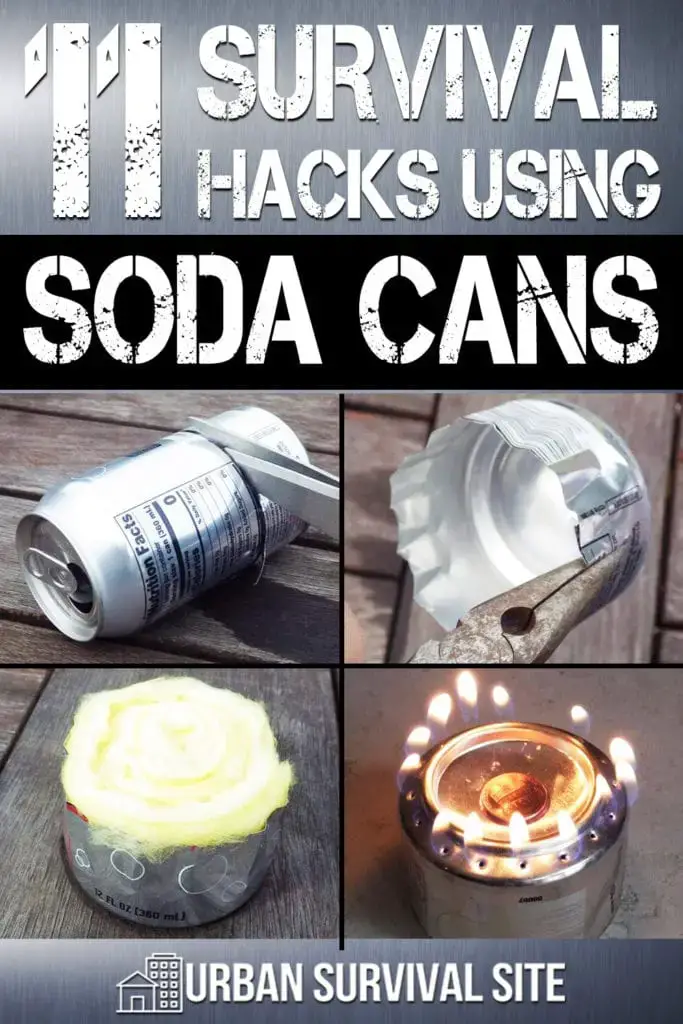
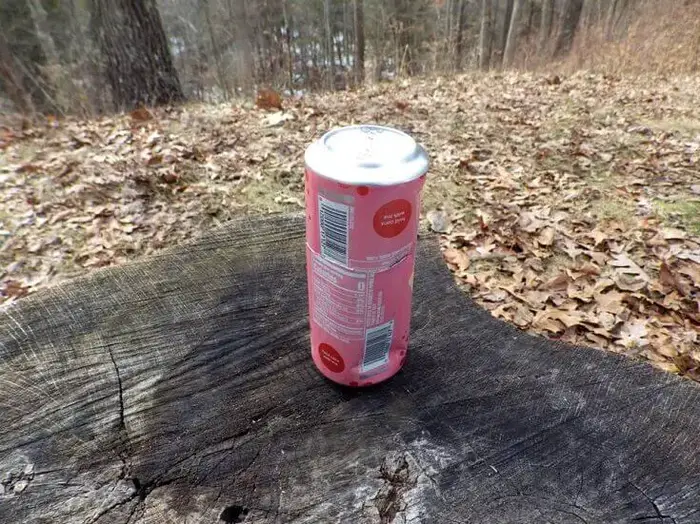
Whether you’re in a wilderness survival situation or without heat in a Texas snowstorm, some survival hacks using aluminum soda cans could quickly save the day.
A few simple tools can make quick work of soda can craft, but even if you’re in the woods naked and afraid you can adapt an empty aluminum can in a variety of ways without tools.
Soda Can Craft 101
Here’s the telegram. The thin aluminum on aluminum cans is extremely sharp. That’s a good thing if you’re trying to craft a knife, and the flexibility of aluminum makes it easy to puncture, cut, and manipulate, but be careful.
If you have gloves, wear them. You’re essentially working with sheet metal, and any sheet metal worker will be the first to tell you gloves are a really good idea.
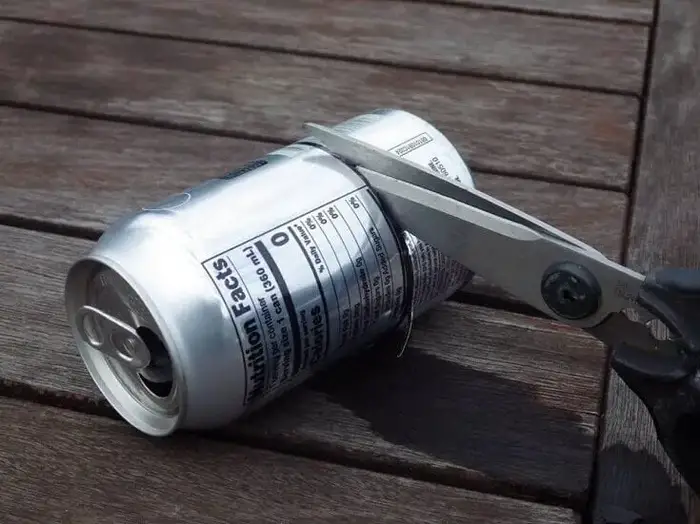
There’s an assortment of tools that will come in handy if doing any work on aluminum cans including tin snips, heavy-duty scissors or shears, needle nose pliers, a hammer, and a hole punch.
There’s a good chance most of us could find those in our garage, but if you’re stranded in the woods, it’s highly unlikely that you packed some tin snips let alone any of those other tools.
Even without tools, you can actually do a lot when the only tool you have is an empty aluminum can you found in the forest. You’ll just have to improvise with sharp sticks, stones, and some careful twisting and pulling. Most of us might have a knife and if you do, you’re pretty much good to go.
Tips For Working With Aluminum Cans
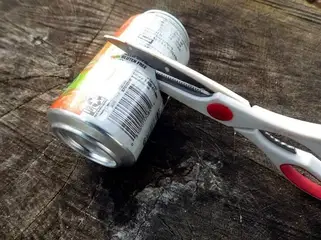
The easiest way to cut into an aluminum can with tin snips or scissors is by starting a slit with a knife.
You then insert the shears into the slit to begin your cut. If all you have is a knife, use a sawing motion along the slit.

Many of these ideas require joining two halves of a can together. You need to crimp the rim of one of those halves to force-fit them.
Needle nose pliers are best, but you can improvise with a split in a stick pushed down on the edge of the can rim and twisted.
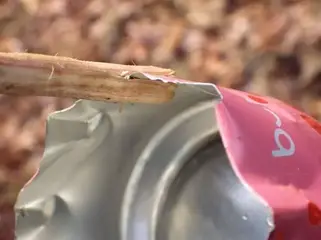
The easiest way to punch holes is with a nail. An improvised alternative is a stick sharpened to a point with its tip hardened in a fire. You can either hold the can and puncture it or place the can on a hard surface like a log or stump and drive the point home with a rock.
A knife tip twisted into the aluminum will also do the trick. All of this might be a good argument for including at least one nail in your survival kit.
Try to do a small fold-over on any exposed aluminum edges, especially if you might be handling that part of the aluminum or putting them up to your lips for a sip of water or to blow a whistle.

We might be wearing gloves while we’re working with the sheet aluminum but we don’t wear them all the time. Especially on our lips.
If you had the presence of mind to tightly roll and pack a yard of 1/2–inch wide duct tape in your survival kit, you can accomplish a lot with waterproofing your can, including making a canteen for transporting water.
Folding a piece of aluminum back and forth repeatedly will eventually cause it to break along that seam. Good to know if you have no way to cut your can.
A small piece of aluminum can be cut, bent, and pounded flat with a rock to create joints or hinges if you need one.
Aluminum Can Craft
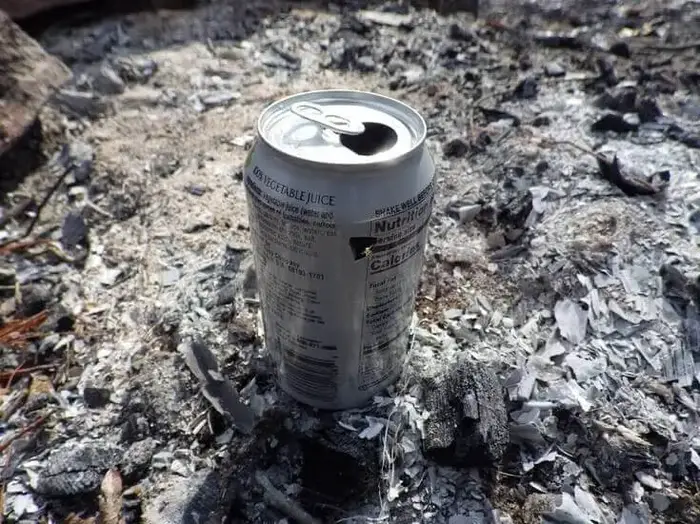
1. Water Purification
A lot of pocket-sized, pre-packed survival kits seem to have everything. Unfortunately, they often fall short when it comes to water collection, purification, and storage.
An aluminum can will save the day with a minimal amount of work. It will let you boil water from a natural water source for the 3 minimum minutes recommended for purification. All you have to do is find the can, fill it with water, and start the fire.
Materials:
1 aluminum can
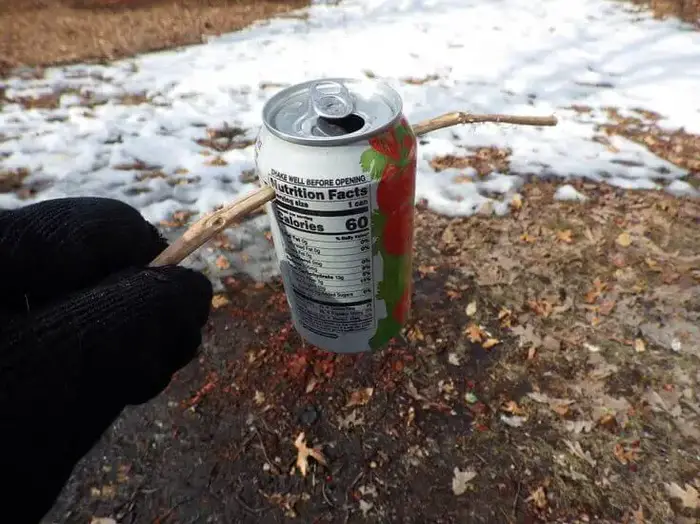
1 sharpened and peeled stick about 12-inches long
Directions:
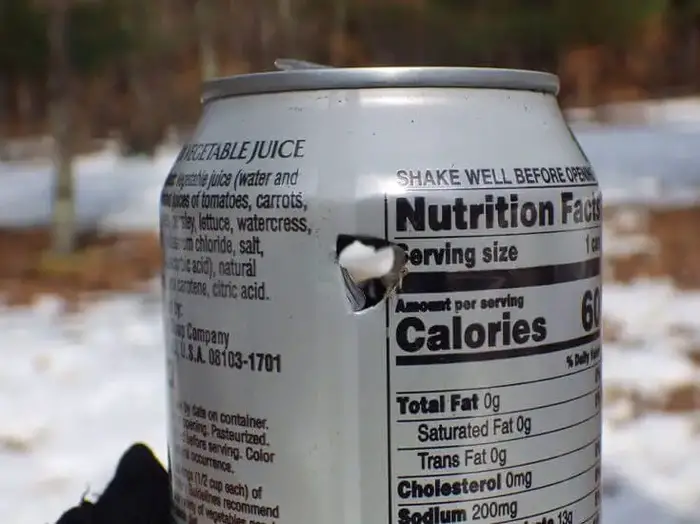
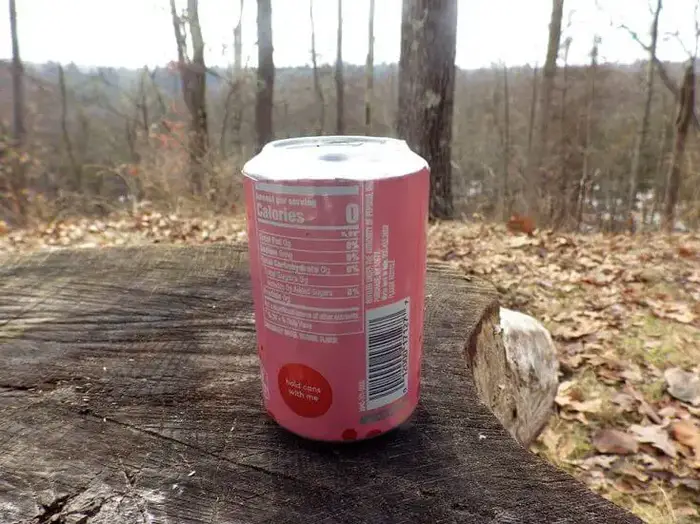
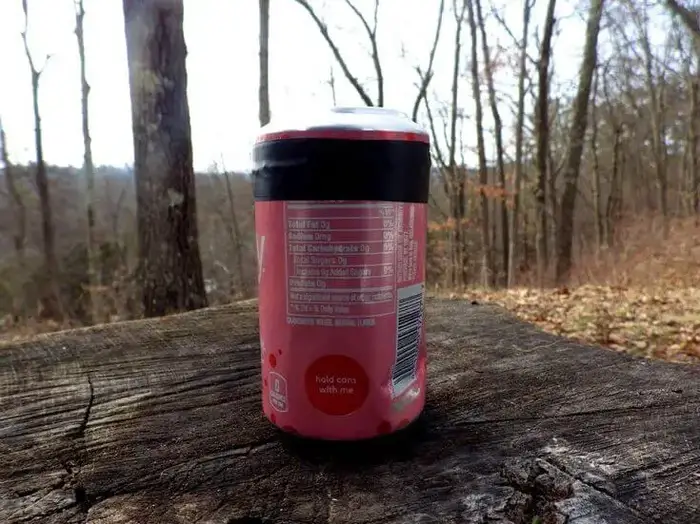
1. Make two holes toward the top of the can. You’ll insert the stick through these holes when you want to remove it from the fire.
2. Filter the water through some fabric into the can and place it on or near the fire until the water boils.
3. Boil for at least 3 minutes and then carefully insert the stick through the holes to lift the can out of the fire.
2. Tinder Trap
Dry, flammable tinder is critical to successfully starting any fire. This is particularly true if you’re using a fire stick or other alternative fire-starting method. Unfortunately, great tinder is sometimes hard to find.
Want to prep but not sure where to begin?
Click Here to Get Your FREE One Year Urban Survival Plan!
Dried cattail fronds are good along with birch bark shavings, dried and crushed pine needles, fabric, dry reindeer moss, and especially char cloth which is a somewhat burnt and blackened piece of fabric.

Regardless of what and where you find your tinder, it’s important to keep it as dry as possible, and it’s great if you can store the surplus. This tinder trap concept is the foundation for some other ideas and it basically provides you with a re-sealable, weather-resistant container for tinder.
Materials:
2 aluminum cans
Knife or shears
Needle nose pliers or a stick with a split
Directions:
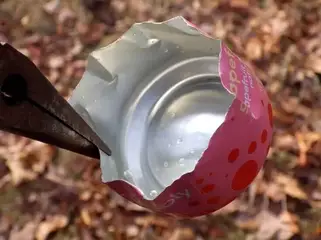
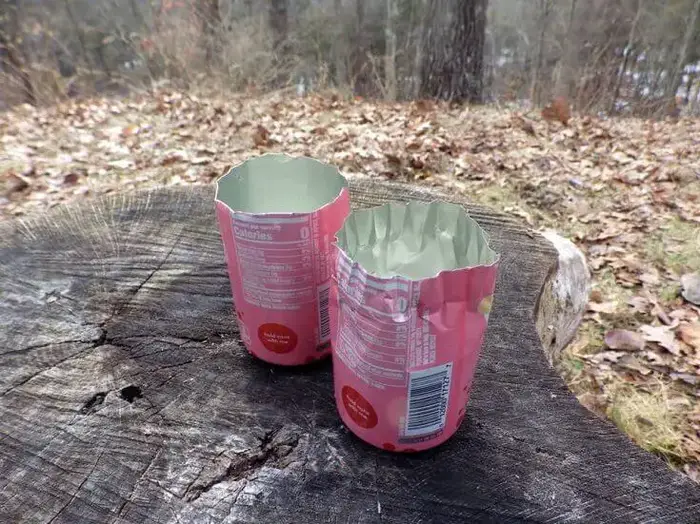
1. Cut the cans in half.
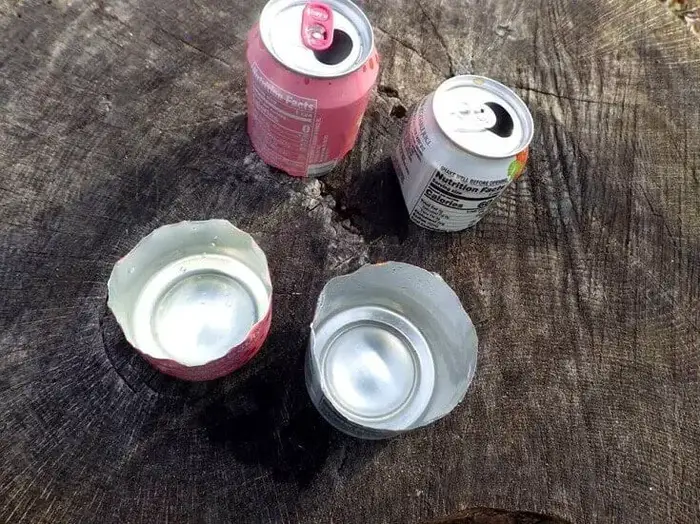
2. Set the halves with the pop-top opening aside. You want to use the two bottoms of the cans.
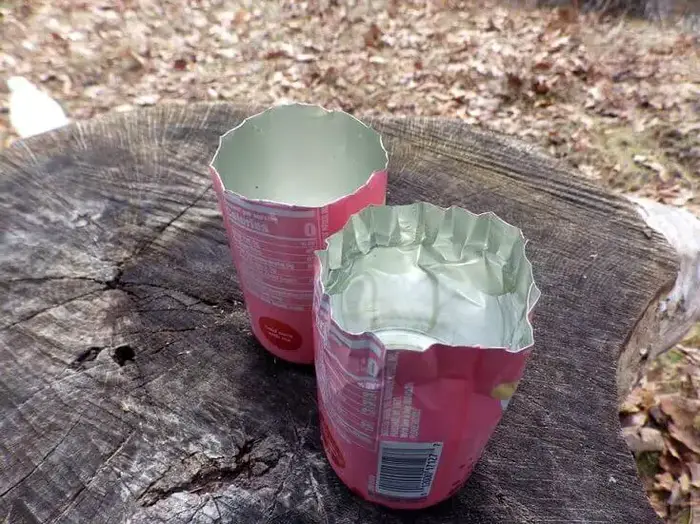
3. Crimp the edge of one of the cut cans with the needle-nose pliers or by working the split stick along the edge with repeated twists.

4. Place your tinder in the can bottom with the crimped edges.
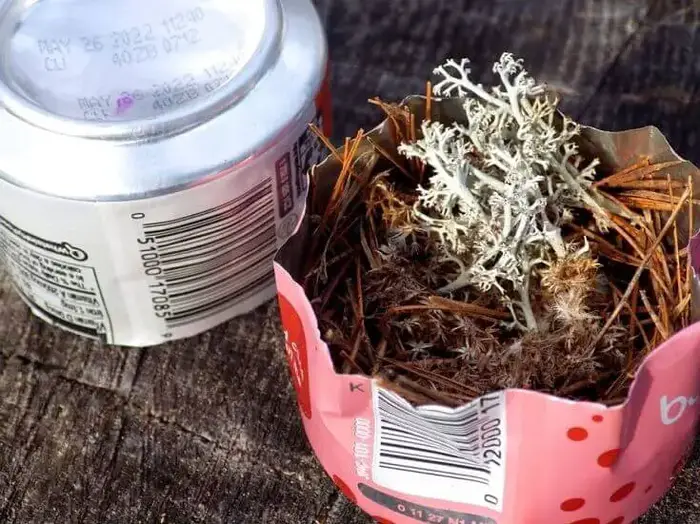
5. Take the un-crimped half/can and press it over the bottom crimped can and push together until tightly sealed.
6. To open, twist off the top and retrieve your tinder.

You can also use the bottom of one of the cans to hold your tinder in a dry and high spot to make it easier to use your fire stick or drop your hot coals from a bow and arrow drill and blow your tinder into flame.
3. Signal Mirror
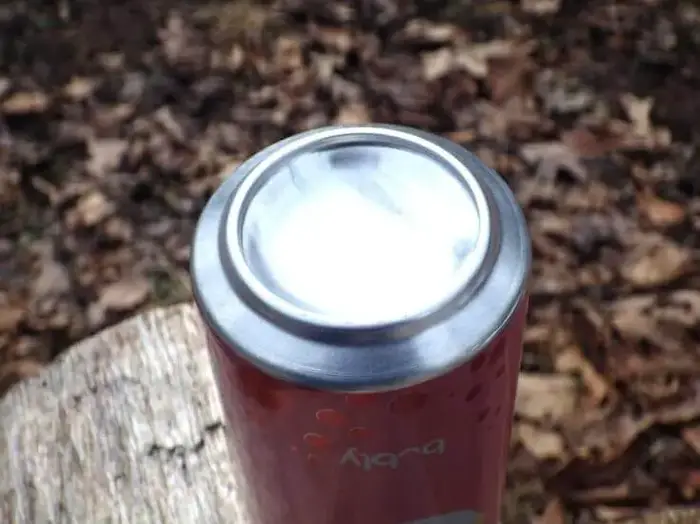
Anyone lost or stranded in the wilderness can increase their odds of being found if they can use a signal mirror to attract someone to their location. The bottom of an aluminum can will make an effective signal mirror, but it will require some polishing.
The good news is that this is another improvised tool that requires minimal labor on the can. You don’t have to cut or crimp a thing, just do some polishing on the concave bottom of the can.
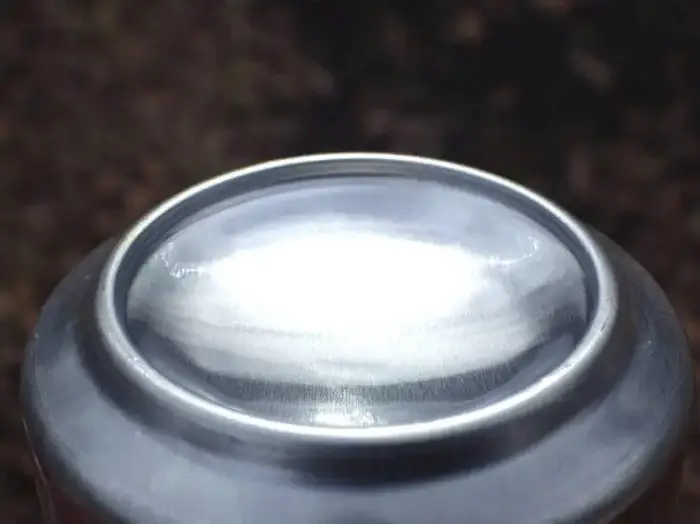
Natural polish options include chocolate, toothpaste, mud, and clay. You make a paste and either use your fingers, some moss, or a piece of fabric to rub and buff and rub and buff some more. Check your progress as you go and try reflecting the polished can bottom into the ground and surrounding trees to see how you’re doing.
When you’re satisfied you can effectively signal. All you have to do is find someone or something in the distance that can see it.
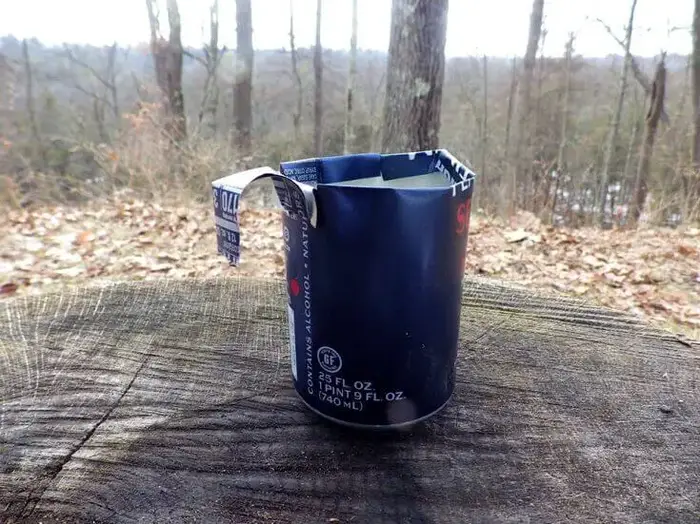
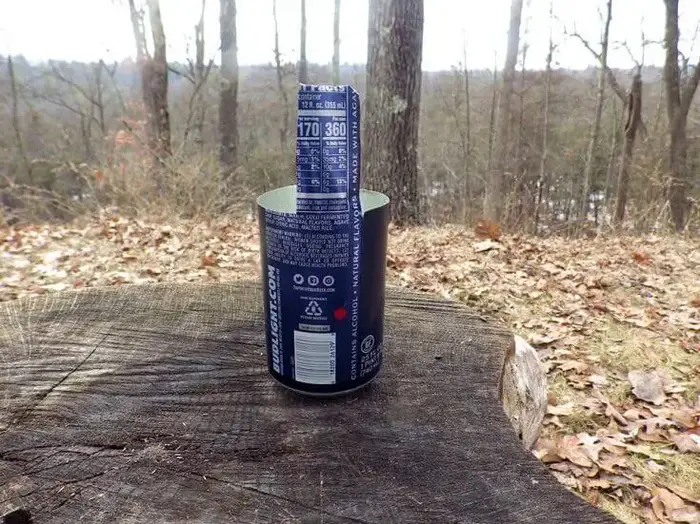
4. Canteen
If you’re stranded or lost without a canteen or some other way to store and transport water, you’re going to be at the mercy of your next wild, water source. A few cans will quickly make for a watertight canteen or two that will allow you to hold and transport your recently purified and precious water.

This is where a short length of tape really helps. You can still create a fairly watertight seal without it, but the idea is to keep the water, not slowly lose it to a leak.
Materials:
2 cans for each canteen
Shears or a knife
Needle nose pliers or a stick with a split to crimp the edges
Enough duct tape (or other tape) to seal the seam around the can
Directions:
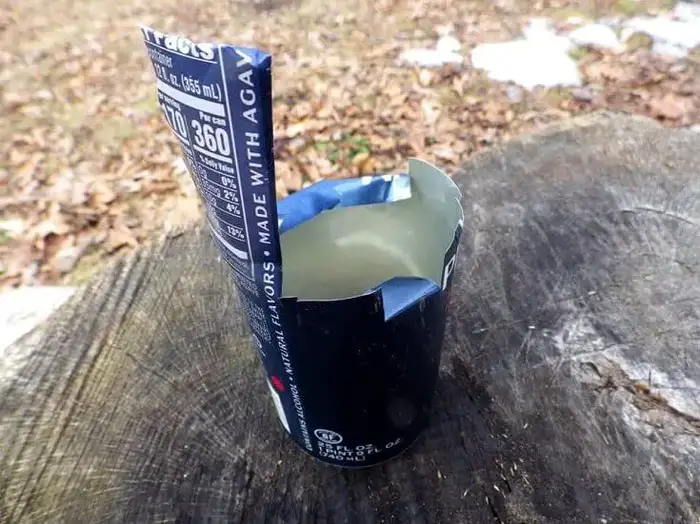
1. Cut the tops off of both cans just under the rim.
2. Crimp the edges of one of the cans.
3. Fill the crimped can with water.
4. Press the other can over the top and push down until tight.
5. Apply tape around the seam if you have it or roll the dice without it.
6. To open, twist the can and pull up.
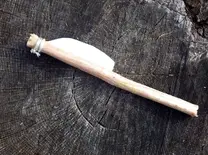
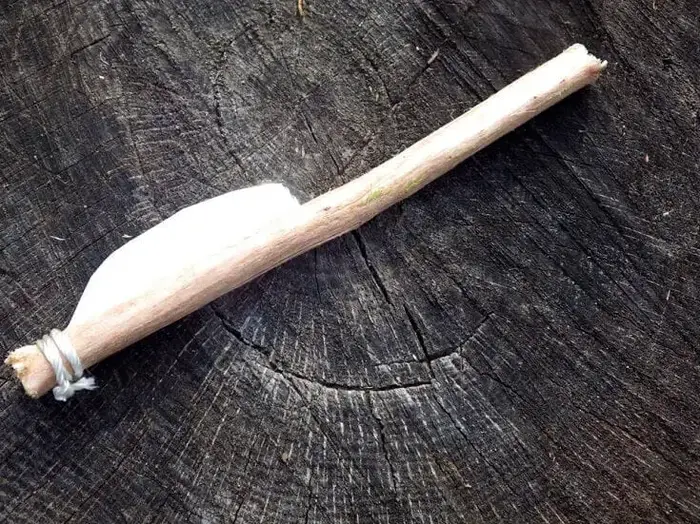
5. Knife
This is simple. You want to cut a section of aluminum from a can and then embed the strip of aluminum in a split cut halfway down the length of a stick about ½-inch in diameter and about 8-inches long.
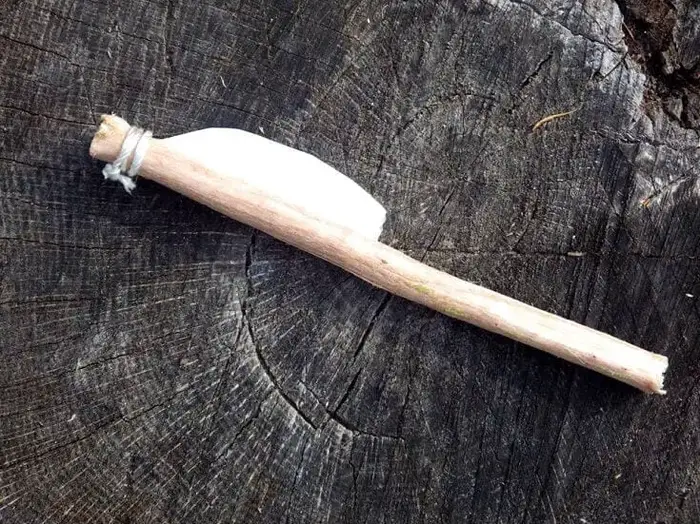
Tie off the top of the stick to keep the split tight using some cord or a section of shoelace.
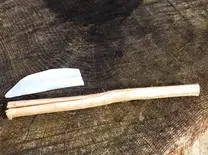
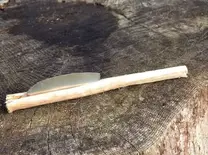
You can use your can/knife to cut the cordage or shoelace. You can use it for light cutting and even filet a fish or use it to cut into another aluminum can to improvise another tool if you don’t have a knife.
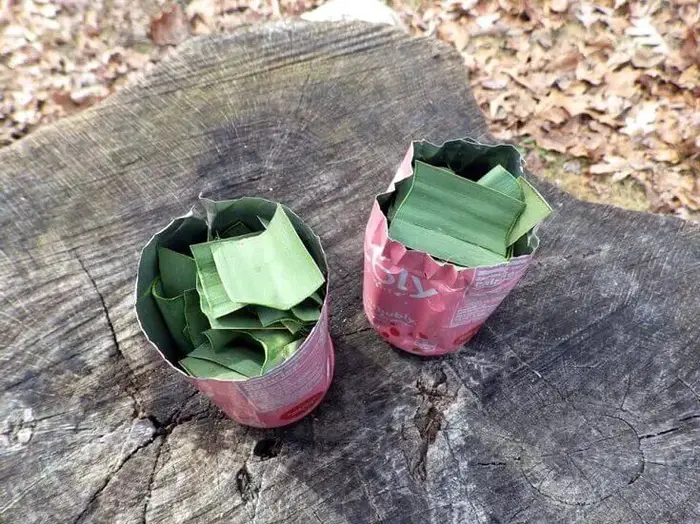
6. Wild Forage Storage
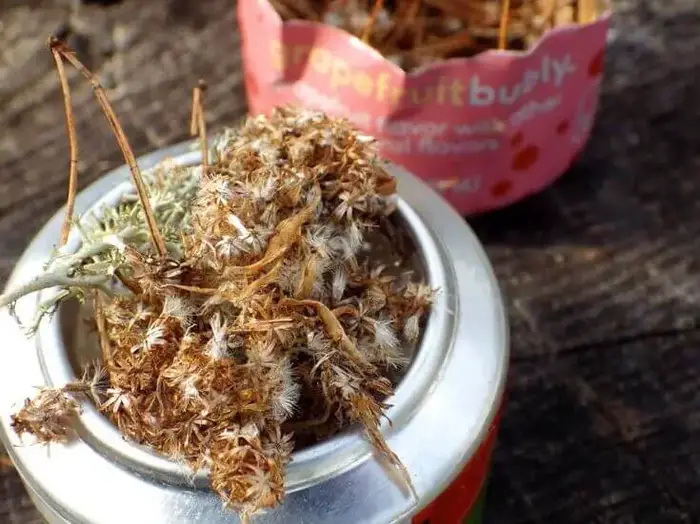
This is nothing more than using the tinder trap/canteen concept for a different use. You repeat the rim crimping step on one of the cans and then force them together.
The good news is you don’t need a watertight seal like you would for a canteen. You could also overstuff both sides of the can as long as you get a decent fit when you force both sides together.
It’s great for collecting and transporting wild berries, sprouts, or anything else you forage while hiking, foraging and trying to find your way out of wherever you are.
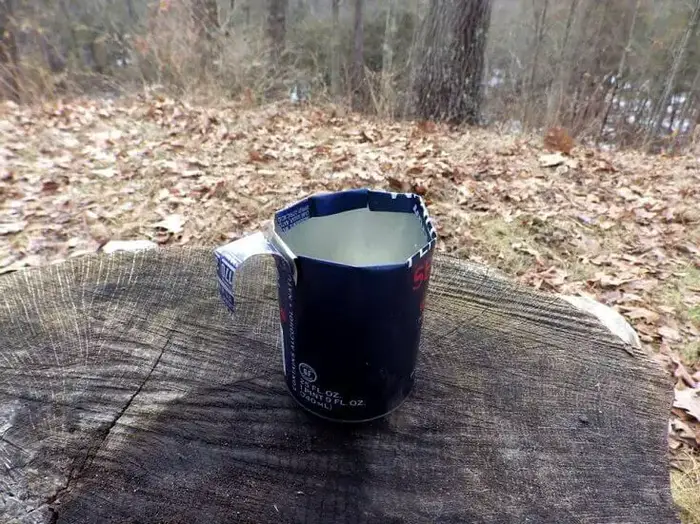
7. Drinking Cup
It seems silly to make a cup out of something designed to hold liquid, but if you’re drinking something hot like a pine needle tea, it’s nice to have a handle.
This is where a fold along the lip edge of the cup is important. Aluminum edges are very sharp and cutting up your lips while taking a simple sip of tea is not the idea.
Materials:
1 soda can
Knife or shears
Directions:
1. Cut off the top 1/3 of the can leaving a 1-inch wide strip leading up to the top of the can.
2. Cut ¼-inch slits every inch down the top of the cut to create bendable tabs.
3. Bend the tabs inward to create a smooth rim.
4. Curl the metal strip down to make a handle.
8. Candle Lantern
A candle lantern can both protect the candle flame from the wind and the reflective interior of the aluminum can will act to reflect light from the lantern. Keeping the top of the can intact and inverting the can will also protect the flame from light rain or snow.
A candle lantern can both protect the candle flame from the wind and the reflective interior of the aluminum can will act to reflect light from the lantern. Keeping the top of the can intact and inverting the can will also protect the flame from light rain or snow.
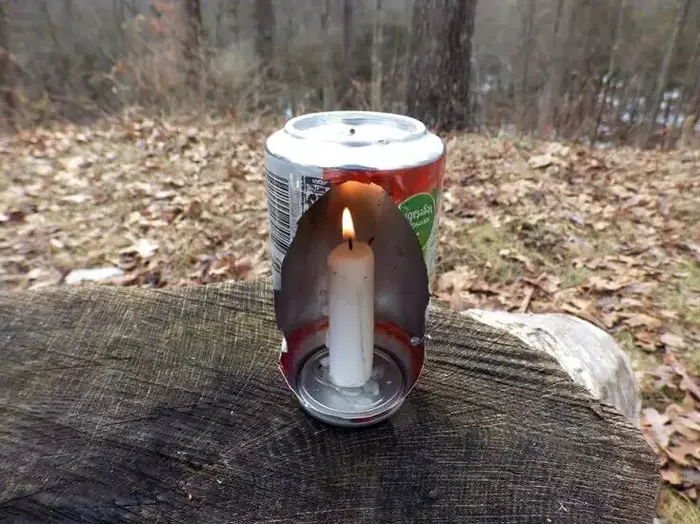
Just cut a curved arch opening in the side of the can with the concave bottom up. Drip some candle wax on the inside of the top lid to affix the candle and hope it doesn’t get too windy.
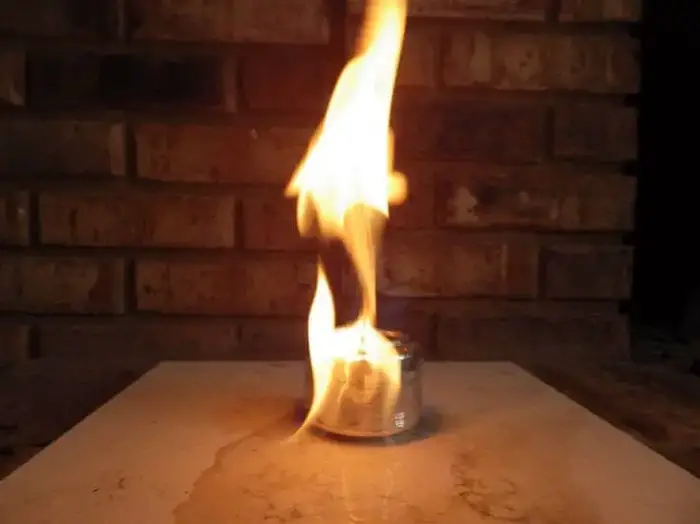
9. Cook Stove and Heater
This idea may seem complicated, but if you’ve made any of the other soda can tools, then you’re already familiar with some of the construction process.
It requires a flammable liquid which may be problematic in an extreme survival situation, but as both a stove and a heater it is surprisingly effective following a power outage as a result of a natural disaster or another domestic emergency.
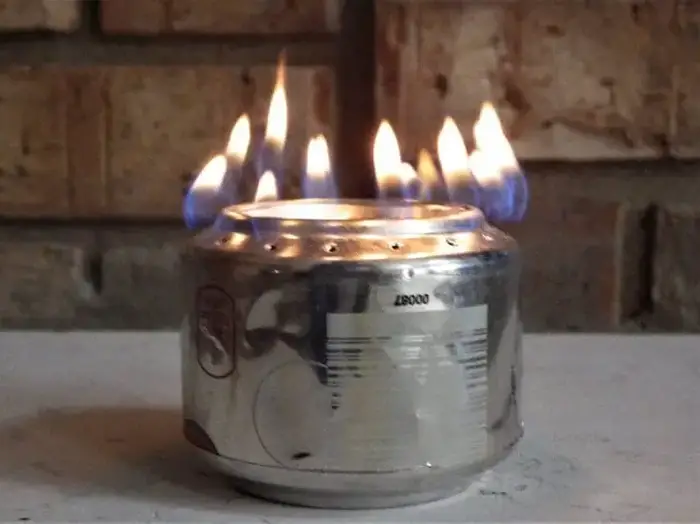
The fuel of choice is isopropyl rubbing alcohol. 70% alcohol is the standard recommendation. Some people have reported successful results using vodka. The things to avoid are highly flammable liquids like gasoline, lighter fluid, and kerosene. There’s a possibility that they could explode. Alcohol, when used properly, is safer.
This concept can be used for cooking or as a heater in a small space. Like any open flame, it consumes oxygen and gives off gases as the alcohol burns. Some ventilation is recommended in enclosed spaces. Outdoors is less of an issue.
Materials:
2 soda cans
Knife or shears
Nail or knife point
A coin or rock
Rubbing alcohol or spirits
Fuel holding material such as dried peat, lichens, moss or fireproof insulation if available
Directions:
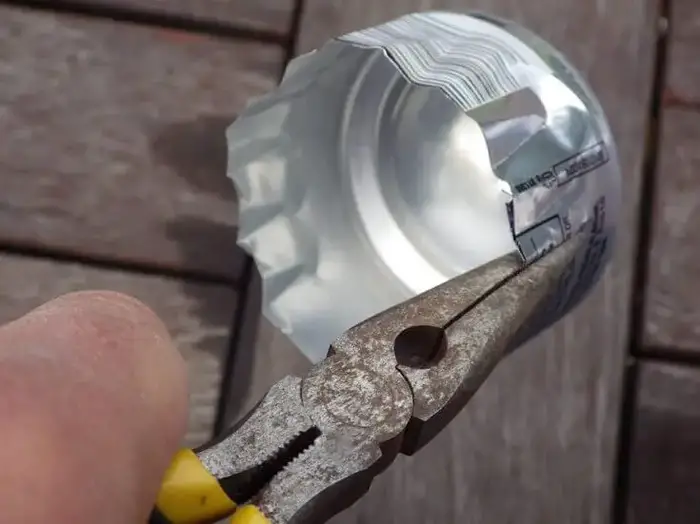
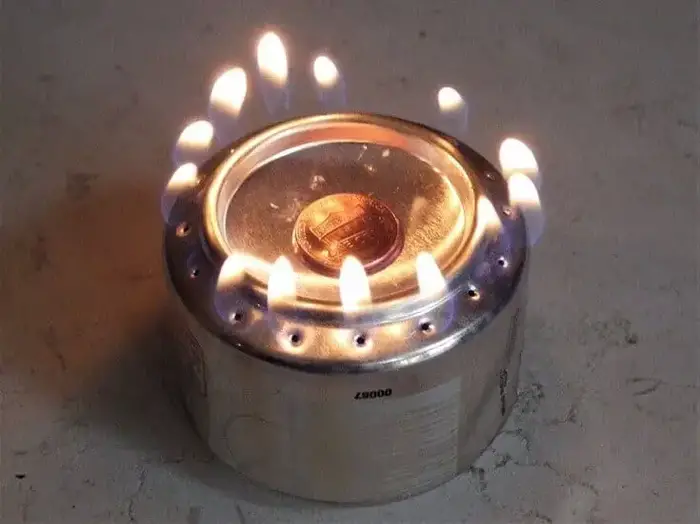
1. Cut the top 2/3’s of each can off.
2. Crimp one of the can bottoms around the edge.
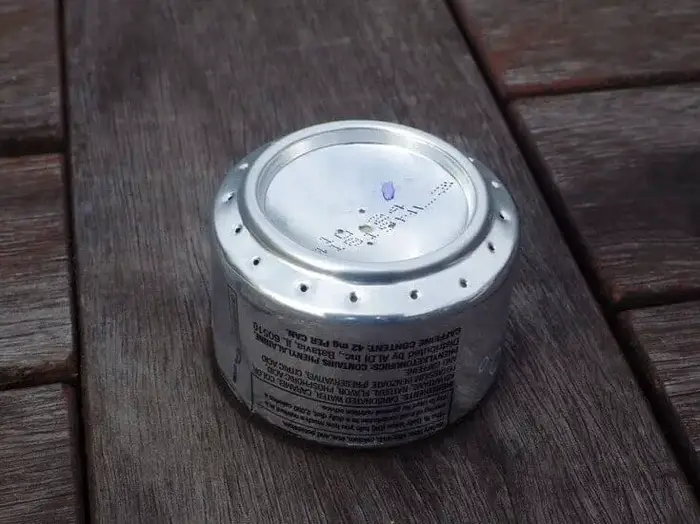
3. Make holes around the rim of the second can and 5 holes in the center.
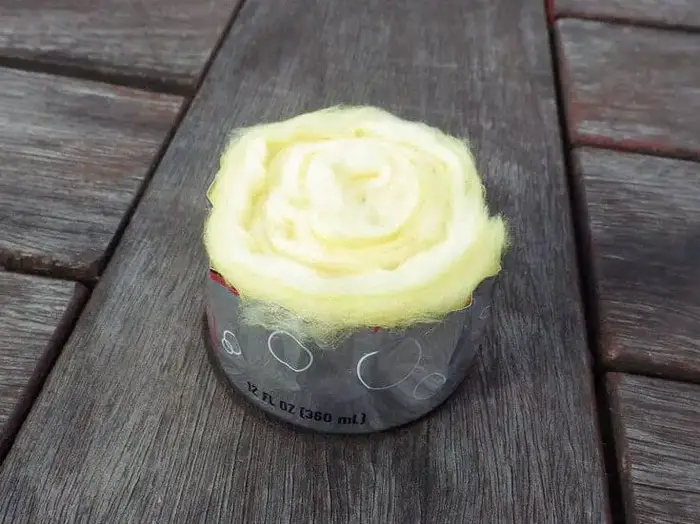
4. Fill with fabric, cattail fluff, dried moss, lichens or insulation.
5. Fill the crimped bottom with alcohol.
6. Force the other can half with the holes over the crimped bottom.
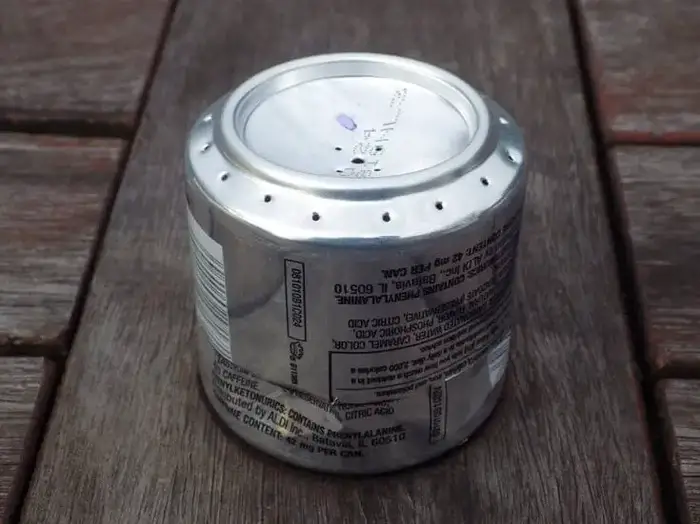
7. Pour some alcohol on and around and light.
8. Once lit, drop the coin or rock over the center holes.
10. Survival whistle
A survival whistle can come in handy in a survival situation, but to put it bluntly, making this whistle out of a soda can is a pain in the neck. Here’s a link to a video that shows you how to craft it.
It involves a lot of metal folding to keep your lips and tongue safe from the sharp edges. It works, but it’s a lot work. And be careful. Don’t cut your tongue.
11. Fish Hook
Here’s another very simple survival solution from a soda can. Only this time you’re using the metal pull tab from the top of the can rather than the can itself.
Any fisherman would take one look with a skeptical eye, but if it’s all you have, it’s worth a try. Of course, this assumes you might have some fishing line and if you had the foresight to pack some fishing line in a survival kit it stands to reason you might have included some hooks.
All that aside, here’s how to make a fishhook from a soda can.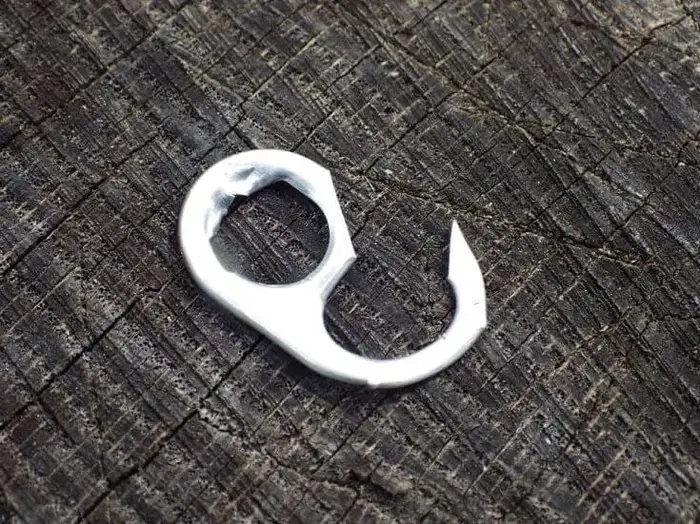
Materials:
Pull tab from a soda can
Knife or wire cutters (some survival multi-tools have this feature)
Directions:
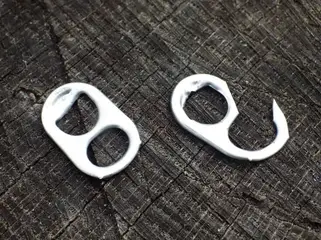
1. Cut out a section of the tab leaving a hook shape.
2. Tie it to your line, bait it, and yank that fish out of the water fast.
Practice
It’s worth trying a couple of these ideas so you get the hang of dealing with sheet aluminum. Once you’ve had some success, you may think of other ways you can use a soda can to create all those things you need to survive in the wild.
A survival whistle can come in handy in a survival situation, but to put it bluntly, making this whistle out of a soda can is a pain in the neck. Here’s a link to a video that shows you how to craft it.
It involves a lot of metal folding to keep your lips and tongue safe from the sharp edges. It works, but it’s a lot work. And be careful. Don’t cut your tongue.
11. Fish Hook
Here’s another very simple survival solution from a soda can. Only this time you’re using the metal pull tab from the top of the can rather than the can itself.
Any fisherman would take one look with a skeptical eye, but if it’s all you have, it’s worth a try. Of course, this assumes you might have some fishing line and if you had the foresight to pack some fishing line in a survival kit it stands to reason you might have included some hooks.
All that aside, here’s how to make a fishhook from a soda can.
Materials:
Pull tab from a soda can
Knife or wire cutters (some survival multi-tools have this feature)
Directions:
1. Cut out a section of the tab leaving a hook shape.
2. Tie it to your line, bait it, and yank that fish out of the water fast.
Practice
It’s worth trying a couple of these ideas so you get the hang of dealing with sheet aluminum. Once you’ve had some success, you may think of other ways you can use a soda can to create all those things you need to survive in the wild.
No comments:
Post a Comment