
Whenever I see someone throw away a chicken carcass after making a nice roast, I cringe a little bit.
Just because you’ve picked all the meat off, there’s no need to waste those bones!
Making and canning bone broth is a great way to become more self-sufficient. There’s a misconception out there that it’s difficult to do but that is simply not the case. This is something you can do easily in just an afternoon, allowing you to always have broth on hand for soups, stews, sauces, gravies, and more.
A great way to save money while also improving your health and self-reliance, learning how to make bone broth at home is a smart choice.
Here’s what you need to know.
What is Bone Broth?
You can make bone broth out of any kind of animal bones. I love making broth from all kinds of leftovers, including chicken carcasses, beef bones, and even, as I mentioned, leg of lamb.
Before we get started, it’s important to clear something up – the difference between stock and broth. The two terms are often used interchangeably, but technically, stock is made from bones while broth also includes meat and vegetables. Many people (myself included) use bones in their broth to ensure a thicker liquid.
Related: How to Safely Store Homemade Broth for 6 Months (No Canning or Freezing Required!)
In the steps below, I’ll walk you through making bone broth out of leftover chickens. I use pasture-raised birds to make my bone broth, though of course, this is not necessary.
The idea behind making bone broth is simple. You’ll simmer bones in water, add some herbs and vegetables, then let it simmer. You can leave the vegetables in once the broth has finished cooking if you want to make a complete soup with the broth, or you can strain them out (they’ll have imparted most of their flavor to the broth, anyway).
Bone broth is loaded to the brim with collagen, gelatin, and all kinds of vitamins and minerals to keep you healthy!
How to Make Bone Broth
Ingredients
● Cooked bones or carcasses (you can use the entire thing, even the feet, if you’re making broth out of chickens)
● Apple cider vinegar (helps to leach extra nutrients and minerals out of the vegetables and bones)
● Vegetables of your choice (carrots and celery are good options, as are onions and garlic – you can even use scraps and skins if you plan on straining your broth afterward)
● Herbs (basil, oregano, thyme, and rosary are my favorite)
● Salt and pepper to taste
You will also need to have either a large stockpot or slow cooker on hand along with various cooking tools like a colander and wooden spoon (for tasting).
You’ll see in the pictures that are included that I typically make my bone broth in a slow cooker to save time (that way, I don’t have to constantly watch the pot). However, you can easily do this in a stockpot, too. The choice is yours!
I made my stock out of a chicken I had roasted the night before – see below!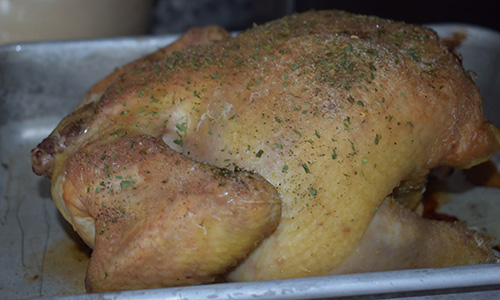
Instructions
1. Put your carcass or bones in your slow cooker, along with your vegetables and herbs.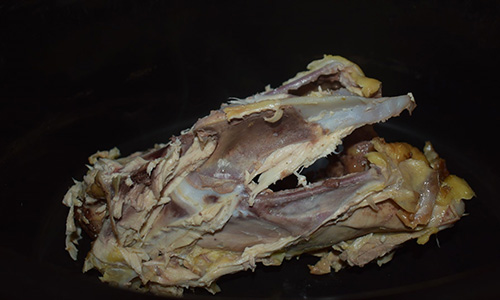
2. Cover everything with water and add a quarter cup of apple cider vinegar.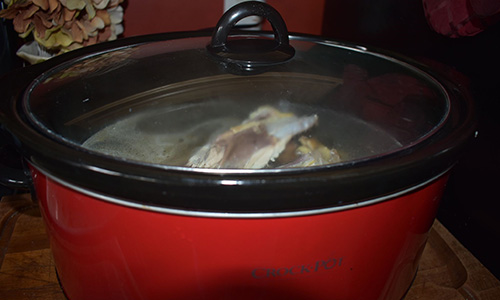
3. Bring the broth to a boil, then reduce it to a low simmer. If you’re working in a crockpot, you can do this by bringing the heat to high for about half an hour, then bringing it back down to low.
4. Keep it in the slow cooker (or on the stovetop) for about 12 hours.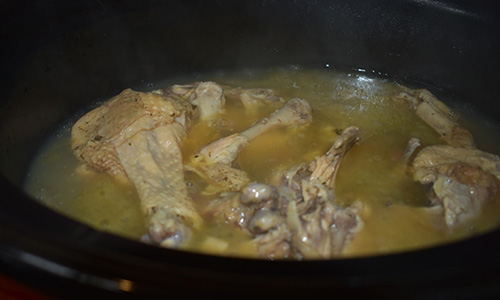
5. After 12 hours, you can strain the broth through a colander.
6. Put the broth in the refrigerator overnight (or for 12 hours). This will allow the broth to firm up and form a layer of fat. This layer of fat should be skimmed off before you process the broth in the canner.
7. Didn’t get as much broth as you wanted from the first batch? Go ahead and run it through another cycle of simmering. You can reuse the bones and carcass twice for a thicker, meatier broth.
How to Can Bone Broth
Bone broth must always be canned in a pressure canner – do not attempt to can it in a water bath canner, as this is unsafe. A pressure canner will warm the broth to much higher temperatures, making it safer for long-term storage.
Here’s how to make bone broth after you’ve made it according to the recipe above.
Supplies Needed
● Pressure canner with lid
● Canning funnel
● Pint or quart jars with lids and bands
● Jar lifter or set of tongs
● Spare kitchen towels
Instructions
1. Once you’ve prepared your bone broth according to the instructions above, the next thing to do is skim off the fat. Your broth will be chilled at this point, so you need to heat it back up. Bring it to a boil in a large stockpot. If you try to can cold bone broth, it might not get hot enough when you attempt to can it.
2. While your broth is boiling, fill the pressure canner with a few inches of water.
3. Wash your canning jars in hot, soapy water. You can sterilize them in the dishwasher, if you prefer, to save time. Make sure none of the jars have nicks or chips.
4. Ladle hot broth into the jars, filling but allowing for about an inch of headspace. This is where the funnel comes in handy!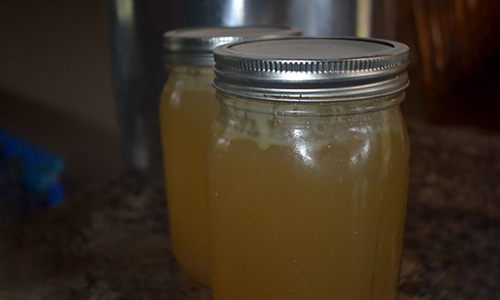
5. Then, wipe the rims of the jars with a clean towel to remove any residues.
Related: The Long-Forgotten Cheesecloth
6. Add your lids and bands, then tighten so that each is fingertip tight.
7. Use the jar lifter or tongs to load your jars into the canner. Cover the canner and secure the lid.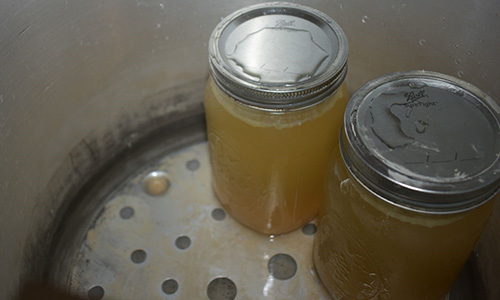
8. Turn the heat up to high and let the pot come to a boil. After a while, you will notice steam coming out of the vent. Let the steam escape for ten minutes or until the indicator pops.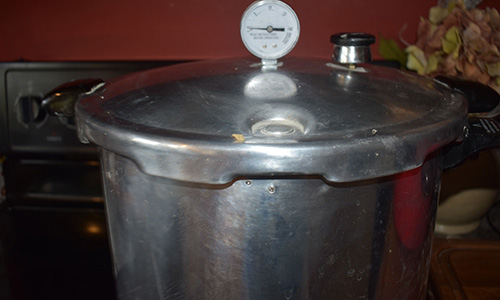
9. Next, put the weight on the vent. Let the pressure come to 10 lbs, then start your timer. YOu will need to be at 11 lbs of pressure for altitudes of 1000 feet above sea level or lower. You will need to adjust for altitude if that is not the case.
10. Watch the canner closely as you may need to adjust the heat if the pressure rises or falls. If it rises slightly above 11, that’s okay – just reduce the heat to relieve some of the pressure. If it dips below 11, however, you’ll need to restart the timer when you get the pressure back up.
11. Process the jars for 20 minutes for pint jars or 25 minutes for quarts.
12. When the timer is up, turn off the heat and let the pressure canner cool down on its own – do NOT attempt to remove the lid, as this can be dangerous. It can take up to an hour for the canner to cool.
13. Carefully remove the lid and turn it away from you when you do so that you don’t suffer a steam burn. Remove your jars with the jar lifter and let them rest on a towel.
14. Let the jars sit for 12-24 hours, then store in a cool, dark location. When you store them, check to make sure each one is sealed. Jars that did not seal will need to be tossed.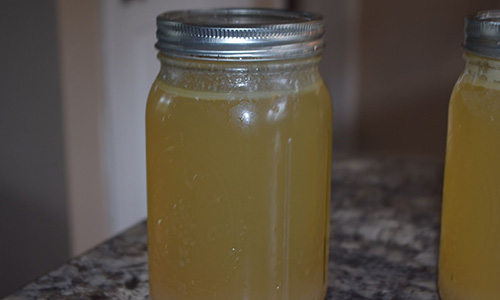
How Long Does Canned Bone Broth Last?
As you can see as indicated by the title of this article alone, canned bone broth has an impressive shelf life – you can expect it to last for at least two years.
That’s right – two years with no freezing or refrigeration necessary! So while you’ll have to put in a little bit of extra legwork in order to make the broth, trust me when I say – it’s worth it.
So what are you waiting for? The next time you have some extra bones left after dinner, don’t toss them in the trash.
Make and can your own bone broth for a self-sufficient pantry instead!
No comments:
Post a Comment