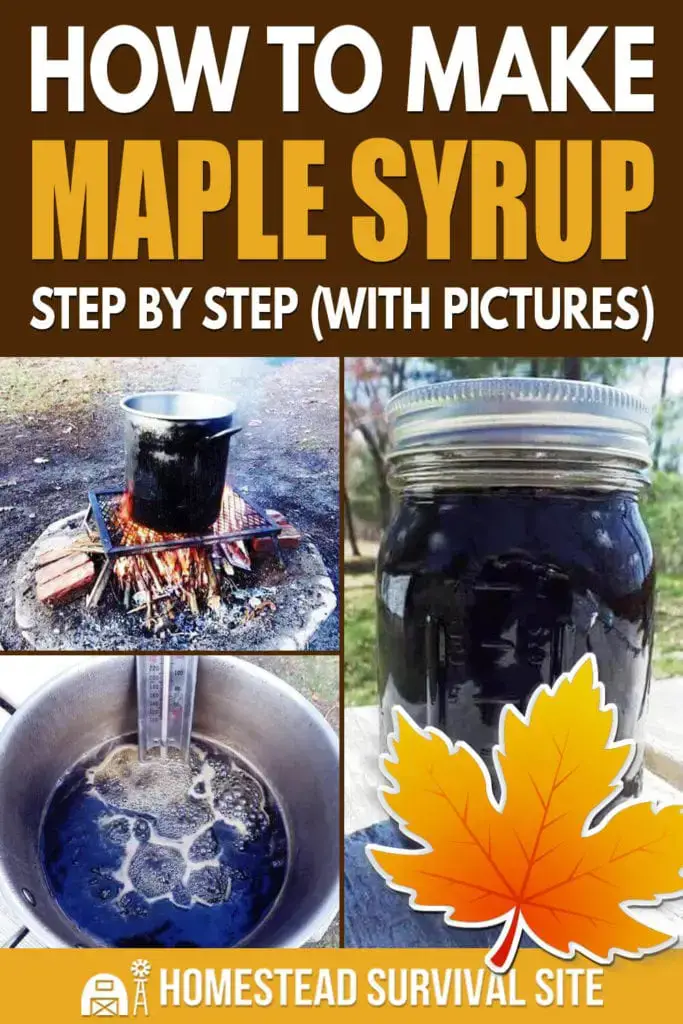
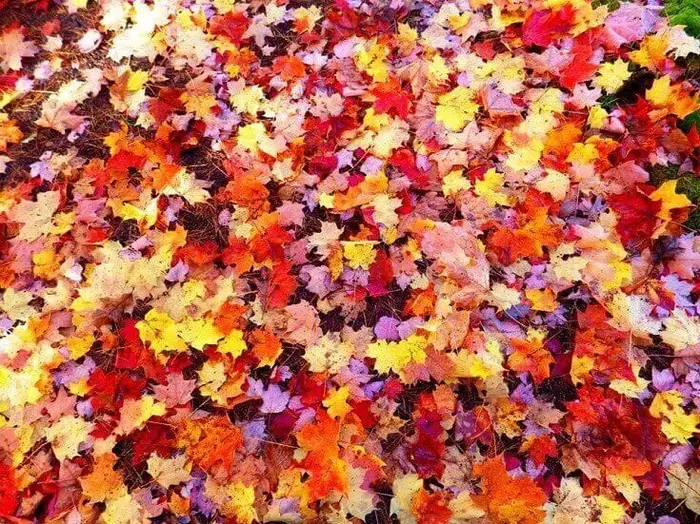
If You Have Maple Trees You Can Make Your Own Maple Syrup.
Many people are intimidated by the idea of making maple syrup from scratch. The whole process seems a bit complicated and often looks like a real mess, but it’s not. It’s actually pretty easy and the most work is a day outside watching the sap boil in a big pot over an open fire or gas fired turkey fryer setup.
The point is, if you have maple trees, you have syrup. The result surprises many people and there’s something particularly rewarding about a breakfast of pancakes made with your own homemade maple syrup. It’s also 100% natural and if you’ve ever bought real maple syrup at the store, you know how precious the real stuff can be.
The Maple Syrup Process in a Nutshell

To make maple syrup, you tap the maple trees to collect the sap, boil it for a few hours to evaporate the water and concentrate the natural sugars, filter it, finish it in a smaller pot over lower heat, jar it, and eat it.
Most of the activity is passive with the trees doing most of the work when the sap is running. But like anything, there are a few details that make it easier and some simple mistakes to avoid.
A Dose of Reality
It takes a lot of sap to get a little syrup.
Before you promise everyone you know that you’ll fill their pantries with real maple syrup, keep one thing in mind. It takes 40 gallons of sap to make 1 gallon of maple syrup. That means if you only end up with 10 gallons of sap, you’ll finish with a quart of syrup.
Maybe you should just invite them over for waffles before you promise everyone a bottle. Then again, if you have enough maple trees and decide to really go to town, you just might be able to share the wealth.
This is not an everyday thing.
You can’t just wander out into the woods in July and expect to tap sap from a maple tree. This is a highly seasonal event. The maple sap usually runs from mid-February through March and possibly part of April in North America. A lot depends on the type of spring weather that develops.
The trigger is the first 40-degree day coming out of winter. As the days continue with freezing nights followed by thawing days, the sap continues to run. Once you have a few nights above freezing the sap run shuts off like a light switch and the trees begin to bud.
Know your trees.

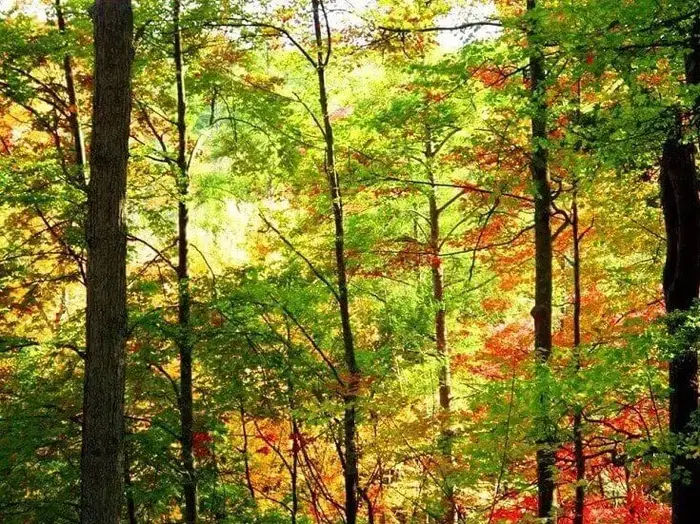
You’re also going to have to learn a thing or two about how to identify trees without leaves. Our maples are glorious in autumn, but in February and March every tree starts to look pretty much the same without leaves. We’ll cover some easy things to look for like tree shape, branch structure, bark and other clues so you don’t end up tapping a bunch of oaks and elms.
Know all of your trees.
In actual fact, it’s not just about maples. There are some other trees that produce a sweet sap including boxelder, birch, and alder but you still have to know how to identify them and their sugar content is not as high. That could mean 80 gallons of sap to a gallon of syrup so try to stick to the maples.
Do this outside.
It doesn’t matter how cold it is outside, you don’t want to do this in the kitchen. The reason you’re boiling gallons of maple sap for hours is to cause the water in the sap to evaporate as steam reducing the liquid to leave the natural sugars behind as a syrup.
Unfortunately, some of that steam filling your kitchen will carry some sugars with it. As it dries it will cover everything: walls, ceiling, cabinets, curtains, appliances, everything. The result could be a thin, dry film of sugar on anything the steam has touched including other rooms where the steam has traveled. Do this outside. It’s why our pioneer ancestors had a dedicated sugar shack for making maple syrup.
Does it harm the trees?
The simple answer is, no. If it did, people wouldn’t continue to do it. The fact is, the trees don’t notice it. They’re drawing gallons and gallons of water from the ground to saturate the trunk, branches, and leaves and will continue to do so until it’s saturated with sap. If it loses a few gallons to your tap, it just assumes that more sap is needed and continues to draw water from the ground to get ready for another season.
However, a standard recommendation is that you only drill one hole for one tap in a tree. Drilling more will cause stress for some trees so it’s a balancing act. We’re only taking enough sap that a maple tree won’t really notice.
As far as the hole you drill is concerned, most experts say that the tree will naturally heal but you can fill the hole with silicone sealer from a caulk gun at the end of the season or insert a small, dead branch into the hole and break it off. Next season you’ll drill a hole in a different location.
Tools and Equipment
There are some basic things you’ll need and it’s unlikely that you’ll find most of them around the house. You may have to purchase some items, but once you have them you’ll be good to go season after season. Some of these items come in kits assembled for tapping maple trees for their sap.
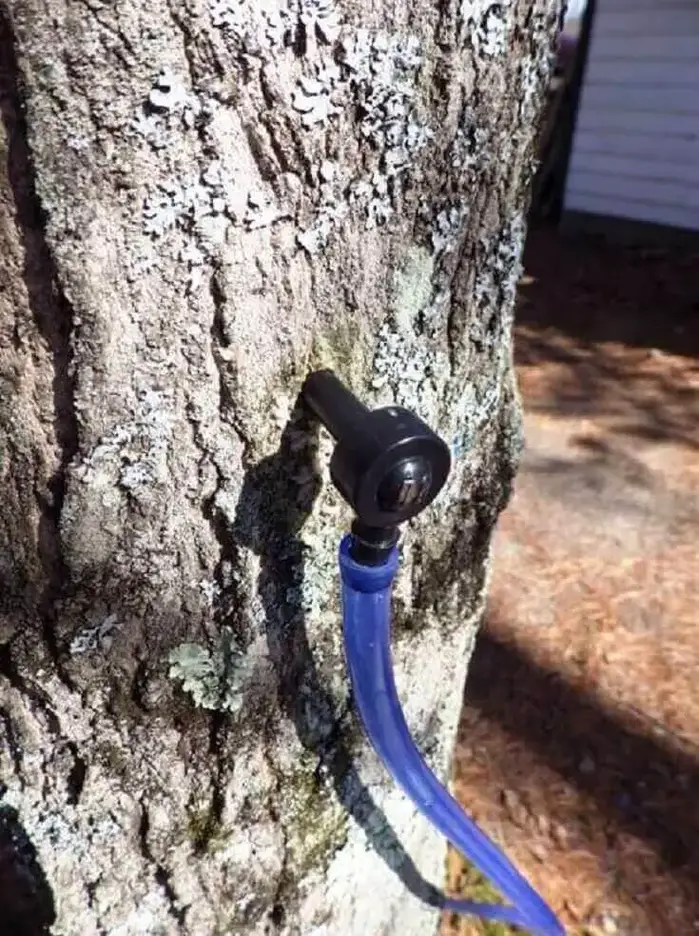
Tree Taps – These are hollow tubes about 2 inches long that you gently pound into a hole you’ve drilled in the trunk of the maple tree. Taps come in various configurations but the best lets you attach a hose to the tap.
Tree Tap Hoses – These connect your tree taps to the container you’re using to collect the sap.
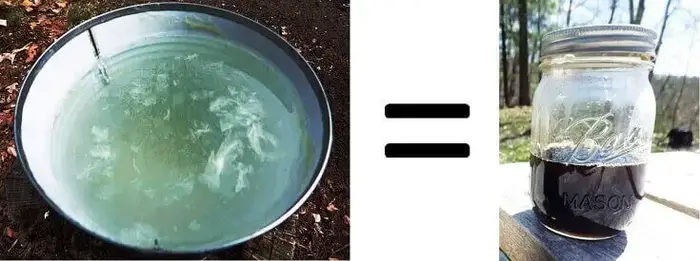
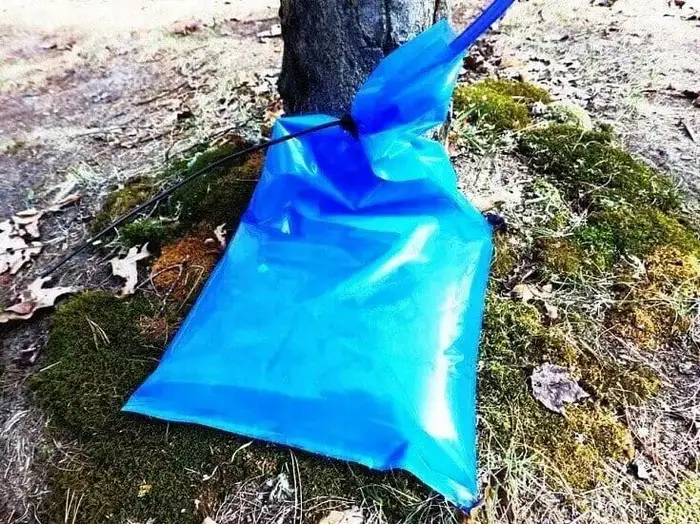
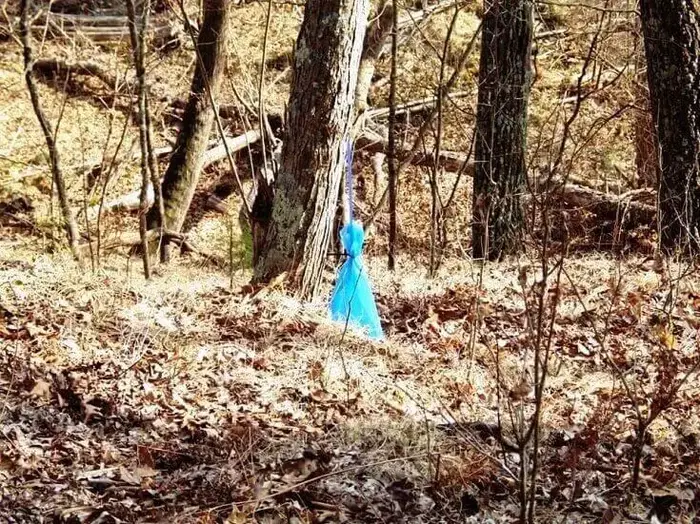
Tree Sap Collection Bags – There are heavy-duty plastic bags that are BPA-free and tinted blue to protect the collected sap from UV radiation. UV light degrades the sap. In the old days, pioneers used buckets hung on hooks attached to the tap. Use the bags, not the buckets. Bags are easier and give you clean sap unpolluted by leaves, twigs, and bird droppings that can collect in an open bucket.
Zip Ties – You use these to bunch up the open end of the bags and zip tie them to the end of the hoses.
Sap Collection Containers – As your bags or buckets fill, you’ll need to drain them from time to time. Use recycled and rinsed 1-gallon water jugs, a large cooler, or anything else that can cleanly store your sap for a few days or more. Keep them cool and in the dark. You could even throw a chunk of ice in the cooler if you want. You’re going to be boiling the sap for hours so bacterial growth isn’t as much a threat, but better to play it safe.
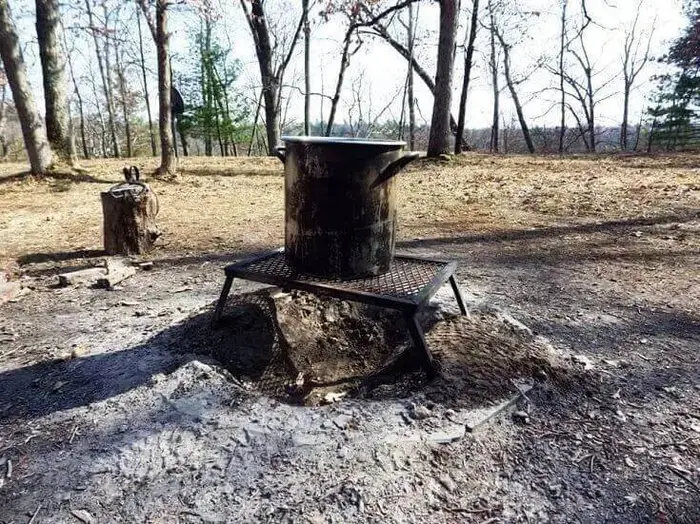
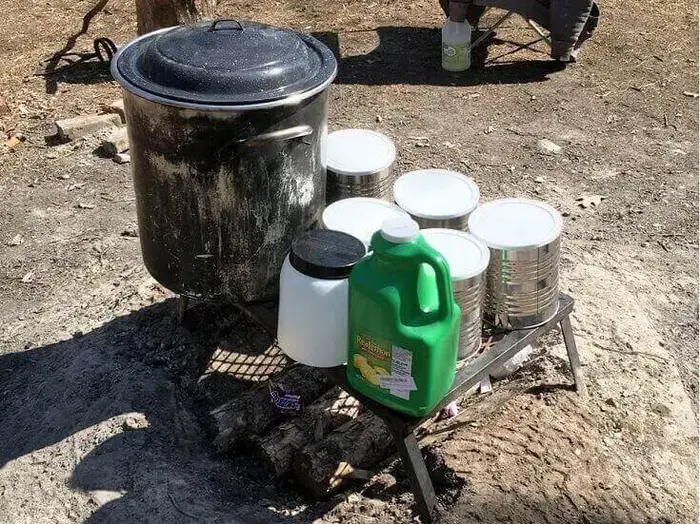
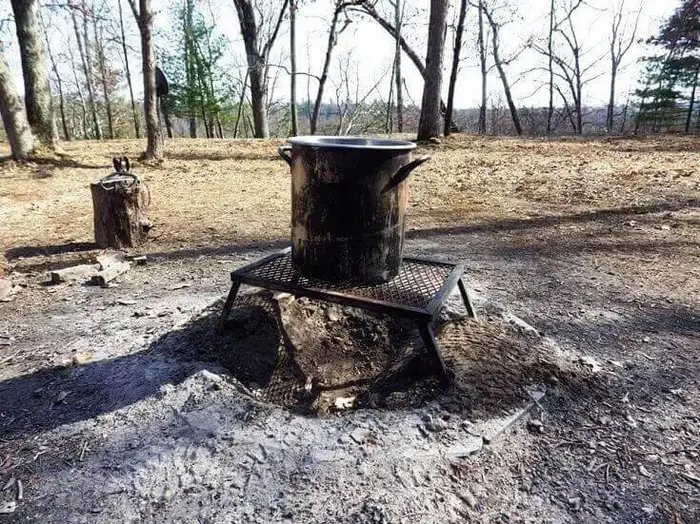
A Large Stock Pot – The bigger the better. A 40-quart stock pot is a good bet, but if you don’t have one or don’t feel inclined to buy one, use the largest pot you have. Some people use large, metal chafing pans to increase the surface area to enhance evaporation.
A Fire Grate – This supports your stock pot over the fire. Make sure it’s stable and strong. 5 gallons of vigorously boiling maple sap is hot and heavy stuff. You could also set your stock pot on a turkey fryer stand and use the gas flame for your evaporation. Make sure you have a full tank of propane.
A Slotted Scoop – As the sap boils, a scum will form and float on the top of the sap. You’ll want to scoop this off from time to time. It will give you a translucent syrup and the foam actually inhibits evaporation.
A Long Wooden Spoon Or Stick – You may need to stir things around from time to time, especially when the sap is starting to reduce. You can buy one or just use a peeled branch about 3 feet long with a carved, flattened end.
Filters – It helps to filter your sap after you’ve collected it and as you continue to reduce it. You don’t have to do it repeatedlyc but we’ll cover the best times to filter to get the purest product.
A Smaller Pot – As you continue to evaporate and reduce your sap to syrup, you’ll want to transfer it to a smaller pot. A two-gallon pot is about right.
A Hot Plate – When you get to the home stretch and are reducing your sap to its final concentration, you really want to be able to manage the heat. An open fire is a possibility if you know how to manage it, but an electric hot plate makes this easier, particularly because you’re using a small pot for the final reduction. A small gas stove that you can use outside works too.
Canning Jars And Lids – The best way to package your syrup is in canning jars. You might want to process the syrup as well for 10 minutes immersed in boiling water if you don’t plan on keeping your syrup refrigerated. You’ll also need the equipment that accompanies canning and preserving like jar lifting tongs and labels.
A Drill – You’ll need a drill to make pilot holes for your sap taps. A battery-powered drill is best because it allows you to roam the woods at will.
A 5/16-Inch Drill Bit – Regardless of the design of the sap taps, they all seem to call for the same size pilot hole in a tree. Check your directions when you get your taps, but it’s a good bet it will call for a 5/16” bit.
A Hammer – This is so you can “gently” pound your taps into the tree. Anything will do, even a rock but who doesn’t have a hammer?
A Candy Thermometer – We’ll get into more details, but you’ll need this to know when the sap is done.
A White Ladle – It helps to dip in and take a look at your sap color and consistency from time to time. A white ladle helps.
A Refractometer – This is an option, but they’re not terribly expensive and they measure the sugar concentration of sweet liquids like honey, syrup, and molasses. They also measure the amount of water resident in any liquid. It’s another way to know when your syrup is done.
Pliers – During and at the end of the season you’ll use pliers to twist the taps out of the trunk.
Tree Identification

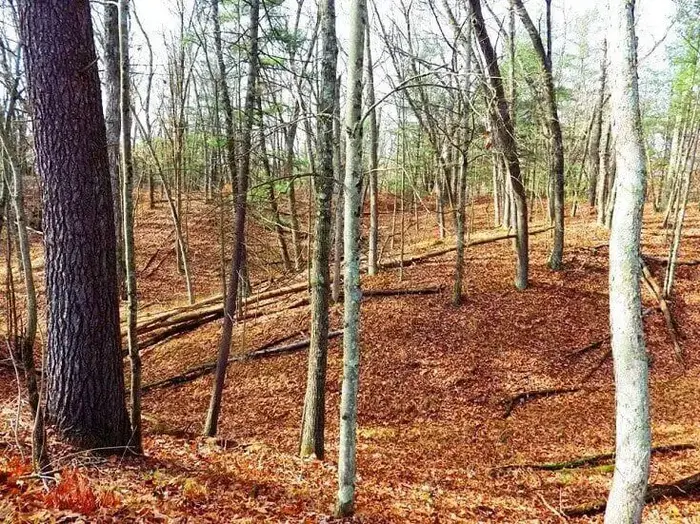
The dilemma for many of us is the challenge of identifying trees without leaves in late winter. The good news is that some trees hold onto their leaves through winter into early spring including some maples. Some oaks and elms do the same.
The bad news is that most trees including many varieties of maple lose all of their leaves, making tree identification a bit of a challenge. Here are the key things to look for if you’re not sure if a tree is a maple.
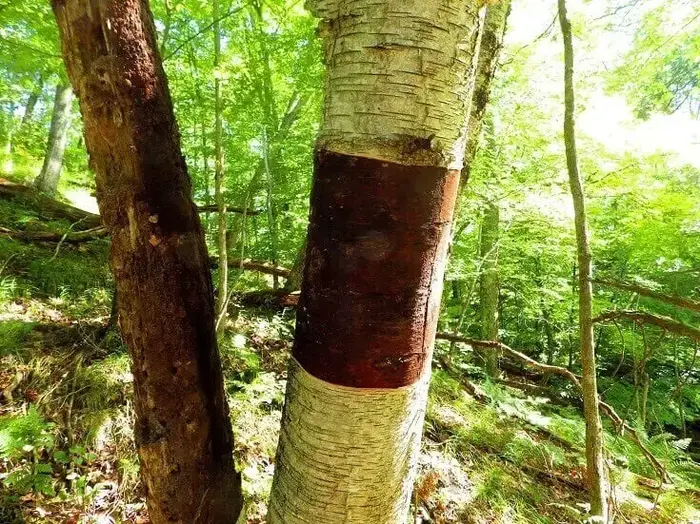
1. The Bark

Maple bark has a smoother texture compared to other trees like oaks and elms. Those are the trees most often confused with maples when the trees are without leaves. Pines and birch are a cinch. Pines are evergreens and the needles will always tell you when it’s a pine, and birch trees always have their unmistakable white bark.
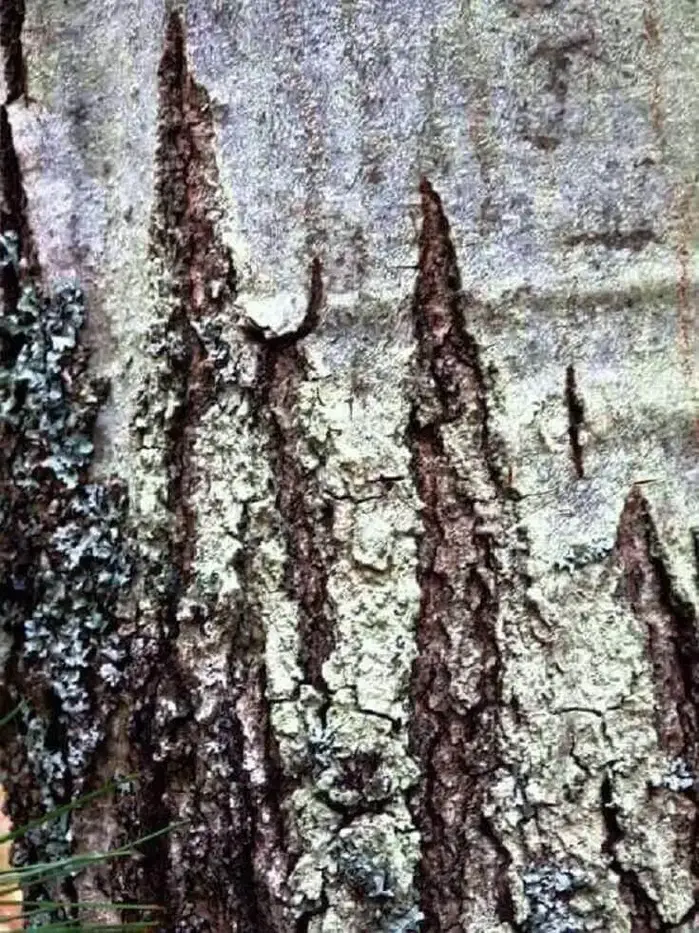
Larger maples might have more defined grooves in their bark towards the base of the trunk, but if the bark starts to get smoother as you look up, it’s a clue that you may have found a maple.
2. The Shape Of The Tree
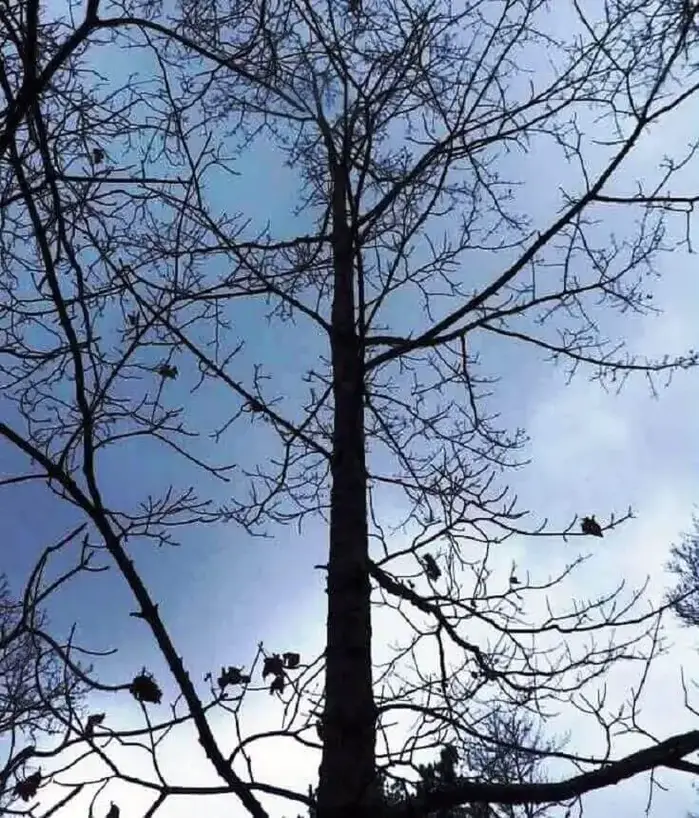
Oaks are the giants in a forest of deciduous trees. Maples rarely get as tall and their trunks also tend to be slimmer, although some can get fairly large. Maples also tend to grow straight up on level ground while oaks and elms will sometimes lean as they grow. Here again, there can be some variation as older maples start to lean because of the weight of a large branch.
The branches of maples also tend to be well spaced in a fairly even pattern up the length of the trunk. Other trees also have some uniformity to the appearance of their branches but if you look at a maple next to an oak you’ll see a bit more discipline on how the branches are spaced along the length of the trunk.
3. The Configuration of the Branches

Many branches on a maple emerge at a 90 degree angle to the trunk. That can happen with any tree but other trees often present branches growing up at an angle up to 45 degrees. When some branches are emerging straight out from the trunk it’s another clue that it’s a maple.
4. Leaf Litter On The Ground Or Still On Tree
Most trees lose their leaves in autumn but some oaks, elms and maples manage to hold onto some leaves. The first thing to do is look at the leaves on the ground around a tree. If the snow isn’t too deep you might see a scatter of maple leaves. That’s another clue but beware. Leaves blow around over time and you could find a mix of leaves under any tree.

The best bet is if the tree still has some lingering, dead leaves on its branches. They’ll be brown and curled up, but if you can see one clearly or pull one from a branch, it should be relatively easy to identify the tree. Assuming you know what maple tree leaves look like.
Field guides to trees can make this simpler across a variety of tree characteristics.
5. Other Maples in the Area
If you’re in a wild, natural forest, it’s a good possibility that multiple trees of the same species will grow in a specific area. The seeds that caused one tree to grow will usually spawn many in groves. If you found one maple, look around. There’s a good chance there will be more.
6. An Immediate Sap Drip After Drilling
The minute you pull the drill bit from the trunk of a maple that you’ve freshly drilled, the sap will show up and eventually drip out of the hole down the trunk if the maple sap is running. That’s a good sign that you’ve found a maple.
Oaks and elms rarely do this, so if you drill and see no sap, take another look at that tree. If in doubt, tap it anyway. Just remember to check on sap progress the next day and if you have collected none, pull the tap and look for a new tree to tap.
7. Maple Tree Varieties
There are 128 maple tree varieties around the world. All produce a sap that can produce a syrup. One variety that stands out for syrup making is the Sugar Maple. It has a natural sugar content of 3% in its sap. No other tree has as high a sugar content with most maple varieties coming in at around 2%.
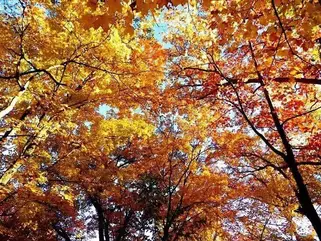
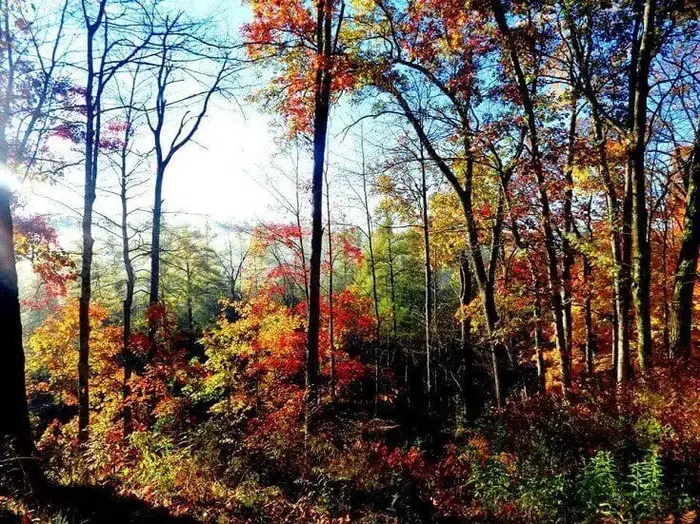
Distinguishing a Sugar Maple from other maple varieties in winter is a real challenge. It’s best to scout them in summer and especially autumn. If you find a Sugar Maple, mark it somehow if you plan to tap it for sap in early spring.

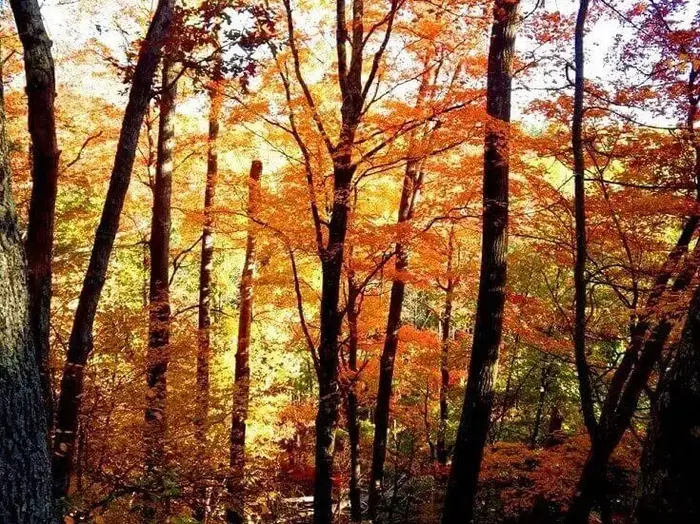
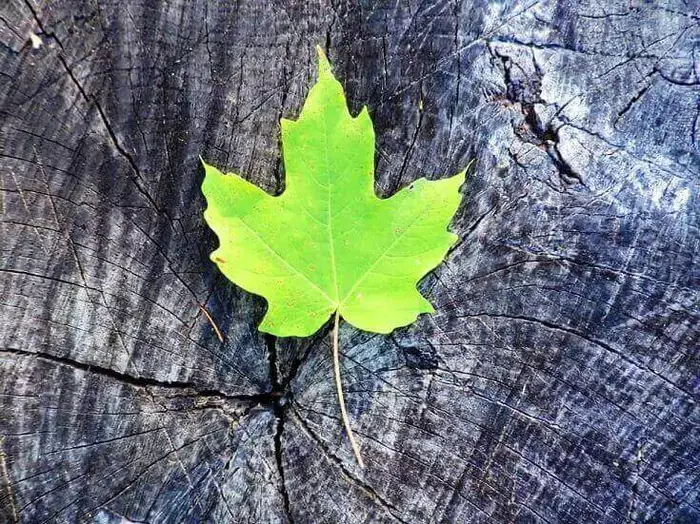
It has medium to dark-green leaves that turn yellow, burnt orange, or red in the fall. Some descriptions say that the sugar maple looks like it’s on fire. It grows to 60′ to 75 feet with a 40′ to 50-foot spread.
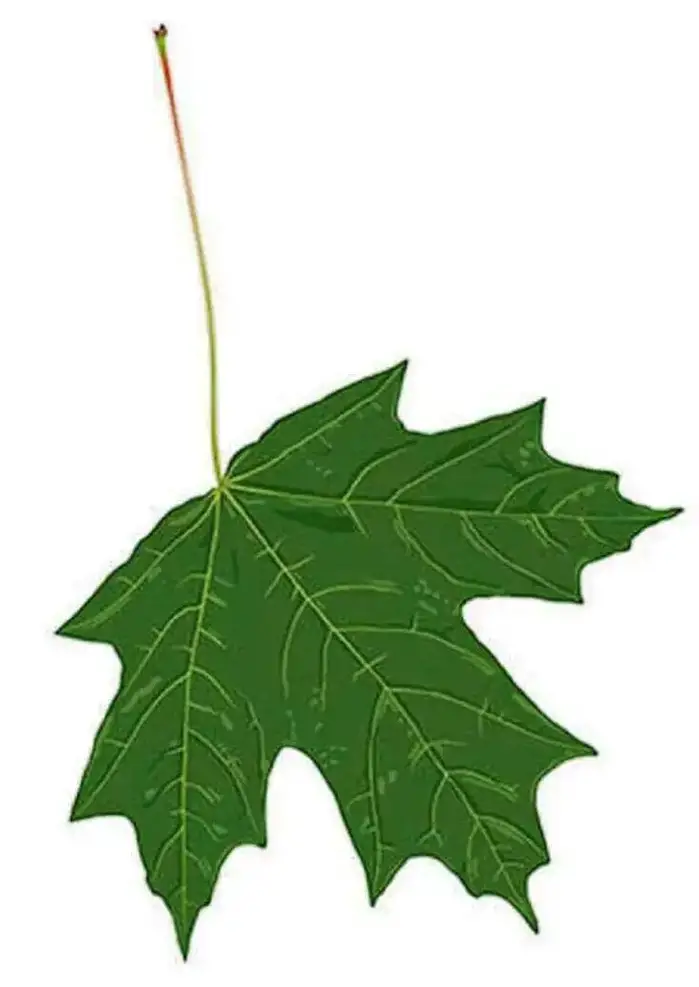
Unfortunately, it looks a lot like some silver maples and red maples although it’s leaves tend to be a bit feathery from a distance and have a flat bottom with large, sharp tips on the leaves.
Knowing When to Tap the Sap
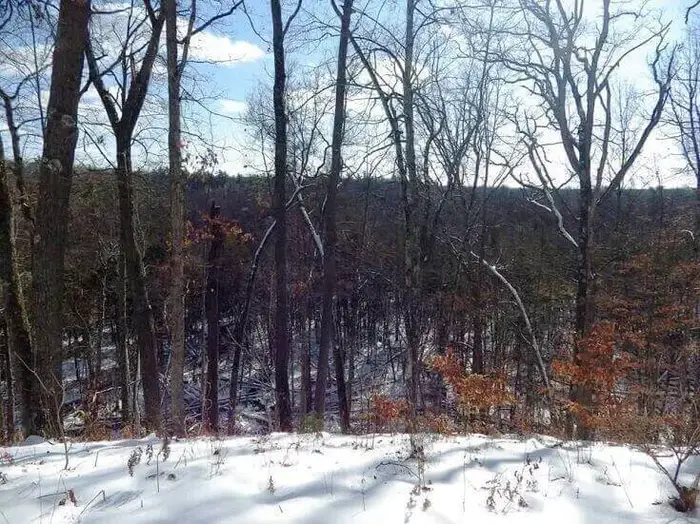
Tapping maple trees for sap takes place in late winter and early spring. In most of North America, this stretches across February and March and the sap run usually lasts for 6 weeks. Temperature is what triggers the sap to run.
In autumn, the trees slowly withdraw the chlorophyll from their leaves causing them to change colors. When the weather consistently falls below freezing, the sap stops running and deciduous trees become dormant for the winter.
It’s the first thaws of early spring that start the sap flowing again. Traditionally, sap harvesters look for the first 40 degree day to tap their trees. As the days go on, the cycle of freezing at night and thaws during the day keep the sap flowing.
The first two weeks of the sap run are fairly slow but the next two weeks really begin to pick up. The final 2 weeks sees the sap flow begin to slow and when the weather maintains a temperature above freezing over succeeding days the trees begin to bud and the heavy sap flow ceases.
Step by Step Instructions for Making Maple Syrup
Here’s what you can expect to do from the day you start thinking about maple syrup to the day you admire your first jar.
1. Assemble Your Tools and Equipment
Make sure you have everything for the initial tapping process and the big day when you reduce your sap to syrup. You might want a pack or pouch to hold your drill, hammer, taps and hoses and any bags and zip ties. Now is also a good time to push your hoses onto your taps so they’re ready to go.
2. Find Your Maples
Don’t tap the first tree you see unless you’ve had your eye on it for a while. In a large forest, you’ll find many maples, and you want the trees with the biggest trunks. A 6-inch diameter is about the minimum, but maple trunks that are at least 8-inches in diameter or more are the best.
You could tie some red or orange tape around the trunks you’ve selected and, when you’re satisfied you’ve covered the range of trees, you can isolate the best trees for tapping.
3. Tap Your Maple Trees
You want to drill your pilot hole about 3-feet above ground level directly into the trunk 1 ½-inches deep on the south side of the tree, which gets the most sun exposure. Drill the pilot hole up on a slight angle of about 10 degrees. You don’t want to exceed that angle or the tap might not seat in the hole properly.
Pull the drill bit out back and forth to clear out any sawdust from drilling. They can clog your tap. A Q-tip can work in a pinch. In fact, if a tree doesn’t seem to be running any sap, check the tap for a clog before tapping a different tree.
Insert the tap with the hose down towards the ground and gently tap into the hole until it can’t be twisted by hand. You’ll use pliers later to twist out the taps at the end of the season.
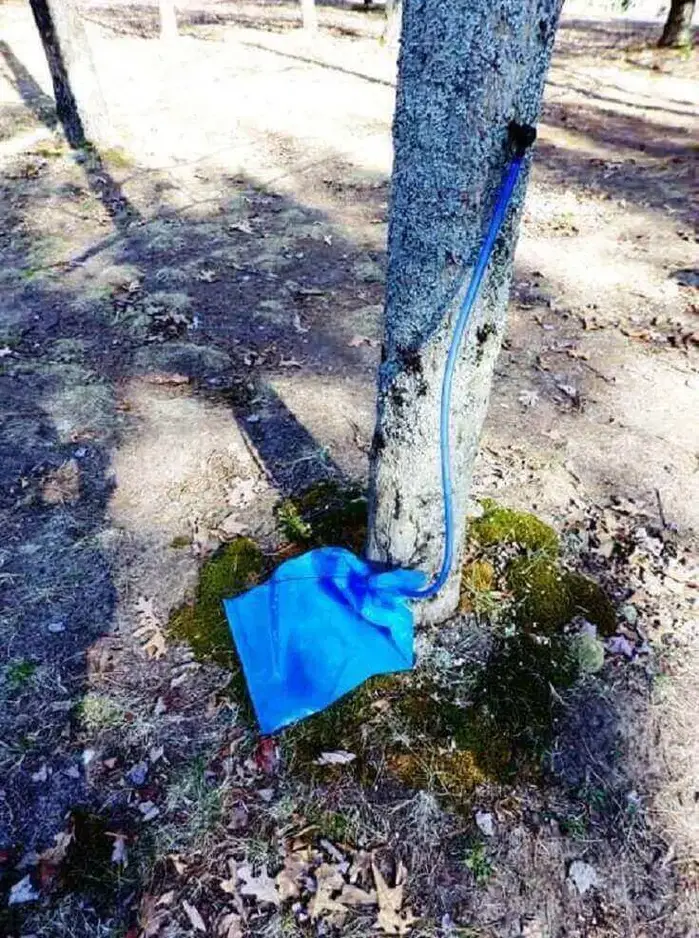
Finally, attach your bags to the hoses. Insert about 4 to 6-inches of the hose into the bag and then use a zip tie to cinch the top of the bag around the hose about 2 to 3-inches down from the open end of the bag.
Lay the bag flat on the ground and remember that it will potentially be filled with up to 2 to 3-gallons of sap.
4. Collecting The Sap
Check your trees daily and be prepared to harvest some sap as you go. A wagon or wheelbarrow to hold your containers is a good idea. You can use a clean empty cooler, rinsed water jugs, food-safe 5-gallon plastic buckets with lids, or anything else that’s clean and can hold up to a gallon of liquid or more.
Don’t empty every bag automatically. Only collect the sap from bags that look like they’re starting to fill. Some trees always seem to produce better than others. If a tree consistently fails to produce measurable sap while other trees are running strong, consider tapping a different tree.
The easiest way to collect the sap is to use some pliers to twist out the tap and inverting the tap end of the hose into the container. This will be a bit of a balancing act. The zip ties do not create a perfect, water-tight seal, so you’ll have to cradle the bag so the sap doesn’t leak out of the bag and eventually you should get some siphoning action from the hose.
When the bag is mostly empty, reinsert the tap and gently hammer it back into place and move on to the next tree.
5. Storing The Sap Before Boiling
There are some people who boil down some sap every day. Most of us don’t get enough sap to make that possible, let alone necessary. That means you’ll be storing sap for a while until you get to boiling day.
It’s best to store any sap in a cool, dark place. UV light from the sun can affect sap in clear containers and bacteria can grow in anything. Store it outdoors if you can because the weather is still chilly, especially at night which will inhibit bacterial growth. You’re going to be boiling the sap for hours so bacteria will most likely succumb, but why give them a head start?
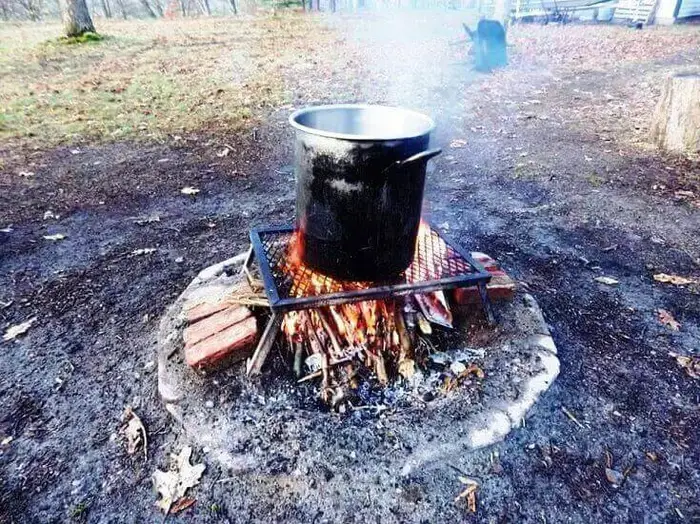
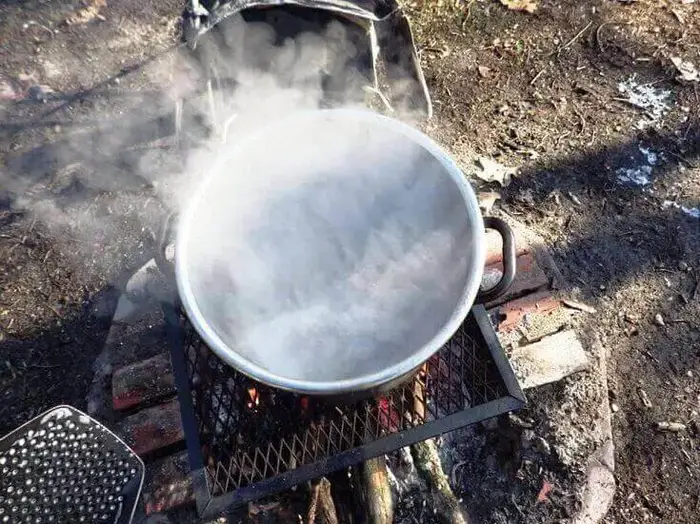
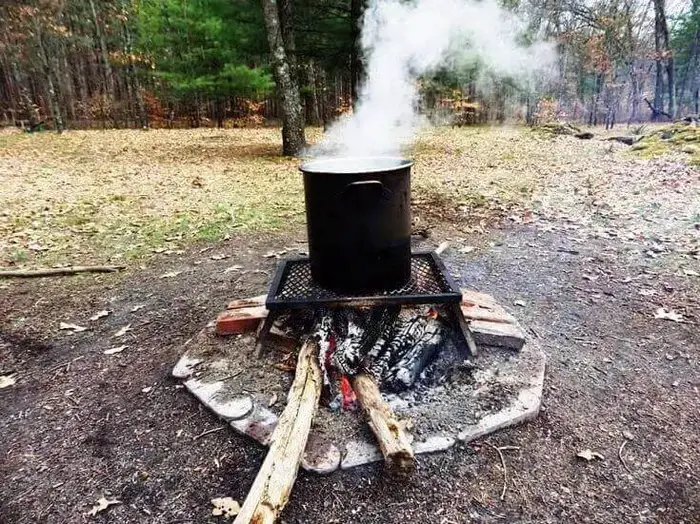
6. Boiling The Sap
Set up your stock pot and grate. If you’re burning wood, make sure you have a good wood pile ready to go. You need to keep the fire hot and the pot at a constant, rolling boil. You’ll be surprised how much wood you’ll go through. The same applies for a propane set up. Make sure you have a full tank of propane and maybe one in reserve.
Some people use large chafing trays or even construct their own boiling trays that are wide and about 6 to 12-inches deep. This allows more of the sap surface to be exposed to air which increases the evaporation rate. It’s not critical and stock pots work fine, but the less surface area exposed to the air, the longer it will take for the sap to evaporate.
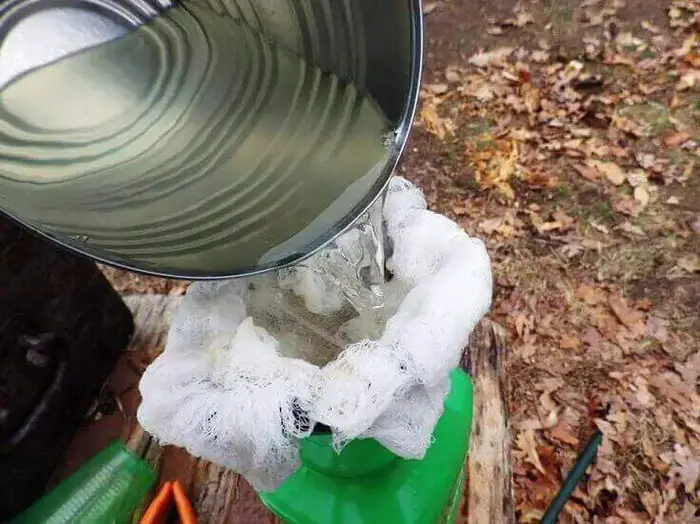
Filter the sap through cheesecloth before pouring it into your stock pot or trays. This will remove any material that has found its way into the sap.
If you’re using a standard 40-quart stock pot, start with about 3 gallons of sap. Bring it to a boil and add another gallon. Bring that to a boil and add another gallon and let it boil.
Take a look inside your pot or tray and as you see the sap boil down, add another gallon for every gallon evaporated. Continue to do this with your remaining sap.
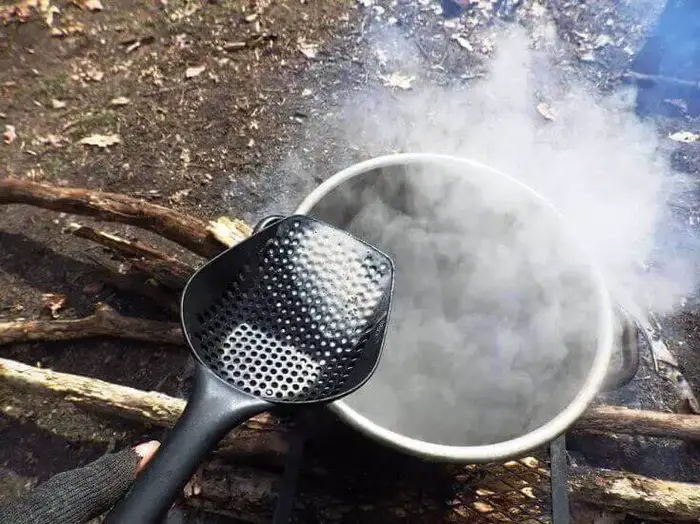
You’ll start to notice a scum of foam forming on the surface of your boiling sap. Use your slotted scoop to remove the scum. The scum will make the syrup cloudy and it also inhibits evaporation. You usually see the most scum at the beginning of the process. As time goes on, you’ll have to skim less and less.
How fast your sap evaporates depends on a variety of factors from the heat of your fire to the size of your pot or pan to the ambient temperature of the surrounding air. Figure you’ll be doing this for a few hours or more.
You don’t have to watch the pot every minute, but stay close. If burning wood, the fire will need more wood on a fairly regular basis. You also want to remember to add fresh sap as the evaporation continues. If the sap reduces down too far, it will turn to syrup while you’re taking a nap in the hammock and will most likely burn. Keep an eye on things.
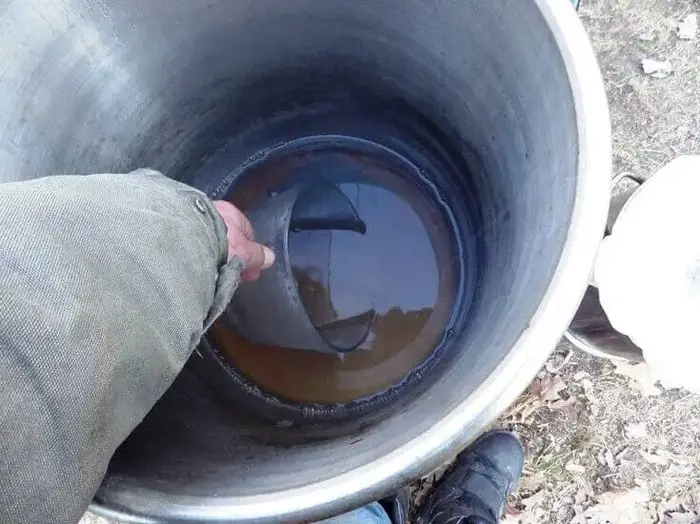
At a certain point, you’re going to want to transfer your sap to a smaller pot. This isn’t critical and many sap makers use the same tray or pot for the entire process, but as the sap starts to concentrate, things like temperature become critical.
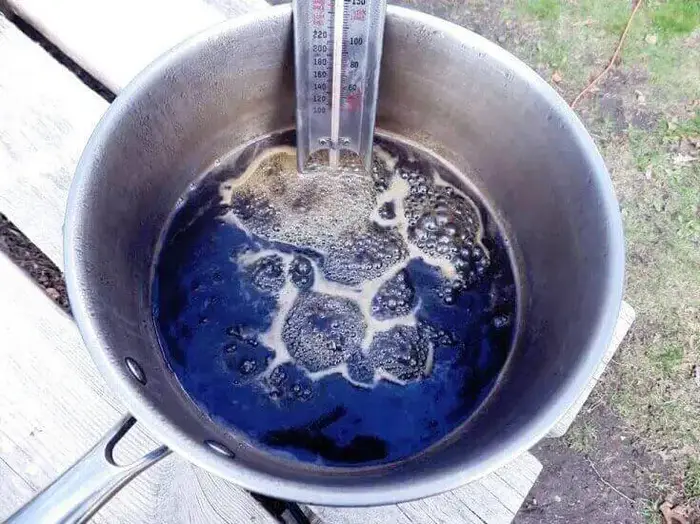
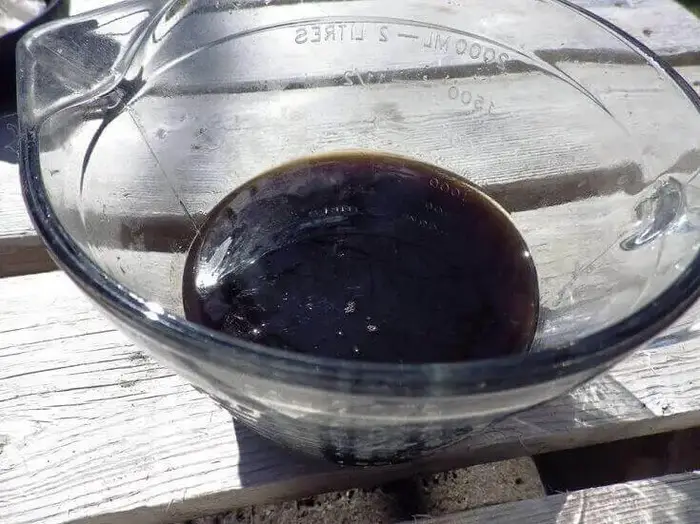
A good clue that it’s time to transition to the finishing step is when the color of the sap begins to turn to a deep, brown color. You’ll notice that the sap changes from a milky, clear color to varying shades of brown as you boil. If not sure, dip a white ladle into the boiling sap and take a look.
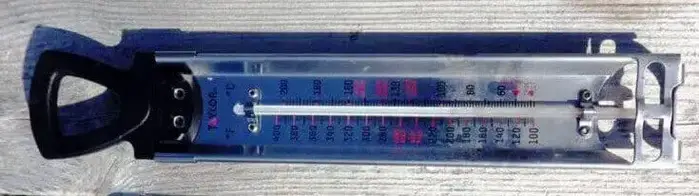
Another clue that the sap is approaching the finish is temperature. Water boils at a constant 212 degrees Fahrenheit. The sugars in maple sap allow it to go higher. Use your candy thermometer to check the temperature and, if it’s 213 degrees or higher, get it off the blazing fire.
That means the water is reduced to the point that the natural sugars are allowing the temperature to rise and the syrup to form. The sap is done at 219 degrees and will begin to harden and eventually burn if you go much more above that so stay vigilant.
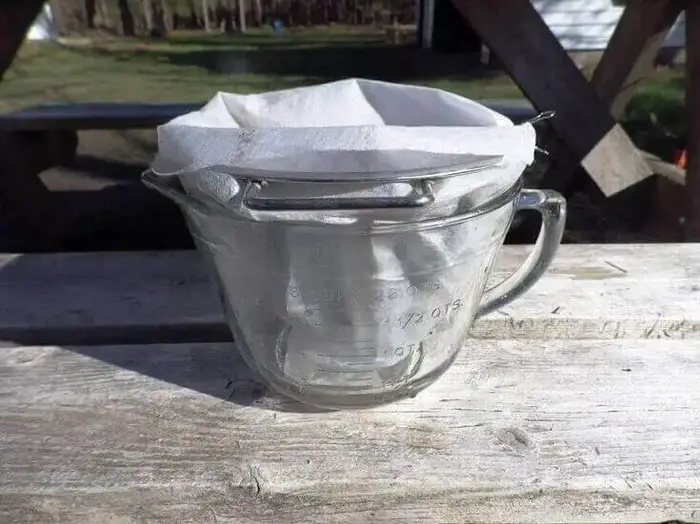
Regardless of whether you transfer your sap to another pot or continue with the same equipment, you should filter the sap before going for the final finish. There are specially designed filters for maple sap although some people use coffee filters. The problem with coffee filters is that a thicker sap approaching syrup will bind up in the coffee filter and drip very slowly through the filter.
You can also use layers of cheesecloth to filter your sap, but it’s actually best to do both. Arrange your sap filters in the bottom of a large funnel or small colander and then layer the cheesecloth over the top.
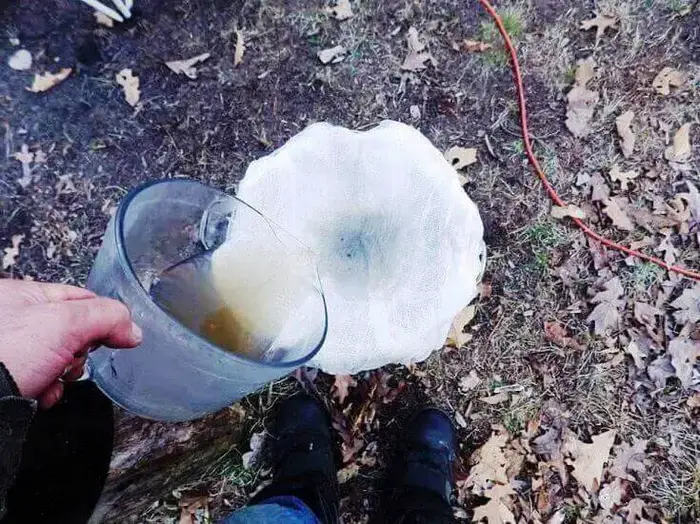
Carefully remove the hot sap with a measuring cup and pour through the filters into another container or your boiling pot.
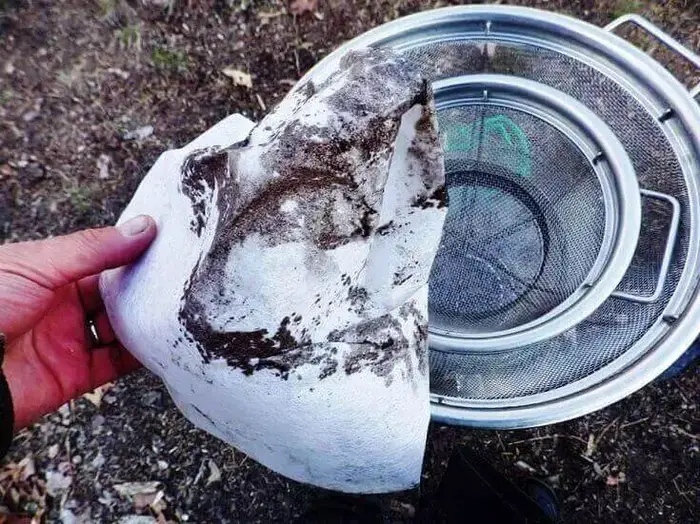
One look at your cheesecloth and filters will show you how much you filtered from your eventual syrup. Most of the dirt and grit you capture is referred to as maple sand and other contaminants could include plant fiber from the trunk or bits of ash from the fire.

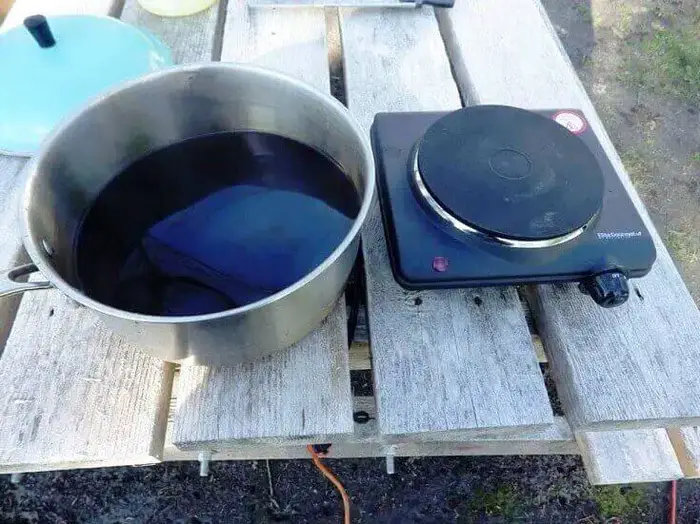
Using a hot plate, small propane stove or a carefully managed fire put your filtered sap in your pot or pan on medium heat to reach a gentle boil. Attach your candy thermometer to the side of the pot or leaning into the pan. You’re still trying to evaporate water but you want to make sure you do this delicately.

Watch the temperature. Your goal is 219 degrees. Taste as you go (very carefully) and you’ll probably be surprised by the sweetness. When the sap reaches 219 degrees, you now have syrup. Don’t be disappointed if it looks runny. Hot syrup always looks runny but will thicken as it cools.
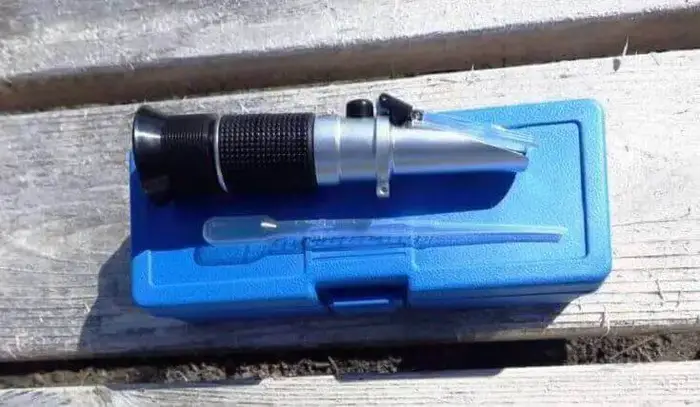
You can also use a Refractometer to assess your syrup. When it reads a sugar content of 66, you’re done. It’s not a critical instrument for sap making if you have a candy thermometer, but it’s interesting and can be used for other home-brewed projects from making molasses to hard cider.
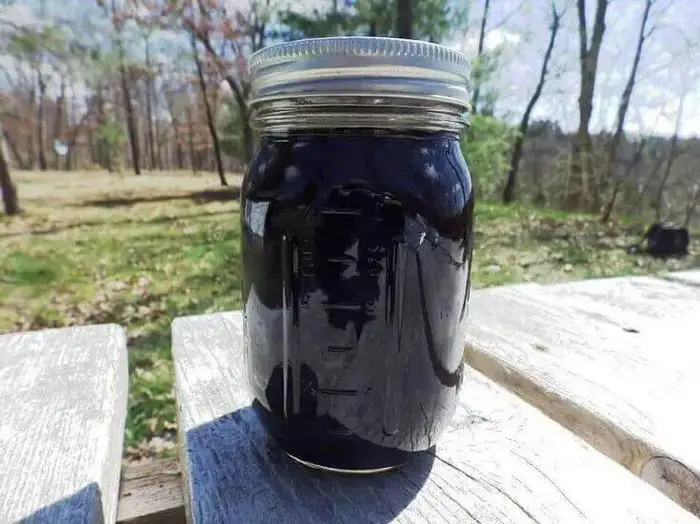
7. Storing The Syrup

Traditional canning jars are your best bet. Sterilize the jars and the lids and fill them with your syrup. While you’re at it, use your sap set-up to bring a large pot of water to a boil and immerse the sealed jars into the water for 10 minutes. That will make the syrup relatively shelf-stable for up to a year.
Once you open a jar, keep it refrigerated. This is 100% natural maple syrup so that means no added preservatives that show up in everyday store-bought syrups that are mostly caramel-colored corn syrup.
Clean Up
- Wash and rinse everything including taps, hoses, bags, pots, and filters. You can reuse them all for next season, but make sure they’re clean, dry, and stored for next year.
- Some sources say you can leave the holes you drilled in the trees and that they will eventually heal. Others recommend a quick hit of wood putty or at least tapping a small stick into the hole to seal it. Most of us choose to seal the holes in some way but that’s up to you.
It’s Worth a Try
Even if you only have one maple tree, you can make syrup from its sap. A mature maple will produce up to 10 gallons of sap if you catch it at the beginning of the sap run. That will give you about a quart of syrup.
Most of the process is just casually collecting and storing the sap until the big boil day. But maybe the best day is the first time you sit down to a plate of pancakes sweetened with your own homemade maple syrup.
No comments:
Post a Comment