
In a grid down or an SHTF situation, the possibility of there being exchanges of gunfire becomes increasingly probable.
While it is preferable to avoid getting into a gunfight, there may come a time when your life or the lives of your group members depend on the use of firearms. The reality of combat is that if you are shooting at someone, they will be shooting back.
Being prepared to deal with a gunshot wound is as important as your proficiency with firearms or any other prep that you will make.
Disclaimer
This article is a guide for building a DIY gunshot wound kit and is not medical advice.
While I, the author, am a veteran who trained in the treatment of gunshot wounds and am currently a certified OFA Level 2 first aid attendant, I am not qualified to give any medical advice on the treatment of wounds.
Training
Before you start building and carrying a bullet wound kit, you need to get trained in first aid but do not stop there.
Related: 5 First Aid Skills Every Senior Should Know
Take as much advanced training that you can, such as the ‘Stop the Bleed’ course. If you want to include tourniquets, decompression needles, or airways in your kit, become properly trained in their use through an accredited training provider. Youtube is not a substitute for hands-on training by a professional.
How to Carry a DIY Bullet Wound Kit
This kit is meant to handle massive life-threatening bleeding and must be readily accessible to be an effective means of bleeding control.
If you carry equipment on a tactical vest, plate carrier, or battle belt, this is where the kit will be. Otherwise, it needs to be somewhere that you access it without any delay.
It is not good enough to be located in a pouch on a belt. Organize the kit so that you can instantly access the contents.
One option is to get a pouch with a Velcro backing which lets you place the pouch out of the way, such as on the back of a battle belt. When you need the kit, reach back and rip the pouch off the belt.
I prefer to keep this kit in a small pouch but have the contents in a heavy ziplock bag that I can pull out of the pouch. I like this option because it becomes easier to transplant this kit into other pouches or bags without unpacking the contents. The ziplock bag also serves as an improvised chest seal as well.
What to Pack in Your DIY Gunshot Wound Kit
These kits need to be tailored to the user’s training, skill level, and individual components’ availability.
The kit I describe here should be used as a guide, not as a checklist to follow blindly.
Tourniquet
I’m listing this as the first item you need in your DIY bullet wound kit because it is arguably the most important.
Related: How To Make Bulletproof Body Armor Plate
When bleeding is so severe that direct pressure cannot stem the flow of blood, a tourniquet needs to be applied. You must learn how to use a tourniquet and practice doing it.
Your tourniquet needs to be the first item that you see when opening the DIY bullet wound kit because there are times when applying a tourniquet will be your first move. Always stage the tourniquet so that you can deploy it without delay.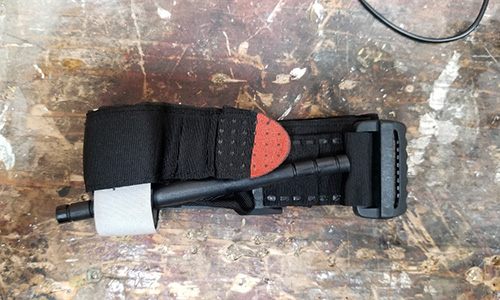
Along with your tourniquet, include a felt pen for writing down when you placed the tourniquet.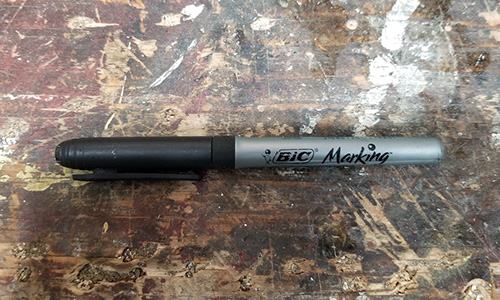
EMT Shears
Cutting away clothing will be one of your first steps in treating a gunshot wound, and EMT shears will make short work of cutting through all manner of clothing.
Don’t cheap out on this item, and it needs to work well. I like to keep my shears on the outside of the pouch for immediate access.
Pressure Dressings
Direct pressure is our go-to method for bleeding control, and having at minimum two pressure dressings is vital in any gunshot wound kit; pack one dressing for both the entry and exit wounds.
Again, many options are available, such as combat dressings, Israeli combat bandages, or civilian pressure dressings.
Related: How to Make Cabbage Bandages to Treat Inflammation and Joint Pain
As long as they will apply pressure to the wound, any of these are good options.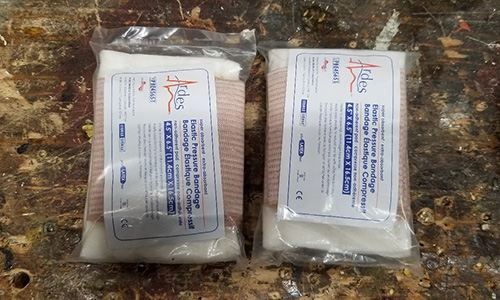
Chest Seals
Chest seals or occlusive dressings are for sucking chest wounds, and while you can purchase them, they are easily improvised using tape and some plastic.
I like to carry a small roll of tape and plan to use either the plastic wrapping for the pressure dressings or the zip lock bag to create a chest seal.
To improvise a chest seal, place plastic over the sucking chest wound and tape all four sides creating a seal. Some schools of thought say only to tape three sides, which will make an improvised one-way valve, and you should seek training before planning on using chest seals.
Gauze
Wound packing is something that you may need to do depending upon the size of the wound. You’ll need to carry an assortment of gauze pads or some compressed gauze.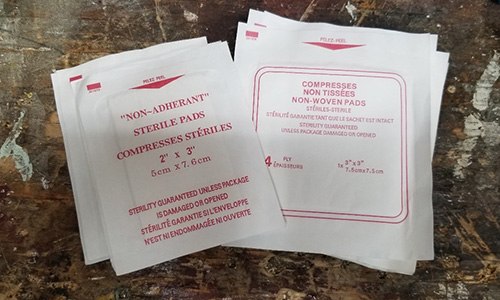
Gloves
You need to protect yourself, and that starts with wearing non-latex gloves. I like to have at least two pairs in any of my kits.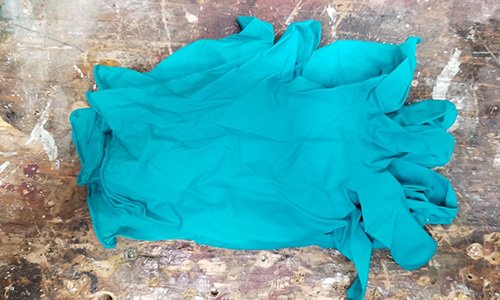
Emergency Blanket
Once you’ve dealt with any bleeding, you need to think about treating for shock since it is not practical to carry a full-sized blanket on your battle belt or plate carrier.
A foil emergency blanket will be the next best thing.
Other Items to Think About
– Decompression needles are an item that has become popular to include in gunshot wound kits but requires advanced training to use.
– Nasopharyngeal airways find their way into many people’s kits and are often recommended to be included, but these require training to use, and you should not include one unless you are trained.
– In the era of COVID-19, we need to think about packing some surgical face masks in with our kit. There needs to be at least three, one for the casualty, one for you, and one for anyone who is assisting you.
– I include a flashlight in every first aid kit that I build. Since we never know what time of day an emergency will strike, it is always a good idea to have a light source. If you can find a headlamp that will fit in the pouch, that would be a better option than a handheld flashlight.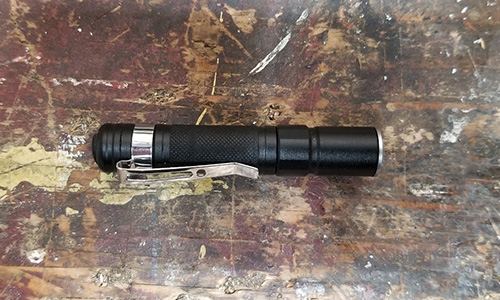 – A CPR mask is something that I do not include in this kit because I design this style of kit for bleeding control and usually keep a pocket mask in my main first aid kit. You may want to include a CPR mask if you carry this kit independent of any other first aid equipment.
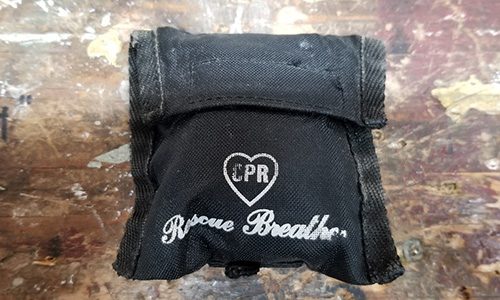
SHTF doesn’t have to be an apocalyptic scenario. With the rise in active shooter incidents worldwide and the threats of violence through rioting and other civil unrest, it is prudent to carry a DIY bullet wound kit as a part of your EDC.
A kit like this is not limited to simply treating gunshot wounds; it will be an effective kit for treating any major bleeding.
No comments:
Post a Comment